Comfort food is all about indulgence and warmth, and you don’t have to miss out on that feeling just because you’re vegan. These 15 vegan comfort food recipes will satisfy your cravings and make you feel right at home.
1. Creamy Vegan Mac and Cheese
Ingredients:
- 1 cup raw cashews, soaked for 2 hours
- 1 cup water
- 1/4 cup nutritional yeast
- 2 tablespoons lemon juice
- 1 tablespoon Dijon mustard
- 1/2 teaspoon garlic powder
- 1/4 teaspoon turmeric
- Salt and pepper to taste
- 8 oz elbow macaroni
Instructions:
- Prepare Cashew Sauce: Drain and rinse cashews. Blend cashews with water, nutritional yeast, lemon juice, Dijon mustard, garlic powder, turmeric, salt, and pepper until smooth.
- Cook Pasta: Cook macaroni according to package instructions.
- Combine: Toss cooked macaroni with cashew sauce. Serve warm.
2. Vegan Shepherd’s Pie
Ingredients:
- 2 cups lentils, cooked
- 1 cup carrots, diced
- 1 cup peas
- 1 onion, chopped
- 2 cloves garlic, minced
- 2 tablespoons tomato paste
- 1 tablespoon soy sauce
- 2 cups mashed potatoes (made with non-dairy milk and vegan butter)
Instructions:
- Prepare Filling: Sauté onion, garlic, carrots, and peas in a pan. Add lentils, tomato paste, and soy sauce. Cook until well combined.
- Assemble Pie: Spread lentil mixture in a baking dish. Top with mashed potatoes.
- Bake: Bake at 375°F (190°C) for 25-30 minutes or until the top is golden brown.
3. Vegan Chili
Ingredients:
- 1 can black beans, drained and rinsed
- 1 can kidney beans, drained and rinsed
- 1 can diced tomatoes
- 1 cup corn kernels
- 1 onion, chopped
- 2 cloves garlic, minced
- 1 tablespoon chili powder
- 1 teaspoon cumin
- Salt and pepper to taste
Instructions:
- Cook Vegetables: Sauté onion and garlic in a pot. Add chili powder, cumin, salt, and pepper.
- Combine Ingredients: Add beans, tomatoes, and corn. Simmer for 20-30 minutes. Adjust seasoning as needed.
4. Vegan Sloppy Joes
Ingredients:
- 1 cup lentils, cooked
- 1 onion, chopped
- 1 bell pepper, chopped
- 2 cloves garlic, minced
- 1 cup tomato sauce
- 1 tablespoon soy sauce
- 1 tablespoon maple syrup
- 1 teaspoon smoked paprika
Instructions:
- Prepare Filling: Sauté onion, bell pepper, and garlic. Add lentils, tomato sauce, soy sauce, maple syrup, and smoked paprika.
- Simmer: Cook for 15-20 minutes until thickened. Serve on vegan burger buns.
5. Vegan Stuffed Bell Peppers
Ingredients:
- 4 bell peppers, tops cut off and seeds removed
- 1 cup cooked quinoa
- 1 can black beans, drained and rinsed
- 1 cup corn kernels
- 1/2 cup salsa
- 1 teaspoon cumin
Instructions:
- Prepare Filling: Mix quinoa, beans, corn, salsa, and cumin.
- Stuff Peppers: Fill peppers with the mixture.
- Bake: Place in a baking dish and bake at 375°F (190°C) for 30-35 minutes.
6. Vegan Pot Pie
Ingredients:
- 1 cup frozen mixed vegetables
- 1/2 cup cooked chickpeas
- 1 onion, chopped
- 2 cloves garlic, minced
- 1 cup vegetable broth
- 1/4 cup non-dairy milk
- 1 tablespoon flour
- 1 teaspoon thyme
- 1 vegan pie crust
Instructions:
- Prepare Filling: Sauté onion and garlic, then add mixed vegetables, chickpeas, and thyme. Stir in flour.
- Add Liquids: Add broth and non-dairy milk. Simmer until thickened.
- Assemble Pie: Pour filling into pie crust and cover with another crust.
- Bake: Bake at 375°F (190°C) for 40-45 minutes.
7. Vegan Mashed Potatoes
Ingredients:
- 4 large potatoes, peeled and diced
- 1/2 cup non-dairy milk
- 1/4 cup vegan butter
- Salt and pepper to taste
Instructions:
- Cook Potatoes: Boil potatoes until tender. Drain.
- Mash: Mash potatoes with non-dairy milk and vegan butter. Season with salt and pepper.
8. Vegan Macaroni Salad
Ingredients:
- 8 oz elbow macaroni
- 1 cup vegan mayonnaise
- 1 tablespoon apple cider vinegar
- 1/2 cup diced celery
- 1/2 cup diced bell pepper
- 1/4 cup chopped red onion
Instructions:
- Cook Pasta: Boil macaroni according to package instructions. Drain and let cool.
- Mix Salad: Combine macaroni, vegan mayonnaise, apple cider vinegar, celery, bell pepper, and onion. Chill before serving.
9. Vegan Mushroom Stroganoff
Ingredients:
- 2 cups mushrooms, sliced
- 1 onion, chopped
- 2 cloves garlic, minced
- 1 cup vegetable broth
- 1/2 cup non-dairy milk
- 1 tablespoon soy sauce
- 1 tablespoon flour
- Salt and pepper to taste
Instructions:
- Sauté: Cook mushrooms, onion, and garlic until softened.
- Make Sauce: Stir in flour, then add vegetable broth, non-dairy milk, and soy sauce. Simmer until thickened.
- Serve: Serve over pasta or rice.
10. Vegan Sweet Potato Casserole
Ingredients:
- 2 cups mashed sweet potatoes
- 1/2 cup brown sugar
- 1/4 cup vegan butter
- 1 teaspoon vanilla extract
- 1/2 teaspoon cinnamon
- 1/2 cup chopped pecans (optional)
Instructions:
- Prepare Mixture: Mix mashed sweet potatoes, brown sugar, vegan butter, vanilla extract, and cinnamon.
- Bake: Transfer to a baking dish and bake at 350°F (175°C) for 25 minutes. Top with pecans if desired and bake for an additional 10 minutes.
11. Vegan Cornbread
Ingredients:
- 1 cup cornmeal
- 1 cup all-purpose flour
- 1/4 cup sugar
- 1 tablespoon baking powder
- 1/2 teaspoon salt
- 1 cup non-dairy milk
- 1/4 cup vegetable oil
- 1 tablespoon apple cider vinegar
Instructions:
- Prepare Batter: Mix cornmeal, flour, sugar, baking powder, and salt. In another bowl, combine milk, oil, and vinegar.
- Combine: Mix wet and dry ingredients until just combined. Pour into a greased baking dish.
- Bake: Bake at 400°F (200°C) for 20-25 minutes.
12. Vegan Chili Cheese Fries
Ingredients:
- Frozen fries (or homemade fries)
- 1 cup vegan chili
- 1/2 cup vegan cheese shreds
- Chopped green onions for garnish
Instructions:
- Prepare Fries: Bake or fry fries according to package instructions.
- Top Fries: Heat vegan chili and pour over fries. Sprinkle with vegan cheese shreds.
- Broil: Place under the broiler for a few minutes until cheese is melted. Garnish with green onions.
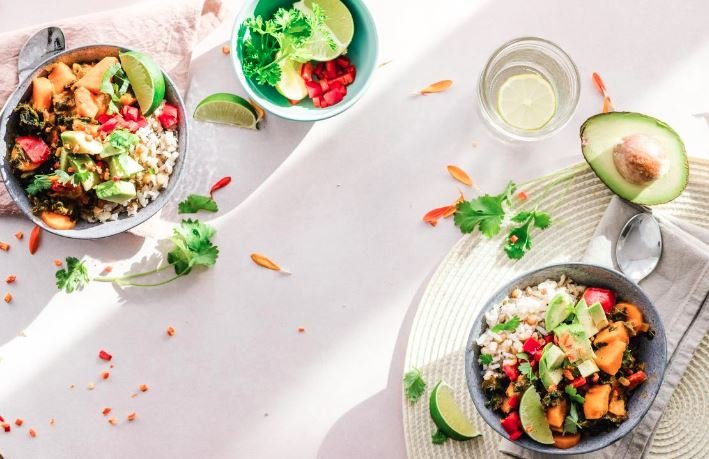
13. Vegan Burrito Bowl
Ingredients:
- 1 cup cooked brown rice
- 1 cup black beans
- 1 cup corn kernels
- 1 cup diced tomatoes
- 1 avocado, sliced
- 1/4 cup salsa
Instructions:
- Assemble Bowl: Layer rice, black beans, corn, tomatoes, and avocado in a bowl.
- Top with Salsa: Spoon salsa over the top and serve.
14. Vegan Creamy Tomato Soup
Ingredients:
- 1 can (28 oz) crushed tomatoes
- 1 onion, chopped
- 2 cloves garlic, minced
- 1 cup non-dairy milk
- 1 tablespoon olive oil
- Salt and pepper to taste
Instructions:
- Sauté: Cook onion and garlic in olive oil until soft.
- Combine Ingredients: Add crushed tomatoes and simmer for 15 minutes.
- Blend: Use an immersion blender to blend soup until smooth. Stir in non-dairy milk and season with salt and pepper.
15. Vegan Chocolate Lava Cake
Ingredients:
- 1/2 cup vegan butter
- 1/2 cup vegan chocolate chips
- 1 cup powdered sugar
- 1/2 cup all-purpose flour
- 2 tablespoons cocoa powder
- 2 large flax eggs (2 tablespoons flaxseed meal mixed with 6 tablespoons water)
- 1/2 teaspoon vanilla extract
Instructions:
- Preheat Oven: Preheat oven to 425°F (220°C).
- Prepare Batter: Melt vegan butter and chocolate chips together. Stir in powdered sugar, flour, cocoa powder, flax eggs, and vanilla extract.
- Bake: Pour into greased ramekins and bake for 12-15 minutes, until the edges are set but the center is still gooey.
- Serve: Let cool for a minute, then serve warm.
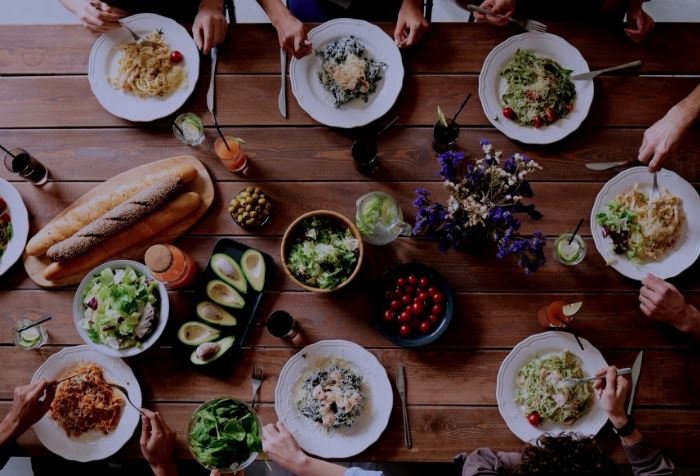
These vegan comfort food recipes are perfect for cozy nights in or when you want to impress your guests with hearty, satisfying dishes.

Homemade BBQ sauce can elevate any grilled or smoked dish with its rich, tangy, and slightly sweet flavors. Making your own BBQ sauce allows you to tailor it to your taste preferences and control the ingredients. Here’s a simple and delicious recipe for the best homemade BBQ sauce:
Ingredients:
- 1 cup ketchup
- 1/2 cup apple cider vinegar
- 1/2 cup brown sugar
- 1/4 cup honey
- 2 tbsp Worcestershire sauce
- 2 tbsp lemon juice
- 1 tbsp soy sauce
- 1 tbsp smoked paprika
- 1 tsp garlic powder
- 1 tsp onion powder
- 1/2 tsp ground black pepper
- 1/2 tsp salt
- 1/2 tsp cayenne pepper (optional, for heat)
- 1/4 tsp liquid smoke (optional, for a smoky flavor)
Instructions:
1. Combine Ingredients:
- In a medium saucepan, combine the ketchup, apple cider vinegar, brown sugar, honey, Worcestershire sauce, lemon juice, and soy sauce. Whisk until well mixed.
2. Add Spices:
- Stir in the smoked paprika, garlic powder, onion powder, black pepper, salt, cayenne pepper (if using), and liquid smoke (if using). Mix well.
3. Simmer:
- Bring the mixture to a simmer over medium heat. Reduce the heat to low and let it simmer gently for 20-30 minutes, stirring occasionally. This allows the flavors to meld and the sauce to thicken.
4. Adjust Seasonings:
- Taste the sauce and adjust the seasoning if needed. You can add more honey for sweetness, more vinegar for tanginess, or more cayenne pepper for heat.
5. Cool and Store:
- Remove the saucepan from heat and let the BBQ sauce cool to room temperature. Transfer the sauce to a clean jar or container with a tight-fitting lid.
6. Refrigerate:
- Store the BBQ sauce in the refrigerator for up to 2 weeks. The flavors will continue to develop and improve as it sits.
Tips for the Best BBQ Sauce:
- Quality Ingredients: Use high-quality ketchup and fresh spices for the best flavor.
- Customize: Feel free to adjust the sweetness, tanginess, or spiciness to suit your taste. Add ingredients like mustard or molasses for different flavor profiles.
- Texture: If you prefer a smoother sauce, you can blend it with an immersion blender or regular blender until smooth.
- Use as Marinade: This BBQ sauce can also be used as a marinade for chicken, ribs, or other meats before grilling or baking.
Enjoy your homemade BBQ sauce on grilled meats, sandwiches, or as a dipping sauce!

Cooking with seasonal ingredients is not only a way to enjoy produce at its peak freshness and flavor but also a way to support local farmers and reduce your environmental footprint. Here’s your ultimate guide to cooking with seasonal ingredients throughout the year, ensuring you make the most of what each season has to offer.
Spring
Seasonal Ingredients:
- Asparagus: Tender and grassy, perfect for grilling or sautéing.
- Peas: Sweet and crisp, great in salads or as a side dish.
- Radishes: Spicy and crunchy, excellent in salads or as a topping.
- Strawberries: Sweet and juicy, ideal for desserts or fresh salads.
- Spinach: Tender and nutritious, suitable for salads, sautés, and soups.
Spring Recipe Ideas:
- Asparagus and Pea Risotto: Creamy risotto with fresh asparagus and sweet peas.
- Strawberry Spinach Salad: A refreshing salad with strawberries, spinach, nuts, and a balsamic vinaigrette.
- Radish and Herb Butter: Sliced radishes served with herb-infused butter on crusty bread.
Summer
Seasonal Ingredients:
- Tomatoes: Juicy and flavorful, great for sauces, salads, and salsas.
- Zucchini: Versatile and mild, perfect for grilling, baking, or stir-fries.
- Corn: Sweet and crunchy, ideal for salads, soups, or simply grilled.
- Peaches: Juicy and fragrant, excellent for desserts or grilling.
- Basil: Aromatic and fresh, perfect for pesto or as a garnish.
Summer Recipe Ideas:
- Caprese Salad: Fresh tomatoes, mozzarella, basil, and a drizzle of balsamic glaze.
- Grilled Corn on the Cob: Seasoned with butter and herbs, or a spicy chili-lime rub.
- Peach Cobbler: Sweet peaches baked with a buttery topping.
Fall
Seasonal Ingredients:
- Pumpkin: Rich and hearty, great for soups, pies, and roasting.
- Apples: Crisp and sweet, perfect for pies, crisps, or fresh in salads.
- Brussels Sprouts: Nutty and crunchy, excellent roasted or sautéed.
- Sweet Potatoes: Sweet and versatile, great for baking, mashing, or roasting.
- Pears: Juicy and fragrant, ideal for desserts or salads.
Fall Recipe Ideas:
- Pumpkin Soup: A creamy and comforting soup made with roasted pumpkin and spices.
- Apple Crisp: Baked apples with a buttery oat topping.
- Roasted Brussels Sprouts and Sweet Potatoes: Tossed with olive oil and herbs, then roasted until caramelized.
Winter
Seasonal Ingredients:
- Citrus Fruits: Oranges, grapefruits, and lemons add brightness and flavor.
- Kale: Hearty and nutritious, great for salads, soups, and sautés.
- Winter Squash: Varieties like butternut and acorn are perfect for soups and roasts.
- Beets: Earthy and sweet, excellent for roasting or salads.
- Pomegranates: Tart and juicy, perfect for adding a burst of flavor to salads or desserts.
Winter Recipe Ideas:
- Butternut Squash Soup: Creamy and comforting, with a hint of spice.
- Kale and Citrus Salad: A refreshing salad with kale, citrus segments, and a light vinaigrette.
- Roasted Beets with Pomegranate Seeds: Roasted beets topped with fresh pomegranate seeds and a sprinkle of feta cheese.
Tips for Cooking with Seasonal Ingredients:
- Visit Farmers’ Markets: Farmers’ markets are a great place to find fresh, seasonal produce and to get inspiration for your meals.
- Preserve for Later: If you have an abundance of seasonal produce, consider preserving it by freezing, canning, or drying.
- Plan Meals Around What’s in Season: Base your weekly meal plan on what’s currently in season to take advantage of the freshest ingredients.
- Experiment with New Recipes: Seasonal ingredients offer an opportunity to try new recipes and cooking techniques.
- Support Local Farmers: Purchasing seasonal produce from local farmers helps support the community and reduces the environmental impact of transportation.
Cooking with seasonal ingredients not only enhances the flavor of your meals but also aligns with a more sustainable and health-conscious lifestyle. Enjoy the vibrant flavors and textures each season brings to your kitchen!
Brownies are a classic treat loved for their rich, fudgy texture and chocolatey goodness. The key to making the best brownies ever is to use high-quality ingredients, follow the right techniques, and balance the texture and flavor. Here’s a foolproof recipe to help you bake perfect brownies every time:
Ingredients:
- 1/2 cup (1 stick) unsalted butter
- 1 cup granulated sugar
- 2 large eggs
- 1 tsp vanilla extract
- 1/3 cup unsweetened cocoa powder
- 1/2 cup all-purpose flour
- 1/4 tsp salt
- 1/4 tsp baking powder
- 1/2 cup chocolate chips (optional, for extra chocolatey goodness)
- 1/2 cup chopped nuts (optional, such as walnuts or pecans)
Instructions:
1. Preheat the Oven:
- Preheat your oven to 350°F (175°C).
- Line an 8×8-inch baking pan with parchment paper or lightly grease it.
2. Melt the Butter:
- In a medium saucepan, melt the butter over low heat. Remove from heat once melted.
3. Combine Sugar and Butter:
- Stir the granulated sugar into the melted butter until well combined.
4. Add Eggs and Vanilla:
- Beat in the eggs, one at a time, ensuring each egg is fully incorporated before adding the next.
- Stir in the vanilla extract.
5. Mix in Dry Ingredients:
- Sift together the cocoa powder, flour, salt, and baking powder.
- Gradually add the dry ingredients to the wet ingredients, mixing just until combined. Avoid over-mixing to keep the brownies tender.
6. Add Chocolate Chips and Nuts:
- Fold in chocolate chips and chopped nuts if using.
7. Pour and Spread Batter:
- Pour the batter into the prepared baking pan and spread it evenly with a spatula.
8. Bake:
- Bake in the preheated oven for 20-25 minutes. Check for doneness by inserting a toothpick into the center; it should come out with a few moist crumbs but not wet batter.
- Be careful not to overbake; brownies should be slightly underbaked in the center for a fudgy texture.
9. Cool:
- Allow the brownies to cool in the pan on a wire rack. Once completely cool, lift them out of the pan using the parchment paper (if used) and cut into squares.
Tips for the Best Brownies:
- Use Quality Chocolate: For the richest flavor, use high-quality cocoa powder and chocolate chips.
- Don’t Overmix: Overmixing the batter can lead to dense and cakey brownies. Mix just until the dry ingredients are incorporated.
- Adjust Sweetness: If you prefer less sweet brownies, reduce the sugar slightly or use bittersweet chocolate.
- Add Swirls: For a twist, swirl in caramel sauce or peanut butter before baking.
- Check Oven Temperature: Ensure your oven is properly calibrated. Oven temperatures can vary, so use an oven thermometer if needed.
Enjoy your perfectly baked brownies, whether you like them fudgy or a bit cakey, with a crisp edge or a gooey center!

Finding quick and easy lunch recipes can make busy days more manageable without sacrificing flavor or nutrition. Here are ten delicious lunch ideas that are both simple to prepare and satisfying:
1. Turkey and Avocado Wrap
Ingredients:
- 1 large tortilla
- 3-4 slices of turkey breast
- 1/2 avocado, sliced
- 1/2 cup spinach or lettuce
- 1 tomato, sliced
- 1 tbsp mayonnaise or mustard
Instructions:
- Spread: Spread mayonnaise or mustard over the tortilla.
- Layer: Layer turkey, avocado slices, spinach, and tomato on the tortilla.
- Roll: Roll up the tortilla tightly, slice in half, and serve.
2. Mediterranean Quinoa Salad
Ingredients:
- 1 cup cooked quinoa
- 1/2 cup cherry tomatoes, halved
- 1/4 cup cucumber, diced
- 1/4 cup Kalamata olives, sliced
- 1/4 cup feta cheese, crumbled
- 2 tbsp olive oil
- 1 tbsp lemon juice
- Salt and pepper, to taste
Instructions:
- Mix: Combine quinoa, tomatoes, cucumber, olives, and feta in a bowl.
- Dress: Drizzle with olive oil and lemon juice. Season with salt and pepper.
- Toss: Toss to combine and serve.
3. Chicken Caesar Salad
Ingredients:
- 2 cups chopped romaine lettuce
- 1 cup cooked chicken breast, sliced
- 1/4 cup Caesar dressing
- 1/4 cup Parmesan cheese, grated
- Croutons (optional)
Instructions:
- Combine: Toss lettuce with Caesar dressing until evenly coated.
- Top: Add chicken, Parmesan cheese, and croutons.
- Serve: Mix well and serve immediately.
4. Veggie-Stuffed Pita
Ingredients:
- 1 whole wheat pita, cut in half
- 1/4 cup hummus
- 1/4 cup shredded carrots
- 1/4 cup cucumber, sliced
- 1/4 cup bell pepper, sliced
- 1/4 cup cherry tomatoes, halved
Instructions:
- Spread: Spread hummus inside each pita half.
- Stuff: Stuff with shredded carrots, cucumber, bell pepper, and cherry tomatoes.
- Serve: Serve immediately or wrap for a portable lunch.
5. Caprese Sandwich
Ingredients:
- 2 slices of crusty bread (such as ciabatta)
- 1 ripe tomato, sliced
- 1/4 cup fresh mozzarella, sliced
- Fresh basil leaves
- 1 tbsp balsamic glaze
- Olive oil
Instructions:
- Assemble: Layer tomato, mozzarella, and basil on one slice of bread.
- Drizzle: Drizzle with balsamic glaze and olive oil.
- Top: Top with the second slice of bread, slice in half, and serve.
6. Egg Salad Sandwich
Ingredients:
- 4 hard-boiled eggs, chopped
- 2 tbsp mayonnaise
- 1 tsp Dijon mustard
- Salt and pepper, to taste
- 2 slices of bread
Instructions:
- Mix: Combine eggs, mayonnaise, mustard, salt, and pepper in a bowl.
- Spread: Spread the egg salad on one slice of bread.
- Top: Top with the other slice of bread, cut in half, and serve.
7. Asian Chicken Lettuce Wraps
Ingredients:
- 1 cup cooked chicken, diced
- 1/4 cup hoisin sauce
- 1 tbsp soy sauce
- 1 tbsp rice vinegar
- 1/4 cup chopped peanuts
- Lettuce leaves (for wrapping)
Instructions:
- Mix Sauce: Combine hoisin sauce, soy sauce, and rice vinegar.
- Combine: Toss chicken with the sauce.
- Serve: Spoon chicken mixture onto lettuce leaves and top with chopped peanuts.
8. Greek Yogurt Chicken Salad
Ingredients:
- 1 cup cooked chicken breast, diced
- 1/2 cup Greek yogurt
- 1 tbsp Dijon mustard
- 1/4 cup celery, diced
- 1/4 cup red grapes, halved
- Salt and pepper, to taste
Instructions:
- Mix: Combine chicken, Greek yogurt, Dijon mustard, celery, and grapes in a bowl.
- Season: Season with salt and pepper.
- Serve: Serve on a bed of lettuce or as a sandwich filling.
9. Black Bean and Corn Salad
Ingredients:
- 1 can black beans, drained and rinsed
- 1 cup corn kernels (fresh or frozen)
- 1/4 cup red bell pepper, diced
- 1/4 cup red onion, diced
- 2 tbsp lime juice
- 1 tbsp olive oil
- Salt and pepper, to taste
Instructions:
- Combine: Mix black beans, corn, bell pepper, and red onion in a bowl.
- Dress: Drizzle with lime juice and olive oil. Season with salt and pepper.
- Toss: Toss to combine and serve.
10. Shrimp and Avocado Salad
Ingredients:
- 1 cup cooked shrimp, peeled and deveined
- 1 avocado, diced
- 2 cups mixed greens
- 1/4 cup cherry tomatoes, halved
- 2 tbsp olive oil
- 1 tbsp lemon juice
- Salt and pepper, to taste
Instructions:
- Combine: Mix shrimp, avocado, greens, and cherry tomatoes in a bowl.
- Dress: Drizzle with olive oil and lemon juice. Season with salt and pepper.
- Toss: Toss gently and serve.
These quick and easy lunch recipes are perfect for busy days and can be prepared in advance for a hassle-free meal. Enjoy a variety of flavors and ingredients to keep your lunches exciting and nutritious!

Making authentic Mexican tacos at home is a delightful and rewarding experience. While tacos can be customized with various fillings and toppings, the essence of a great taco lies in its simplicity and quality of ingredients. Here’s a guide to making classic Mexican tacos from scratch:
Ingredients:
For the Taco Meat:
- 1 lb ground beef or pork (or chicken, if preferred)
- 1 tbsp vegetable oil
- 1 small onion, finely chopped
- 2 cloves garlic, minced
- 1 tsp ground cumin
- 1 tsp chili powder
- 1/2 tsp paprika
- 1/2 tsp dried oregano
- 1/4 tsp cayenne pepper (optional, for heat)
- 1/2 cup beef or chicken broth (or water)
- Salt and black pepper, to taste
For the Taco Shells:
- Corn tortillas (store-bought or homemade)
Toppings:
- Shredded lettuce
- Diced tomatoes
- Chopped fresh cilantro
- Sliced radishes
- Diced onions
- Sliced jalapeños (optional)
- Shredded cheese (like Cotija or Mexican blend)
- Sour cream
- Fresh lime wedges
- Salsa or pico de gallo
Instructions:
1. Prepare the Taco Meat:
- Heat Oil: In a large skillet, heat vegetable oil over medium heat.
- Cook Onions and Garlic: Add the chopped onion and cook until softened, about 3-4 minutes. Stir in the minced garlic and cook for another 30 seconds.
- Brown the Meat: Add the ground beef (or pork/chicken) to the skillet. Cook until browned and fully cooked, breaking up the meat with a spoon as it cooks.
- Season: Stir in cumin, chili powder, paprika, oregano, and cayenne pepper (if using). Mix well to coat the meat with the spices.
- Add Liquid: Pour in the broth or water. Simmer for 5-10 minutes, until the liquid is mostly absorbed and the meat is well-seasoned. Adjust salt and pepper to taste.
2. Prepare the Taco Shells:
- Heat Tortillas: If using store-bought tortillas, heat them in a dry skillet over medium heat for about 30 seconds on each side, or until warm and pliable. You can also warm them in the oven or microwave.
- Homemade Tortillas (Optional): For homemade tortillas, mix masa harina with water and a pinch of salt, then press and cook them on a hot griddle or skillet until cooked through.
3. Assemble the Tacos:
- Fill Tortillas: Place a warm tortilla on a plate. Spoon a portion of the cooked taco meat onto the center of the tortilla.
- Add Toppings: Top with shredded lettuce, diced tomatoes, chopped cilantro, diced onions, sliced radishes, and jalapeños (if using).
- Add Cheese and Sauces: Sprinkle with shredded cheese, and add a dollop of sour cream. Drizzle with salsa or pico de gallo.
- Garnish: Serve with fresh lime wedges for squeezing over the tacos.
Tips for Perfect Tacos:
- Quality Ingredients: Use fresh and high-quality ingredients for the best flavor.
- Adjust Spice Levels: Customize the heat level by adjusting the amount of cayenne pepper or adding hot sauce.
- Make It Your Own: Feel free to experiment with different proteins (like fish or beef), and add unique toppings like avocado or pickled onions.
- Warm Tortillas: Ensure tortillas are warm and pliable to prevent cracking.
Enjoy your homemade tacos with family and friends! These authentic Mexican tacos are sure to bring a taste of Mexico right to your kitchen.
Cookies are a beloved treat that can be customized for any event, from casual snacks to festive celebrations. Here are some of the best homemade cookie recipes that are perfect for any occasion:
1. Classic Chocolate Chip Cookies
Ingredients:
- 1 cup unsalted butter, softened
- 1 cup granulated sugar
- 1 cup packed brown sugar
- 2 large eggs
- 2 tsp vanilla extract
- 3 cups all-purpose flour
- 1 tsp baking soda
- 1/2 tsp baking powder
- 1/2 tsp salt
- 2 cups semisweet chocolate chips
Instructions:
- Preheat Oven: Preheat to 350°F (175°C).
- Cream Butter and Sugars: Beat butter, granulated sugar, and brown sugar until light and fluffy. Add eggs one at a time, then mix in vanilla.
- Combine Dry Ingredients: In a separate bowl, whisk flour, baking soda, baking powder, and salt.
- Mix Together: Gradually add dry ingredients to the butter mixture. Stir in chocolate chips.
- Bake: Drop rounded tablespoons of dough onto a baking sheet. Bake for 10-12 minutes until edges are golden.
2. Soft and Chewy Sugar Cookies
Ingredients:
- 2 3/4 cups all-purpose flour
- 1 1/2 tsp baking powder
- 1/2 tsp baking soda
- 1/2 tsp salt
- 1 cup unsalted butter, softened
- 1 1/2 cups granulated sugar
- 2 large eggs
- 1 tsp vanilla extract
Instructions:
- Preheat Oven: Preheat to 350°F (175°C).
- Mix Dry Ingredients: Whisk flour, baking powder, baking soda, and salt.
- Cream Butter and Sugar: Beat butter and sugar until creamy. Add eggs one at a time and mix in vanilla.
- Combine: Gradually mix in dry ingredients.
- Bake: Drop spoonfuls of dough onto a baking sheet. Flatten slightly with the bottom of a glass. Bake for 8-10 minutes.
3. Oatmeal Raisin Cookies
Ingredients:
- 1 cup unsalted butter, softened
- 1 cup granulated sugar
- 1 cup packed brown sugar
- 2 large eggs
- 1 tsp vanilla extract
- 2 cups rolled oats
- 1 1/2 cups all-purpose flour
- 1 tsp baking soda
- 1/2 tsp cinnamon
- 1/2 tsp salt
- 1 cup raisins
Instructions:
- Preheat Oven: Preheat to 350°F (175°C).
- Cream Butter and Sugars: Beat butter, granulated sugar, and brown sugar until smooth. Add eggs and vanilla.
- Mix Dry Ingredients: Whisk flour, baking soda, cinnamon, and salt. Gradually add to butter mixture.
- Add Oats and Raisins: Stir in oats and raisins.
- Bake: Drop rounded tablespoons of dough onto a baking sheet. Bake for 10-12 minutes until golden brown.
4. Peanut Butter Cookies
Ingredients:
- 1 cup unsalted butter, softened
- 1 cup creamy peanut butter
- 1 cup granulated sugar
- 1 cup packed brown sugar
- 2 large eggs
- 2 1/2 cups all-purpose flour
- 1 tsp baking soda
- 1/2 tsp salt
Instructions:
- Preheat Oven: Preheat to 350°F (175°C).
- Cream Butter, Peanut Butter, and Sugars: Beat until creamy. Add eggs one at a time.
- Combine Dry Ingredients: Mix flour, baking soda, and salt. Gradually add to the butter mixture.
- Shape Cookies: Roll dough into balls and place on a baking sheet. Flatten with a fork in a crisscross pattern.
- Bake: Bake for 10-12 minutes until edges are golden.
5. Snickerdoodles
Ingredients:
- 1 cup unsalted butter, softened
- 1 1/2 cups granulated sugar
- 2 large eggs
- 2 3/4 cups all-purpose flour
- 2 tsp cream of tartar
- 1 tsp baking soda
- 1/2 tsp salt
- 3 tbsp granulated sugar (for rolling)
- 1 tbsp ground cinnamon (for rolling)
Instructions:
- Preheat Oven: Preheat to 350°F (175°C).
- Cream Butter and Sugar: Beat butter and sugar until fluffy. Add eggs one at a time.
- Combine Dry Ingredients: Mix flour, cream of tartar, baking soda, and salt. Gradually add to the butter mixture.
- Roll and Coat: Mix remaining sugar and cinnamon. Roll dough into balls and coat in cinnamon-sugar.
- Bake: Place on a baking sheet and bake for 10-12 minutes.
6. White Chocolate Macadamia Nut Cookies
Ingredients:
- 1 cup unsalted butter, softened
- 1 cup granulated sugar
- 1 cup packed brown sugar
- 2 large eggs
- 1 tsp vanilla extract
- 2 1/2 cups all-purpose flour
- 1 tsp baking soda
- 1/2 tsp salt
- 1 cup white chocolate chips
- 1 cup macadamia nuts, chopped
Instructions:
- Preheat Oven: Preheat to 350°F (175°C).
- Cream Butter and Sugars: Beat until light and fluffy. Add eggs one at a time and mix in vanilla.
- Combine Dry Ingredients: Whisk flour, baking soda, and salt. Gradually mix into butter mixture.
- Add Chips and Nuts: Stir in white chocolate chips and macadamia nuts.
- Bake: Drop rounded tablespoons of dough onto a baking sheet. Bake for 10-12 minutes until edges are golden.
7. Gingerbread Cookies
Ingredients:
- 3 1/4 cups all-purpose flour
- 1 tsp baking soda
- 1 tbsp ground ginger
- 1 tbsp ground cinnamon
- 1/2 tsp ground cloves
- 1/2 tsp salt
- 1/2 cup unsalted butter, softened
- 1/2 cup granulated sugar
- 1/2 cup molasses
- 1 large egg
Instructions:
- Preheat Oven: Preheat to 350°F (175°C).
- Mix Dry Ingredients: Whisk flour, baking soda, ginger, cinnamon, cloves, and salt.
- Cream Butter and Sugar: Beat until creamy. Add molasses and egg, mixing well.
- Combine: Gradually add dry ingredients to the butter mixture.
- Roll and Cut: Roll dough on a floured surface and cut into shapes. Place on a baking sheet.
- Bake: Bake for 8-10 minutes until firm. Cool before decorating.
8. Almond Joy Cookies
Ingredients:
- 1 cup unsalted butter, softened
- 1 cup granulated sugar
- 1 cup packed brown sugar
- 2 large eggs
- 1 tsp vanilla extract
- 2 1/4 cups all-purpose flour
- 1 tsp baking soda
- 1/2 tsp salt
- 1 cup shredded coconut
- 1 cup chopped almonds
- 1 cup chocolate chips
Instructions:
- Preheat Oven: Preheat to 350°F (175°C).
- Cream Butter and Sugars: Beat until fluffy. Add eggs and vanilla.
- Combine Dry Ingredients: Mix flour, baking soda, and salt. Gradually add to the butter mixture.
- Add Coconut, Almonds, and Chips: Stir in shredded coconut, chopped almonds, and chocolate chips.
- Bake: Drop rounded tablespoons of dough onto a baking sheet. Bake for 10-12 minutes until golden.
9. Chocolate Crinkle Cookies
Ingredients:
- 1 cup granulated sugar
- 1/2 cup unsweetened cocoa powder
- 1/2 cup vegetable oil
- 2 large eggs
- 1 tsp vanilla extract
- 2 cups all-purpose flour
- 2 tsp baking powder
- 1/2 tsp salt
- Powdered sugar (for rolling)
Instructions:
- Preheat Oven: Preheat to 350°F (175°C).
- Mix Wet Ingredients: Beat sugar, cocoa powder, and oil until smooth. Add eggs and vanilla.
- Combine Dry Ingredients: Whisk flour, baking powder, and salt. Gradually mix into the wet ingredients.
- Shape and Coat: Roll dough into balls and coat in powdered sugar.
- Bake: Place on a baking sheet and bake for 10-12 minutes.
10. Salted Caramel Cookies
Ingredients:
- 1 cup unsalted butter, softened
- 1 cup granulated sugar
- 1 cup packed brown sugar
- 2 large eggs
- 1 tsp vanilla extract
- 2 1/4 cups all-purpose flour
- 1 tsp baking soda
- 1/2 tsp salt
- 1 cup caramel bits or chopped caramel candy
- Sea salt flakes (for sprinkling)
Instructions:
- Preheat Oven: Preheat to 350°F (175°C).
- Cream Butter and Sugars: Beat until creamy. Add eggs and vanilla.
- Combine Dry Ingredients: Mix flour, baking soda, and salt. Gradually add to the butter mixture.
- Add Caramel: Stir in caramel bits or chopped caramel candy.
- Bake: Drop rounded tablespoons of dough onto a baking sheet. Sprinkle with sea salt flakes before baking. Bake for 10-12 minutes.
These homemade cookie recipes are perfect for any occasion, from holiday gatherings to everyday treats. Each one brings a unique flavor and texture to satisfy every cookie craving!

Smoothie bowls are a delicious and nutritious way to start your day or enjoy a healthy snack. They offer endless customization and are packed with fruits, vegetables, and toppings. Here’s a step-by-step guide to making the perfect smoothie bowl:
Ingredients:
For the Smoothie Base:
- 1 cup frozen fruit (such as berries, mango, banana, or a mix)
- 1 banana (fresh or frozen)
- 1/2 cup Greek yogurt (or any non-dairy yogurt for a vegan option)
- 1/2 cup liquid (such as almond milk, coconut water, or regular milk)
- 1 tablespoon honey or maple syrup (optional, for added sweetness)
- 1 tablespoon chia seeds (optional, for extra nutrients)
For the Toppings:
- Fresh fruit (such as sliced bananas, berries, kiwi, or mango)
- Granola (store-bought or homemade)
- Nuts and seeds (such as almonds, walnuts, chia seeds, or hemp seeds)
- Nut butters (such as almond butter or peanut butter)
- Shredded coconut (unsweetened)
- Honey or maple syrup (for drizzling)
- Cacao nibs or dark chocolate shavings (optional)
Instructions:
1. Prepare the Smoothie Base:
- Combine Ingredients: In a blender, add the frozen fruit, banana, Greek yogurt, and 1/2 cup of your chosen liquid.
- Blend: Blend until smooth, adding more liquid if necessary to achieve your desired consistency. The mixture should be thicker than a regular smoothie, similar to soft-serve ice cream.
- Adjust Sweetness: Taste and add honey or maple syrup if you prefer a sweeter base. Blend again to combine.
2. Assemble the Smoothie Bowl:
- Pour: Transfer the smoothie base into a bowl. Smooth out the surface with the back of a spoon.
- Add Toppings: Arrange your choice of toppings on the surface of the smoothie base. You can create sections or simply scatter them for a more relaxed look.
3. Serve and Enjoy:
- Serve Immediately: Smoothie bowls are best enjoyed right after assembly while the toppings are fresh and the texture is creamy.
- Add Extra Drizzle: Drizzle a little honey or maple syrup on top for added sweetness, if desired.
Tips for the Perfect Smoothie Bowl:
- Thick Consistency: For a thicker smoothie base, use more frozen fruit and less liquid. You can also add a scoop of protein powder or a handful of oats.
- Frozen Fruit: Using frozen fruit is key to achieving a creamy texture without needing ice, which can dilute the flavor.
- Customize Flavors: Feel free to experiment with different fruit combinations and add-ins like spinach or kale for extra nutrition.
- Layering Toppings: For a visually appealing bowl, layer your toppings neatly and use a variety of colors and textures.
Enjoy your smoothie bowl as a satisfying breakfast, a nutritious snack, or a refreshing dessert!

Pasta is a versatile and comforting dish that can be adapted to suit any taste or occasion. Here are ten delicious pasta recipes that you should definitely add to your cooking repertoire:
1. Classic Spaghetti Carbonara
Ingredients:
- 12 oz spaghetti
- 4 oz pancetta or bacon, diced
- 2 large eggs
- 1 cup grated Parmesan cheese
- 2 cloves garlic, minced
- Salt and black pepper to taste
- Fresh parsley, chopped (optional)
Instructions:
- Cook Pasta: Cook spaghetti according to package instructions. Reserve 1/2 cup of pasta water and drain.
- Cook Pancetta: In a skillet, cook pancetta until crispy. Add garlic and cook for 1 minute.
- Combine: In a bowl, whisk together eggs and Parmesan cheese. Toss hot pasta with pancetta and garlic, then remove from heat and mix in the egg mixture, adding reserved pasta water to create a creamy sauce.
- Season and Serve: Season with salt and pepper. Garnish with parsley if desired.
2. Creamy Tomato Basil Pasta
Ingredients:
- 12 oz penne pasta
- 1 tbsp olive oil
- 2 cloves garlic, minced
- 1 can (14.5 oz) crushed tomatoes
- 1/2 cup heavy cream
- 1/4 cup fresh basil, chopped
- Salt and black pepper to taste
- Grated Parmesan cheese (optional)
Instructions:
- Cook Pasta: Cook penne according to package instructions. Drain and set aside.
- Make Sauce: Heat olive oil in a pan. Sauté garlic until fragrant. Add crushed tomatoes and simmer for 10 minutes. Stir in heavy cream and basil.
- Combine: Toss cooked pasta with the sauce. Season with salt and pepper.
- Serve: Top with Parmesan cheese if desired.
3. Pesto Pasta with Sun-Dried Tomatoes
Ingredients:
- 12 oz fusilli pasta
- 1/2 cup pesto sauce
- 1/2 cup sun-dried tomatoes, chopped
- 1/4 cup pine nuts, toasted
- Grated Parmesan cheese (optional)
Instructions:
- Cook Pasta: Cook fusilli according to package instructions. Drain and set aside.
- Combine: Toss cooked pasta with pesto sauce, sun-dried tomatoes, and pine nuts.
- Serve: Garnish with Parmesan cheese if desired.
4. Baked Ziti with Meat Sauce
Ingredients:
- 12 oz ziti pasta
- 1 lb ground beef
- 1 jar (24 oz) marinara sauce
- 1 cup ricotta cheese
- 2 cups shredded mozzarella cheese
- 1/4 cup grated Parmesan cheese
- 1 tsp dried oregano
Instructions:
- Cook Pasta: Cook ziti according to package instructions. Drain and set aside.
- Make Meat Sauce: Cook ground beef until browned. Stir in marinara sauce and oregano. Simmer for 10 minutes.
- Combine: Mix cooked ziti with meat sauce and ricotta cheese. Transfer to a baking dish, top with mozzarella and Parmesan cheese.
- Bake: Bake at 375°F (190°C) for 25-30 minutes, until cheese is bubbly and golden.
5. Shrimp Scampi Pasta
Ingredients:
- 12 oz linguine pasta
- 1 lb large shrimp, peeled and deveined
- 4 tbsp butter
- 4 cloves garlic, minced
- 1/4 cup white wine
- 1/4 cup fresh lemon juice
- 1/4 cup chopped parsley
- Salt and black pepper to taste
Instructions:
- Cook Pasta: Cook linguine according to package instructions. Drain and set aside.
- Cook Shrimp: In a pan, melt butter and sauté garlic until fragrant. Add shrimp and cook until pink. Stir in white wine and lemon juice.
- Combine: Toss cooked pasta with shrimp and sauce. Garnish with parsley and season with salt and pepper.
6. Spinach and Ricotta Stuffed Shells
Ingredients:
- 20 jumbo pasta shells
- 1 cup ricotta cheese
- 1 cup spinach, chopped
- 1/2 cup grated Parmesan cheese
- 1 egg
- 2 cups marinara sauce
Instructions:
- Cook Shells: Cook pasta shells according to package instructions. Drain and let cool.
- Prepare Filling: Mix ricotta cheese, spinach, Parmesan cheese, and egg in a bowl.
- Stuff Shells: Fill each shell with the ricotta mixture and place in a baking dish. Pour marinara sauce over shells.
- Bake: Bake at 375°F (190°C) for 20-25 minutes.
7. Lemon Garlic Pasta
Ingredients:
- 12 oz spaghetti
- 3 tbsp olive oil
- 4 cloves garlic, minced
- Zest and juice of 1 lemon
- 1/4 cup chopped parsley
- Salt and black pepper to taste
- Grated Parmesan cheese (optional)
Instructions:
- Cook Pasta: Cook spaghetti according to package instructions. Drain and set aside.
- Make Sauce: Heat olive oil in a pan. Sauté garlic until fragrant. Add lemon zest and juice.
- Combine: Toss pasta with lemon garlic sauce and parsley. Season with salt and pepper.
- Serve: Top with Parmesan cheese if desired.
8. Pasta Primavera
Ingredients:
- 12 oz penne pasta
- 2 tbsp olive oil
- 1 bell pepper, sliced
- 1 zucchini, sliced
- 1 cup cherry tomatoes
- 1/4 cup grated Parmesan cheese
- Salt and black pepper to taste
Instructions:
- Cook Pasta: Cook penne according to package instructions. Drain and set aside.
- Sauté Vegetables: In a pan, heat olive oil and sauté bell pepper, zucchini, and cherry tomatoes until tender.
- Combine: Toss cooked pasta with vegetables and Parmesan cheese. Season with salt and pepper.
9. Creamy Mushroom Pasta
Ingredients:
- 12 oz fettuccine pasta
- 2 tbsp olive oil
- 8 oz mushrooms, sliced
- 1 cup heavy cream
- 1/2 cup grated Parmesan cheese
- 1/4 cup white wine (optional)
- Salt and black pepper to taste
Instructions:
- Cook Pasta: Cook fettuccine according to package instructions. Drain and set aside.
- Sauté Mushrooms: In a pan, heat olive oil and cook mushrooms until golden. Add white wine if using, and cook until reduced.
- Make Sauce: Stir in heavy cream and Parmesan cheese. Cook until sauce thickens.
- Combine: Toss pasta with the mushroom sauce. Season with salt and pepper.
10. Pappardelle with Butternut Squash and Sage
Ingredients:
- 12 oz pappardelle pasta
- 1 small butternut squash, peeled and cubed
- 3 tbsp olive oil
- 1/4 cup fresh sage leaves
- 1/4 cup grated Parmesan cheese
- Salt and black pepper to taste
Instructions:
- Roast Squash: Toss butternut squash with olive oil, salt, and pepper. Roast at 400°F (200°C) for 25-30 minutes, until tender.
- Cook Pasta: Cook pappardelle according to package instructions. Drain and set aside.
- Combine: Toss roasted squash with cooked pasta and fresh sage leaves. Garnish with Parmesan cheese.
These pasta recipes cover a variety of flavors and styles, ensuring there’s something for everyone to enjoy. From creamy sauces to fresh veggies, you’re sure to find a new favorite dish!

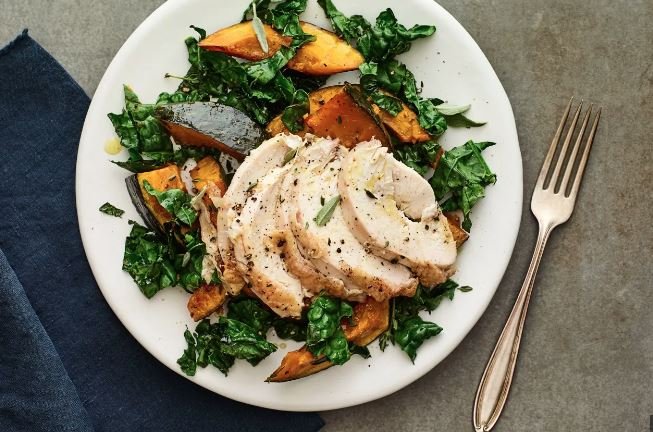
Cooking the perfect Thanksgiving turkey involves a few key steps: seasoning, cooking, and resting. Whether you’re a seasoned pro or a first-time cook, this guide will help you prepare a delicious, moist turkey that’s sure to impress your guests.
Ingredients:
- 1 whole turkey (12-16 pounds), thawed if frozen
- 1/2 cup unsalted butter, melted
- 1/4 cup olive oil
- 2 tablespoons salt
- 1 tablespoon black pepper
- 1 tablespoon garlic powder
- 1 tablespoon onion powder
- 1 tablespoon dried thyme
- 1 tablespoon dried rosemary
- 1 teaspoon paprika
- 1 onion, quartered
- 1 lemon, quartered
- 4 garlic cloves, smashed
- Fresh herbs (such as rosemary, thyme, and sage), optional
Instructions:
1. Prepare the Turkey:
- Thaw the Turkey: If using a frozen turkey, allow it to thaw in the refrigerator. Plan for 24 hours of thawing time for every 4-5 pounds of turkey.
- Preheat Oven: Preheat your oven to 325°F (165°C).
- Remove Giblets: Remove the giblets and neck from the cavity of the turkey. Rinse the turkey inside and out with cold water and pat dry with paper towels.
2. Season the Turkey:
- Make the Seasoning Mixture: In a bowl, mix melted butter, olive oil, salt, pepper, garlic powder, onion powder, thyme, rosemary, and paprika.
- Season the Turkey: Rub the seasoning mixture all over the turkey, including under the skin if possible. Place some of the seasoning inside the cavity.
- Stuff the Cavity: Stuff the cavity with onion, lemon, garlic, and fresh herbs if using. This will add flavor from the inside out.
3. Roast the Turkey:
- Truss the Turkey: Tie the legs together with kitchen twine and tuck the wing tips under the bird to prevent them from burning.
- Place on Rack: Place the turkey on a rack in a roasting pan. This helps the heat circulate around the turkey and allows the juices to drip into the pan.
- Roast: Roast the turkey in the preheated oven. As a general rule, cook for about 15 minutes per pound. For a 12-pound turkey, this will be approximately 3 to 3.5 hours.
4. Baste the Turkey:
- Basting: Every 30-45 minutes, baste the turkey with the pan juices or additional melted butter. This helps keep the turkey moist and adds flavor.
- Check Temperature: Use a meat thermometer to check for doneness. Insert it into the thickest part of the thigh without touching the bone. The internal temperature should reach 165°F (74°C).
5. Rest the Turkey:
- Remove from Oven: Once the turkey reaches the correct temperature, remove it from the oven.
- Rest: Let the turkey rest for at least 20-30 minutes before carving. This allows the juices to redistribute and keeps the meat moist.
6. Carve and Serve:
- Carve: Use a sharp knife to carve the turkey. Start by removing the legs and thighs, then slice the breast meat.
- Serve: Arrange the carved turkey on a serving platter and serve with your favorite sides and gravy.
Tips for the Best Turkey:
- Brining: For extra moist turkey, consider brining it before roasting. A simple brine can be made with water, salt, sugar, and spices. Soak the turkey in the brine for 8-12 hours in the refrigerator.
- Butter Under Skin: For a richer flavor and extra moisture, lift the skin from the meat and spread some of the seasoning mixture directly onto the meat.
- Covering with Foil: If the turkey is browning too quickly, cover it loosely with aluminum foil during the last part of roasting to prevent over-browning.
With these steps, you’ll have a perfectly cooked Thanksgiving turkey that’s golden brown, juicy, and full of flavor. Enjoy your holiday feast!
