The Secrets to Making Authentic Italian Cuisine

Italian cuisine is renowned for its rich flavors, fresh ingredients, and simple yet elegant dishes. The secrets to making authentic Italian food lie in understanding the basics of its cuisine, using high-quality ingredients, and mastering a few key techniques. Here’s how to create Italian dishes that taste like they’re straight from Italy.

1. Use Fresh, High-Quality Ingredients

  • Olive Oil: Choose extra-virgin olive oil for its robust flavor and health benefits. It’s a staple in Italian cooking.
  • Tomatoes: Use San Marzano tomatoes for a rich, sweet flavor in sauces. They are often considered the best for authentic Italian dishes.
  • Cheese: Opt for authentic Italian cheeses like Parmigiano-Reggiano, Pecorino Romano, and mozzarella di bufala. Freshly grated cheese always enhances the flavor.
  • Herbs: Fresh basil, oregano, rosemary, and thyme are essential for Italian flavor. Avoid dried herbs when fresh is available.

2. Master the Art of Pasta

  • Cooking Pasta: Cook pasta in plenty of salted water until it’s al dente, which means it should have a slight bite to it. Italian pasta is never overcooked.
  • Pasta Water: Reserve some pasta water before draining. This starchy water can be used to adjust the consistency of sauces and help them adhere to the pasta.
  • Sauce Pairing: Match pasta shapes with sauces. For example, use spaghetti for tomato-based sauces and rigatoni for chunky sauces.

3. Perfect Your Sauces

  • Tomato Sauce: For a simple marinara, sauté garlic in olive oil, add crushed tomatoes, and season with salt, pepper, and fresh basil. Simmer for at least 20 minutes to develop the flavor.
  • Pesto: Blend fresh basil, garlic, pine nuts, Parmesan cheese, and olive oil for a classic pesto. Adjust ingredients to taste and use it as a pasta sauce or spread.
  • Bechamel: For creamy sauces, like lasagna, make a bechamel sauce by cooking butter and flour to create a roux, then gradually whisk in milk until smooth.

4. Embrace Simplicity

  • Minimalism: Italian cuisine often focuses on a few high-quality ingredients rather than complex combinations. Let the natural flavors of the ingredients shine.
  • Seasoning: Use salt and pepper to enhance flavors rather than overpowering dishes with multiple spices.

5. Respect Tradition

  • Classic Dishes: Familiarize yourself with traditional Italian dishes such as risotto, lasagna, and Osso Buco. Each region in Italy has its own specialties and cooking methods.
  • Cooking Techniques: Learn traditional techniques like sautéing, braising, and making risotto. These methods are central to authentic Italian cooking.

6. Enjoy the Process

  • Pasta Dough: Make your own pasta dough for the freshest taste. Use flour, eggs, and a pinch of salt. Roll and cut it to your desired shapes.
  • Pizza Dough: For homemade pizza, use a simple dough recipe with flour, yeast, salt, and water. Allow it to rise properly for a light, crispy crust.

7. Pair Food with Wine

  • Regional Pairing: In Italy, wine is paired with food based on regional traditions. For example, pair a robust Chianti with a hearty meat dish or a light Pinot Grigio with seafood.
  • Wine Knowledge: Understand basic wine pairings and how they complement various Italian dishes to enhance the dining experience.

8. Craft Homemade Desserts

  • Tiramisu: Layer coffee-soaked ladyfingers with a mascarpone mixture for this classic Italian dessert. Chill before serving for the best texture.
  • Panna Cotta: A creamy, vanilla-flavored dessert that’s simple to make. Serve with fresh berries or a berry compote.

9. Embrace the Mediterranean

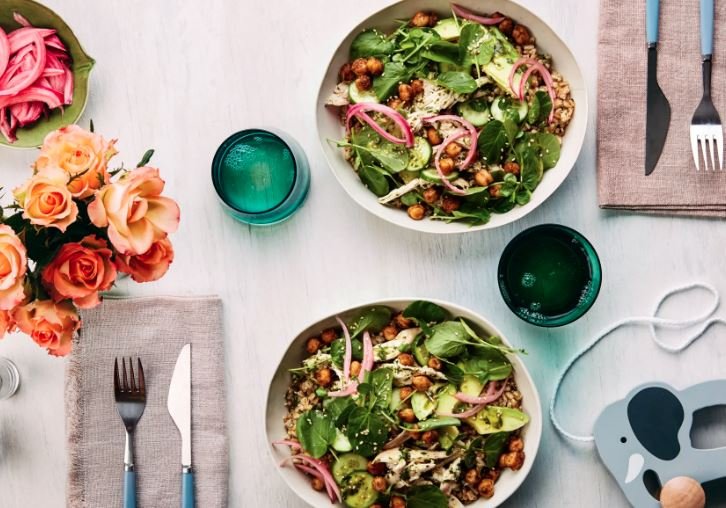
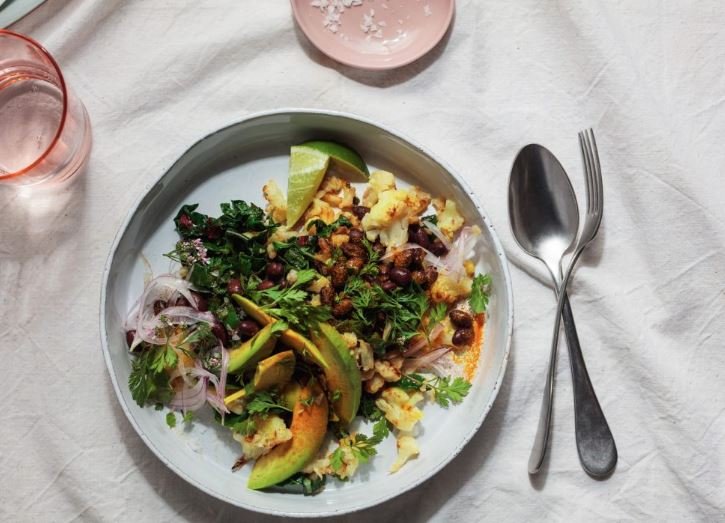
  • Fresh Vegetables: Incorporate fresh vegetables like tomatoes, eggplant, zucchini, and bell peppers. These are key ingredients in many Italian dishes.
  • Seafood: Use fresh seafood in dishes like pasta with clams or seafood risotto, reflecting the coastal regions of Italy.

10. Serve with Style

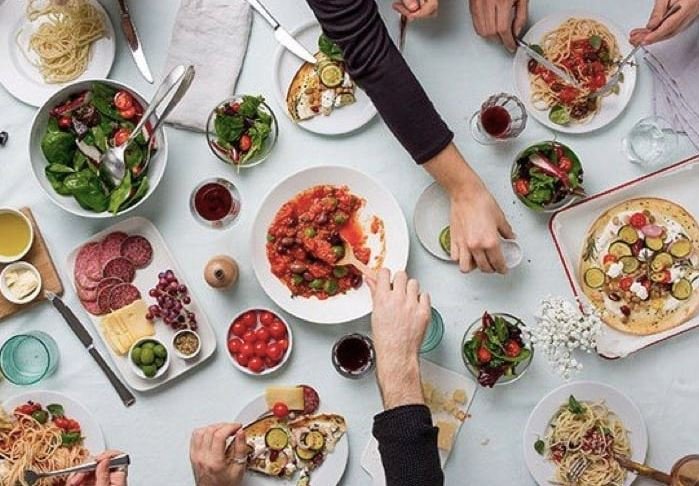
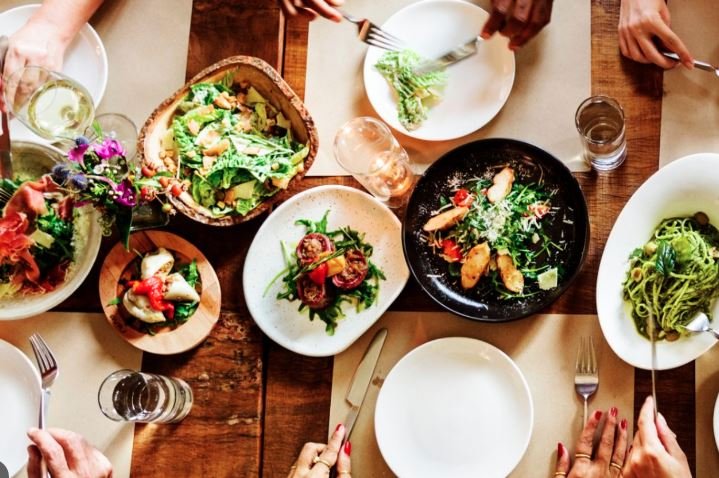
  • Presentation: Italian meals are often served family-style, with dishes placed in the center of the table for sharing. Presentation matters, so arrange your dishes attractively.
  • Table Setting: Use simple yet elegant tableware. A well-set table adds to the enjoyment of the meal and reflects the Italian love of dining as an experience.

By focusing on fresh ingredients, traditional techniques, and simplicity, you can bring the essence of Italian cuisine into your kitchen. Enjoy the process of creating and savoring these delicious dishes!

10 Easy and Delicious One-Pot Meals

One-pot meals are perfect for busy weeknights or lazy weekends, offering simplicity in preparation and cleanup. Here are ten easy and delicious one-pot meals that are sure to become family favorites.

1. Classic Beef Stroganoff

Ingredients:

  • 1 lb beef stew meat or thinly sliced beef
  • 1 tbsp olive oil
  • 1 onion, chopped
  • 2 cloves garlic, minced
  • 1 cup mushrooms, sliced
  • 1 cup beef broth
  • 1 cup sour cream
  • 1 tbsp Dijon mustard
  • 2 tbsp flour
  • Salt and pepper to taste
  • 8 oz egg noodles

Instructions:

  1. Cook Beef: In a large skillet or pot, heat olive oil over medium heat. Brown beef on all sides. Remove and set aside.
  2. Sauté Vegetables: In the same pot, sauté onion, garlic, and mushrooms until soft.
  3. Combine Ingredients: Add flour, stir for 1 minute, then add beef broth, sour cream, and Dijon mustard. Stir until smooth.
  4. Simmer: Return beef to the pot and simmer for 15 minutes until beef is tender.
  5. Cook Noodles: In a separate pot, cook egg noodles according to package instructions. Drain and mix into the beef mixture before serving.

2. Chicken and Rice

Ingredients:

  • 1 lb chicken thighs or breasts
  • 1 cup long-grain rice
  • 1 onion, chopped
  • 2 cloves garlic, minced
  • 1 bell pepper, chopped
  • 1 can diced tomatoes (14.5 oz)
  • 1 cup chicken broth
  • 1 tsp dried oregano
  • 1 tsp paprika
  • Salt and pepper to taste

Instructions:

  1. Sear Chicken: In a large pot or Dutch oven, sear chicken on both sides until golden. Remove and set aside.
  2. Sauté Vegetables: In the same pot, sauté onion, garlic, and bell pepper until soft.
  3. Add Rice and Liquids: Stir in rice, diced tomatoes, chicken broth, oregano, paprika, salt, and pepper.
  4. Simmer: Return chicken to the pot. Bring to a boil, then reduce heat, cover, and simmer for 20-25 minutes until rice and chicken are cooked.

3. One-Pot Pasta Primavera

Ingredients:

  • 8 oz pasta (penne or spaghetti)
  • 2 tbsp olive oil
  • 1 onion, chopped
  • 2 cloves garlic, minced
  • 1 cup bell peppers, sliced
  • 1 cup zucchini, sliced
  • 1 cup cherry tomatoes, halved
  • 2 cups vegetable broth
  • 1/2 cup grated Parmesan cheese
  • Salt and pepper to taste

Instructions:

  1. Sauté Vegetables: In a large pot, heat olive oil and sauté onion and garlic until fragrant.
  2. Add Vegetables: Add bell peppers, zucchini, and cherry tomatoes. Cook for a few minutes until slightly tender.
  3. Cook Pasta: Stir in pasta and vegetable broth. Bring to a boil, then reduce heat and simmer for 10-12 minutes, stirring occasionally, until pasta is cooked and liquid is absorbed.
  4. Finish: Stir in Parmesan cheese and season with salt and pepper.

4. Beef and Bean Chili

Ingredients:

  • 1 lb ground beef
  • 1 onion, chopped
  • 2 cloves garlic, minced
  • 1 can kidney beans (15 oz), drained and rinsed
  • 1 can black beans (15 oz), drained and rinsed
  • 1 can diced tomatoes (14.5 oz)
  • 1 cup beef broth
  • 1 tbsp chili powder
  • 1 tsp cumin
  • Salt and pepper to taste

Instructions:

  1. Cook Beef: In a large pot, cook ground beef with onion and garlic until beef is browned.
  2. Add Ingredients: Stir in beans, diced tomatoes, beef broth, chili powder, cumin, salt, and pepper.
  3. Simmer: Bring to a boil, then reduce heat and simmer for 20-30 minutes, stirring occasionally.

5. Creamy Mushroom Risotto

Ingredients:

  • 1 tbsp olive oil
  • 1 onion, chopped
  • 2 cloves garlic, minced
  • 1 cup Arborio rice
  • 1 cup white wine (optional)
  • 4 cups vegetable or chicken broth
  • 1 cup mushrooms, sliced
  • 1/2 cup grated Parmesan cheese
  • Salt and pepper to taste

Instructions:

  1. Sauté Vegetables: In a large pot, heat olive oil and sauté onion and garlic until soft. Add mushrooms and cook until tender.
  2. Add Rice: Stir in Arborio rice and cook for 1-2 minutes.
  3. Deglaze: Pour in white wine (if using) and cook until mostly absorbed.
  4. Cook Risotto: Gradually add broth, one cup at a time, stirring constantly until liquid is absorbed and rice is creamy (about 20-25 minutes).
  5. Finish: Stir in Parmesan cheese and season with salt and pepper.

6. Spaghetti Bolognese

Ingredients:

  • 1 lb ground beef
  • 1 onion, chopped
  • 2 cloves garlic, minced
  • 1 can diced tomatoes (14.5 oz)
  • 1 cup beef broth
  • 1 tbsp tomato paste
  • 1 tsp dried basil
  • 1 tsp dried oregano
  • Salt and pepper to taste
  • 8 oz spaghetti

Instructions:

  1. Cook Beef: In a large pot, cook ground beef with onion and garlic until browned.
  2. Add Sauce Ingredients: Stir in diced tomatoes, beef broth, tomato paste, basil, oregano, salt, and pepper.
  3. Simmer: Simmer for 20 minutes to develop flavors.
  4. Cook Spaghetti: Cook spaghetti according to package instructions. Drain and mix with the sauce.

7. One-Pot Mediterranean Quinoa

Ingredients:

  • 1 cup quinoa
  • 2 cups vegetable broth
  • 1 cup cherry tomatoes, halved
  • 1 cup cucumber, diced
  • 1/2 cup Kalamata olives, sliced
  • 1/4 cup feta cheese, crumbled
  • 2 tbsp olive oil
  • 1 tbsp lemon juice
  • Salt and pepper to taste

Instructions:

  1. Cook Quinoa: In a pot, bring vegetable broth to a boil. Add quinoa, reduce heat, and simmer for 15 minutes until quinoa is cooked and broth is absorbed.
  2. Combine Ingredients: Fluff quinoa with a fork. Stir in cherry tomatoes, cucumber, olives, feta cheese, olive oil, lemon juice, salt, and pepper.

8. Chicken and Sausage Gumbo

Ingredients:

  • 1 lb chicken thighs, cut into pieces
  • 1/2 lb andouille sausage, sliced
  • 1 onion, chopped
  • 1 bell pepper, chopped
  • 2 cloves garlic, minced
  • 1 can diced tomatoes (14.5 oz)
  • 4 cups chicken broth
  • 1 tbsp Cajun seasoning
  • 2 tbsp flour
  • 2 tbsp vegetable oil

Instructions:

  1. Cook Sausage: In a large pot, cook sausage slices until browned. Remove and set aside.
  2. Sear Chicken: In the same pot, sear chicken pieces until browned. Remove and set aside.
  3. Make Roux: Add oil and flour to the pot. Cook, stirring constantly, until the mixture is golden brown.
  4. Add Vegetables and Liquids: Stir in onion, bell pepper, garlic, diced tomatoes, chicken broth, and Cajun seasoning. Return chicken and sausage to the pot.
  5. Simmer: Simmer for 30-40 minutes until chicken is cooked through. Serve over rice.

9. One-Pot Teriyaki Chicken and Rice

Ingredients:

  • 1 lb chicken thighs, cut into pieces
  • 1 cup rice
  • 1 cup broccoli florets
  • 1/2 cup carrots, sliced
  • 1/2 cup teriyaki sauce
  • 1 cup chicken broth
  • 1 tbsp vegetable oil

Instructions:

  1. Sear Chicken: In a large pot, heat oil and sear chicken pieces until browned.
  2. Add Rice and Liquids: Stir in rice, teriyaki sauce, and chicken broth. Bring to a boil.
  3. Simmer: Reduce heat, cover, and simmer for 20 minutes. Add broccoli and carrots, and continue cooking for another 10 minutes until rice is tender and vegetables are cooked.

10. Creamy Chicken and Spinach Tortellini

Ingredients:

  • 1 lb chicken breast, diced
  • 1 onion, chopped
  • 2 cloves garlic, minced
  • 1 cup heavy cream
  • 1 cup chicken broth
  • 1 package (9 oz) refrigerated tortellini
  • 2 cups fresh spinach
  • 1/2 cup grated Parmesan cheese
  • Salt and pepper to taste

Instructions:

  1. Cook Chicken: In a large pot, cook diced chicken until browned. Remove and set aside.
  2. Sauté Vegetables: In the same pot, sauté onion and garlic until soft.
  3. Add Liquids: Stir in heavy cream and chicken broth. Bring to a simmer.
  4. Cook Tortellini: Add tortellini and cook according to package instructions.
  5. Finish: Return chicken to the pot. Stir in spinach and Parmesan cheese. Season with salt and pepper before serving.

These one-pot meals offer a variety of flavors and ingredients, making them perfect for any day of the week. Enjoy the convenience and deliciousness of these easy-to-make recipes!

How to Bake Perfectly Golden Biscuits

Baking perfectly golden biscuits can elevate any meal, whether as a side for dinner, a base for breakfast sandwiches, or a delightful snack with tea. Follow these steps to achieve flaky, buttery, and beautifully golden biscuits every time.

Ingredients

– 2 cups all-purpose flour

– 1 tablespoon baking powder

– 1/2 teaspoon baking soda

– 1/2 teaspoon salt

– 1/4 cup cold unsalted butter (cut into small cubes)

– 3/4 cup buttermilk (or milk with a splash of vinegar/lemon juice as a substitute)

– Optional: 1 tablespoon sugar (for slightly sweeter biscuits)

Equipment Needed

– Mixing bowl

– Pastry cutter or fork

– Rolling pin

– Biscuit cutter (or a glass cup)

– Baking sheet

– Parchment paper (optional)

– Oven

Steps to Bake Perfect Biscuits

  1. Preheat Your Oven

Preheat your oven to 425°F (220°C). This high temperature will help your biscuits rise beautifully and develop a golden crust.

  1. Prepare Your Baking Sheet

Line a baking sheet with parchment paper or lightly grease it to prevent the biscuits from sticking.

  1. Combine Dry Ingredients

In a large mixing bowl, whisk together the flour, baking powder, baking soda, salt, and sugar (if using). This step helps ensure even distribution of the leavening agents.

  1. Cut in the Butter

Add the cold, cubed butter to the flour mixture. Use a pastry cutter or fork to cut the butter into the flour until it resembles coarse crumbs. There should still be small bits of butter visible, as they create layers and flakiness in the biscuits.

  1. Add the Buttermilk

Make a well in the center of the mixture and pour in the chilled buttermilk. Using a fork, gently stir the mixture until it just comes together. Be careful not to overmix; a few lumps are okay. Overworking the dough can lead to tough biscuits.

  1. Knead Gently

Turn the dough out onto a lightly floured surface. With floured hands, gently knead the dough 3-4 times, just until it holds together. This helps create layers without overworking the dough.

  1. Roll and Cut the Dough

Using a rolling pin, roll the dough to about 1/2-inch thick. Using a biscuit cutter or a glass, cut out biscuits, pressing straight down without twisting to ensure they rise properly. Place the biscuits on the prepared baking sheet, leaving space between them.

  1. Brush with Buttermilk or Butter

For an extra golden crust, brush the tops of the biscuits with a little buttermilk or melted butter before baking. This step enhances browning and adds richness.

  1. Bake Until Golden

Place the baking sheet in the preheated oven and bake for about 12-15 minutes or until the biscuits are golden brown on top. Keep an eye on them as baking times may vary slightly depending on your oven.

  1. Cool and Serve

Once baked, remove the biscuits from the oven and let them cool slightly on a wire rack. Serve warm with butter, honey, or your favorite jam.

Tips for Perfect Biscuits

– Use Cold Ingredients: Ensure your butter and buttermilk are cold to achieve a flaky texture.

– Don’t Overmix: Mix just until combined to avoid tough biscuits.

– Experiment with Flavors: Add herbs (like rosemary or chives), cheese, or spices for added flavor variations.

– Store Properly: For leftovers, store biscuits in an airtight container. Reheat in the oven for a few minutes to restore freshness.

With these simple steps and tips, you’ll be well on your way to baking perfectly golden biscuits that will have everyone asking for seconds.

Top 10 Healthy Dinner Recipes for Picky Eaters

Cooking for picky eaters can be a challenge, but with the right recipes, you can create healthy, delicious dinners that everyone will enjoy! Here are ten healthy dinner recipes that are appealing, easy to prepare, and likely to win over even the most selective eaters.

  1. Sneaky Veggie Pasta

Ingredients:

– Whole wheat or gluten-free pasta

– Your choice of ground turkey or chicken

– Tomato sauce

– Pureed carrots and spinach (mix into the sauce)

– Grated parmesan cheese

Instructions:

  1. Cook the pasta according to package instructions.
  2. In a pan, brown the ground turkey or chicken.
  3. Add the tomato sauce and pureed veggies; simmer for 10 minutes.
  4. Serve over pasta and top with parmesan cheese.
  5. Chicken Quesadillas

Ingredients:

– Whole wheat tortillas

– Shredded cooked chicken (leftover or rotisserie)

– Shredded cheese (Cheddar or Monterey Jack)

– Chopped bell peppers and spinach (optional)

– Salsa or guacamole for dipping

Instructions:

  1. Heat a non-stick skillet over medium heat.
  2. On one half of the tortilla, layer the chicken, cheese, and veggies.
  3. Fold the tortilla in half and cook until the cheese melts, about 3-4 minutes per side.
  4. Slice and serve with salsa or guacamole.
  5. Baked Chicken Tenders

Ingredients:

– Chicken breast, cut into strips

– Whole wheat breadcrumbs

– Parmesan cheese

– Paprika, garlic powder, salt, and pepper

– Greek yogurt or honey mustard for dipping

Instructions:

  1. Preheat the oven to 400°F (200°C).
  2. Mix breadcrumbs, parmesan, and spices in a bowl.
  3. Dip chicken strips into the mixture and place on a baking sheet.
  4. Bake for 20 minutes until golden and cooked through. Serve with dipping sauce.
  5. Healthy Tacos

Ingredients:

– Ground turkey or lean beef

– Taco seasoning (low sodium)

– Corn tortillas

– Toppings: shredded lettuce, chopped tomatoes, avocado, and shredded cheese

Instructions:

  1. In a skillet, cook ground turkey or beef until browned.
  2. Drain excess fat and add taco seasoning with a little water; simmer for 5 minutes.
  3. Serve in corn tortillas with preferred toppings.
  4. Pizza-Stuffed Bell Peppers

Ingredients:

– Bell peppers, halved and seeds removed

– Cooked ground turkey or chicken

– Tomato sauce or marinara

– Shredded mozzarella cheese

– Italian herbs

Instructions:

  1. Preheat the oven to 375°F (190°C).
  2. In a bowl, mix cooked meat with tomato sauce and herbs.
  3. Stuff the bell pepper halves with the mixture and top with cheese.
  4. Bake for 25-30 minutes or until the peppers are tender.
  5. Creamy Avocado and Spinach Pasta

Ingredients:

– Whole wheat pasta

– Ripe avocados

– Fresh spinach

– Garlic

– Lemon juice

– Salt and pepper

Instructions:

  1. Cook pasta according to package instructions.
  2. In a blender, puree avocados, spinach, garlic, lemon juice, salt, and pepper until smooth.
  3. Toss the pasta with the avocado sauce and enjoy!
  4. Mini Vegetable Frittatas

Ingredients:

– Eggs

– Milk

– Chopped spinach, bell peppers, and cherry tomatoes

– Shredded cheese

– Salt and pepper

Instructions:

  1. Preheat the oven to 350°F (175°C).
  2. In a mixing bowl, whisk eggs and milk; season with salt and pepper.
  3. Add vegetables and cheese.
  4. Pour mixture into a greased muffin tin and bake for 20-25 minutes until set.
  5. Homemade Meatballs

Ingredients:

– Ground turkey or lean beef

– Whole grain breadcrumbs

– Ground oats (for added nutrition)

– Eggs

– Italian seasoning, salt, and pepper

– Marinara sauce

Instructions:

  1. Preheat the oven to 400°F (200°C).
  2. In a bowl, mix all ingredients until combined.
  3. Form into small meatballs and place on a baking sheet.
  4. Bake for 20-25 minutes, then serve with marinara sauce over whole wheat spaghetti.
  5. Quinoa and Black Bean Bowls

Ingredients:

– Quinoa

– Canned black beans, rinsed

– Corn

– Diced tomatoes

– Avocado and cilantro for topping

– Lime juice

Instructions:

  1. Cook quinoa according to package instructions.
  2. In a bowl, combine cooked quinoa, black beans, corn, and diced tomatoes.
  3. Top with diced avocado, cilantro, and a squeeze of lime juice before serving.
  4. Sweet Potato and Chickpea Curry

Ingredients:

– Diced sweet potatoes

– Canned chickpeas, drained

– Coconut milk

– Curry powder

– Spinach

– Salt and pepper

Instructions:

  1. In a pot, sauté sweet potatoes in a little olive oil until slightly softened.
  2. Add chickpeas, coconut milk, curry powder, and seasonings; simmer for 20-25 minutes until sweet potatoes are tender.
  3. Stir in spinach until wilted and serve!

Conclusion

These ten healthy dinner recipes are not only nutritious but also cater to picky eaters, ensuring that everyone leaves the table satisfied. When cooking for selective eaters, consider involving them in the meal preparation process—this can encourage them to try new foods and flavors.

How to Make the Perfect Homemade Chicken Soup

Homemade chicken soup is a classic comfort food that warms the heart and nourishes the soul. It’s the perfect dish for chilly days, a remedy for colds, or simply a wholesome meal any time of year. Making chicken soup from scratch allows you to customize the flavors and ingredients to your liking. Here’s a step-by-step guide to help you create the perfect homemade chicken soup.

Ingredients

For the Soup Base:

– 1 whole chicken (about 3 to 4 lbs) or 4-5 chicken thighs or breasts, skinless

– 8 cups of water or low-sodium chicken broth

– 2 tablespoons olive oil or butter

– 1 large onion, diced

– 2-3 cloves garlic, minced

– 3-4 carrots, sliced

– 2-3 stalks celery, sliced

– 1-2 bay leaves

– 1 teaspoon dried thyme (or a few sprigs of fresh thyme)

– Salt and pepper to taste

– Optional: 1-2 teaspoons of freshly squeezed lemon juice for brightness

For the Soup Additions:

– 1 cup of egg noodles, rice, or any preferred pasta

– Fresh parsley, chopped (for garnish)

Instructions

  1. Prepare the Chicken

– If using a whole chicken, rinse it under cold water and remove any giblets from inside the cavity. Pat it dry with paper towels. If using chicken pieces, they can be cooked directly without much preparation.

  1. Cook the Chicken

– In a large stockpot, add the chicken (whole or pieces) and cover it with 8 cups of water or broth. Bring it to a boil over medium-high heat. Once boiling, reduce to a simmer. Skim off any foam that rises to the top.

  1. Sauté the Vegetables

– In a separate skillet, heat the olive oil or butter over medium heat. Add the diced onion, carrots, and celery. Sauté for about 5-7 minutes, until the onions are translucent and the vegetables have softened. Add the minced garlic and cook for an additional minute until fragrant.

  1. Combine and Season

– Once the chicken has simmered for about 30 minutes, add the sautéed vegetables, bay leaves, thyme, salt, and pepper to the pot. Allow the mixture to continue simmering for another 30-40 minutes. If using chicken pieces, you can pull them out when cooked through (internal temperature reaching about 165°F or 75°C) and set them aside to cool.

  1. Finish Cooking the Soup

– If using a whole chicken, allow it to cook for about 1 to 1.5 hours until fully cooked and tender. Once cooked, remove the chicken from the pot and let it cool enough to handle.

  1. Shred the Chicken

– Once the chicken is cool, shred the meat into bite-sized pieces, discarding the skin and bones. Return the shredded chicken to the soup pot.

  1. Add Pasta or Rice (optional)

– If you want to add noodles or rice, stir them into the soup, and let it simmer until cooked through (about 8-10 minutes for noodles or 15-20 minutes for rice). Adjust the amount of broth to account for the pasta or rice absorbing liquid.

  1. Taste and Adjust

– Taste the soup, and add more salt, pepper, or lemon juice as needed to achieve your desired flavor. Remove the bay leaves and any thyme stems.

  1. Serve

– Ladle the soup into bowls, and garnish with freshly chopped parsley. Serve hot with crusty bread or crackers on the side.

Tips for the Perfect Chicken Soup

– For Richer Flavor: Roasting the chicken before adding it to the pot can enhance the flavor.

– Vegetable Variations: Feel free to add other vegetables like potatoes, peas, or corn based on your preference.

– Make It Ahead: Chicken soup tastes even better the next day, as the flavors meld together. Store in an airtight container in the refrigerator for up to 4 days.

– Freeze for Later: Store leftover soup in freezer-safe containers for up to 3 months. Thaw in the refrigerator before reheating.

Conclusion

Homemade chicken soup is a labor of love that yields a comforting and nourishing meal great for any occasion. With simple ingredients and a straightforward process, you can create a delicious soup that warms the heart and fills the belly. Enjoy your homemade chicken soup, and don’t forget to share it with friends and family!

The Best Comfort Food Recipes for Fall

As the leaves begin to change and the air turns crisp, fall invites us to indulge in comforting and hearty meals that warm both the body and the soul. From creamy soups to rich casseroles and delightful desserts, there’s a wealth of comfort food to enjoy this season. Here are some of the best comfort food recipes perfect for fall:

  1. Creamy Pumpkin Soup

Ingredients:

– 1 tablespoon olive oil

– 1 medium onion, chopped

– 2 cloves garlic, minced

– 4 cups canned pumpkin (or fresh roasted pumpkin)

– 4 cups vegetable or chicken broth

– 1 cup heavy cream (or coconut milk for a dairy-free option)

– 1 teaspoon ground cinnamon

– ½ teaspoon nutmeg

– Salt and pepper to taste

– Optional toppings: toasted pumpkin seeds, croutons, or a swirl of cream

Instructions:

  1. In a large pot, heat olive oil over medium heat. Add onions and garlic, sautéing until translucent.
  2. Stir in the pumpkin, broth, cinnamon, nutmeg, salt, and pepper. Bring to a boil, then reduce heat and simmer for 20 minutes.
  3. Use an immersion blender (or transfer to a blender) to blend the soup until smooth. Stir in heavy cream.
  4. Serve hot, garnished with your choice of toppings.
  5. Classic Beef Stew

Ingredients:

– 2 lbs beef chuck, cut into 1-inch pieces

– 3 tablespoons olive oil

– 4 cups beef broth

– 3 carrots, sliced

– 3 potatoes, diced

– 2 onions, chopped

– 3 cloves garlic, minced

– 2 tablespoons tomato paste

– 1 teaspoon dried thyme

– 2 bay leaves

– Salt and pepper to taste

– Fresh parsley for garnish

Instructions:

  1. In a large pot, heat olive oil over medium-high heat. Brown the beef chunks on all sides, then remove and set aside.
  2. In the same pot, add onions and garlic, cooking until softened. Stir in tomato paste and thyme.
  3. Return the beef to the pot, along with broth, carrots, potatoes, salt, and pepper. Add bay leaves.
  4. Bring to a boil, then reduce heat and let simmer for 1.5 to 2 hours, until the beef is tender.
  5. Discard bay leaves, garnish with parsley, and serve hot with crusty bread.
  6. Butternut Squash Risotto

Ingredients:

– 1 cup Arborio rice

– 1 small butternut squash, peeled and diced

– 1 onion, diced

– 2 cloves garlic, minced

– 4 cups vegetable broth

– 1 cup white wine (optional)

– 1 cup grated Parmesan cheese (or nutritional yeast for vegan)

– 2 tablespoons olive oil

– Salt and pepper to taste

– Fresh sage leaves for garnish

Instructions:

  1. In a pan, heat olive oil over medium heat. Add onions and garlic, sautéing until soft.
  2. Stir in the diced butternut squash and cook for about 5 minutes.
  3. Add Arborio rice, stirring to toast for 2 minutes. Then pour in the wine, if using, and cook until absorbed.
  4. Gradually add the vegetable broth, one ladle at a time, stirring frequently until the liquid is absorbed and the rice is creamy, about 20-25 minutes.
  5. Stir in Parmesan cheese, season with salt and pepper, and garnish with fresh sage.
  6. Apple Crisp

Ingredients:

– 6 cups sliced apples (Granny Smith or Honeycrisp work well)

– 1 tablespoon lemon juice

– ½ cup brown sugar

– 1 teaspoon cinnamon

– 1 cup rolled oats

– ½ cup all-purpose flour

– ½ cup softened butter

– ½ cup granulated sugar

– ¼ teaspoon salt

Instructions:

  1. Preheat the oven to 350°F (175°C). Grease a baking dish.
  2. In a large bowl, toss the sliced apples with lemon juice, brown sugar, and cinnamon. Spread the apple mixture evenly in the baking dish.
  3. In another bowl, mix oats, flour, softened butter, granulated sugar, and salt until crumbly. Sprinkle the mixture over the apples.
  4. Bake for 40-45 minutes, or until the apples are tender and the topping is golden brown.
  5. Serve warm, ideally with vanilla ice cream or whipped cream.
  6. Chicken Pot Pie

Ingredients:

– 1 lb cooked chicken, shredded

– 2 cups mixed vegetables (carrots, peas, corn)

– 1 cup chicken broth

– 1 cup milk

– 1/3 cup butter

– 1/3 cup all-purpose flour

– 1 teaspoon thyme

– Salt and pepper to taste

– 1 package pie crusts (or make your own)

Instructions:

  1. Preheat the oven to 425°F (220°C).
  2. In a saucepan, melt butter over medium heat. Stir in flour until smooth, then gradually add chicken broth and milk, stirring until thickened.
  3. Add shredded chicken, mixed vegetables, thyme, salt, and pepper to the sauce. Remove from heat.
  4. Place one pie crust in a pie dish, pour in the chicken mixture, and cover with the second crust. Cut slits in the top crust for steam to escape.
  5. Bake for 30-35 minutes or until the crust is golden brown.

Conclusion

These comforting fall recipes are perfect for those chilly nights when you crave something hearty and delicious. Whether you’re sharing them with family and friends or enjoying them solo, each dish promises to bring warmth and satisfaction to your dining experience.

How to Cook the Perfect Thanksgiving Cranberry Sauce

Thanksgiving wouldn’t be complete without some delicious cranberry sauce to accompany your turkey and stuffing. This tangy, sweet condiment not only enhances the flavors of the feast but also adds a vibrant pop of color to your table. Whether you prefer your cranberry sauce smooth or chunky, homemade is always a crowd-pleaser. Here’s a simple and foolproof recipe to help you create the perfect Thanksgiving cranberry sauce.

Ingredients

– 12 ounces fresh or frozen cranberries (about 3 cups)

– 1 cup granulated sugar

– 1 cup water or orange juice (for added flavor)

– 1/2 teaspoon cinnamon (optional)

– Zest of 1 orange (optional, for extra brightness)

– Pinch of salt (to enhance flavor)

Instructions

  1. Rinse the Cranberries:

– If you’re using fresh cranberries, rinse them under cold water to remove any dirt and debris. Discard any cranberries that are mushy or discolored.

  1. Combine Ingredients in a Saucepan:

– In a medium saucepan, combine the cranberries, sugar, and water (or orange juice). If you’re using cinnamon and orange zest, add those as well. Stir the mixture to ensure the sugar starts to dissolve.

  1. Cook the Sauce:

– Bring the mixture to a boil over medium-high heat. Once boiling, reduce the heat to low and let it simmer for about 10-15 minutes. During this time, the cranberries will burst, and the sauce will thicken. Stir occasionally to prevent sticking and to ensure even cooking.

  1. Check the Consistency:

– After about 10-15 minutes, check the consistency of your cranberry sauce. If you prefer it thicker, you can let it simmer for an additional 5 minutes. Remember that it will thicken further as it cools.

  1. Taste and Adjust:

– Taste the sauce and adjust the sweetness or acidity according to your preference. If it’s too tart, add a little more sugar; if it’s too sweet, add a squeeze of lemon or orange juice to balance it out.

  1. Cool and Store:

– Once your sauce reaches the desired consistency, remove it from the heat and let it cool for about 30 minutes at room temperature. Transfer the cranberry sauce to a serving bowl or airtight container. If making ahead of time, you can store it in the refrigerator for up to a week.

  1. Serve:

– Cranberry sauce can be served chilled, at room temperature, or gently warmed. Feel free to garnish with additional orange zest or serve alongside your turkey, stuffing, and other sides.

Tips for the Perfect Cranberry Sauce

– Experiment with Flavors: Feel free to add other spices like nutmeg or cloves for a warmer flavor profile. You can also include chopped apples, pears, or nuts for added texture.

– Use Fresh Ingredients: While frozen cranberries work well, using fresh cranberries will provide the best flavor and texture.

– Presentation Matters: For a more elegant presentation, you can prepare the sauce in advance and serve it in a beautiful glass serving dish or a mason jar.

Conclusion

Making the perfect Thanksgiving cranberry sauce is a simple yet rewarding process. With just a few ingredients and a little time, you can create a homemade sauce that will elevate your Thanksgiving dinner. Remember to taste as you go, and don’t be afraid to adjust the flavors to suit your personal preference. Happy Thanksgiving and enjoy your delicious feast!

10 Delicious Recipes for a Summer Picnic

Summer picnics are a delightful way to enjoy the sunshine, fresh air, and good company. Whether you’re heading to the park, beach, or your own backyard, delicious food is a must. Here are ten delicious recipes that are perfect for a summer picnic, easy to transport, and sure to impress!

  1. Caprese Skewers

Ingredients:

– Grape tomatoes

– Fresh mozzarella balls (bocconcini)

– Fresh basil leaves

– Balsamic glaze

– Salt and pepper

Instructions:

  1. On skewers, thread a tomato, a basil leaf, and a mozzarella ball. Repeat until the skewer is filled.
  2. Drizzle with balsamic glaze and season with salt and pepper just before serving.
  3. Pasta Salad with Pesto

Ingredients:

– 8 oz. pasta (fusilli or penne)

– 1 cup cherry tomatoes, halved

– 1 cup bell peppers, diced

– 1 cup cucumber, diced

– 1/2 cup pesto

– 1/4 cup grated Parmesan cheese

Instructions:

  1. Cook the pasta according to the package instructions. Drain and cool.
  2. In a large bowl, combine cooled pasta, vegetables, pesto, and Parmesan. Toss to combine and serve.
  3. Fruit Salad with Honey Lime Dressing

Ingredients:

– 2 cups strawberries, sliced

– 2 cups blueberries

– 2 cups pineapple, diced

– 2 cups watermelon, cubed

– 1 tablespoon honey

– Juice of 1 lime

Instructions:

  1. In a small bowl, whisk together honey and lime juice.
  2. In a large bowl, combine all the fruit and drizzle the honey lime dressing over it. Toss gently to combine.
  3. Mini Quiches

Ingredients:

– 6 large eggs

– 1 cup milk

– 1 cup mixed vegetables (spinach, bell peppers, onions)

– 1 cup shredded cheese (cheddar or Swiss)

– Salt and pepper

Instructions:

  1. Preheat the oven to 375°F (190°C) and grease a muffin tin.
  2. In a bowl, whisk together eggs, milk, salt, and pepper. Stir in the vegetables and cheese.
  3. Pour the mixture into muffin tins and bake for about 20 minutes or until set. Let cool and serve.
  4. Grilled Vegetable Wraps

Ingredients:

– 1 zucchini, sliced

– 1 bell pepper, sliced

– 1 eggplant, sliced

– 1 cup spinach

– Hummus or cream cheese

– Tortillas

Instructions:

  1. Grill the vegetables until tender and slightly charred.
  2. Spread hummus or cream cheese onto tortillas, layer with grilled vegetables and spinach, then roll tightly.
  3. Cut in half for easy serving.
  4. Deviled Eggs

Ingredients:

– 6 large eggs

– 3 tablespoons mayonnaise

– 1 teaspoon Dijon mustard

– Salt and pepper

– Paprika for garnish

Instructions:

  1. Hard-boil the eggs, then cool and peel.
  2. Slice each egg in half and remove the yolks. In a bowl, mash the yolks with mayonnaise, mustard, salt, and pepper.
  3. Fill the egg whites with the yolk mixture and sprinkle with paprika.
  4. Chicken Salad Lettuce Wraps

Ingredients:

– 2 cups cooked chicken, shredded

– 1/2 cup mayonnaise

– 1/4 cup celery, diced

– 1/4 cup grapes, halved

– Lettuce leaves (for wraps)

– Salt and pepper

Instructions:

  1. In a bowl, mix together chicken, mayonnaise, celery, grapes, salt, and pepper.
  2. Spoon the chicken salad into lettuce leaves and wrap them for easy eating.
  3. Banana Bread Muffins

Ingredients:

– 2 ripe bananas, mashed

– 1/3 cup melted butter

– 1 teaspoon baking soda

– Pinch of salt

– 3/4 cup sugar

– 1 large egg, beaten

– 1 teaspoon vanilla extract

– 1 cup all-purpose flour

Instructions:

  1. Preheat the oven to 350°F (175°C) and grease a muffin tin.
  2. Mix mashed bananas with melted butter in a mixing bowl. Add baking soda and salt.
  3. Stir in sugar, egg, and vanilla. Finally, mix in flour until just combined.
  4. Pour batter into the muffin tin and bake for 18-20 minutes.
  5. Cheese and Charcuterie Board

Ingredients:

– Assortment of cheeses (cheddar, brie, gouda)

– Various cured meats (salami, prosciutto)

– Crackers and bread

– Assorted nuts and dried fruits

– Fresh grapes or figs

Instructions:

  1. Arrange the cheeses, meats, crackers, nuts, and fruits on a large platter or board.
  2. Serve with small plates and utensils for easy sharing.
  3. Iced Lemonade

Ingredients:

– 1 cup fresh lemon juice

– 1 cup sugar (or to taste)

– 4 cups water

– Lemon slices and mint for garnish

Instructions:

  1. In a pitcher, mix lemon juice, sugar, and water until the sugar dissolves.
  2. Chill in the refrigerator.
  3. Serve over ice with lemon slices and fresh mint.

Conclusion

These ten recipes are not only delicious but also easy to prepare and transport, making them perfect for your summer picnic. Whether you’re enjoying a casual day at the park or throwing a backyard barbecue, these dishes will surely impress your family and friends.

How to Make the Best Homemade Croissants

Croissants are the quintessential flaky pastry, known for their buttery layers and delightful texture. While they may seem daunting to make, with some patience and the right technique, you can achieve bakery-quality croissants right in your kitchen. Here’s a detailed guide on how to make the best homemade croissants.

Ingredients

For the Dough:

– 4 cups all-purpose flour (plus more for dusting)

– 1/4 cup granulated sugar

– 1 tablespoon salt

– 2 teaspoons instant yeast

– 1 1/4 cups cold milk (about 50°F or 10°C)

– 1/2 cup unsalted butter, melted

For the Butter Layer:

– 1 cup (2 sticks) unsalted butter, cold

For Egg Wash:

– 1 egg

– 1 tablespoon milk or water

Equipment Needed

– Rolling pin

– Plastic wrap

– Baking sheet

– Parchment paper

– Kitchen scale (optional)

– Pastry brush

Instructions

  1. Prepare the Dough

– Mix Dry Ingredients: In a large mixing bowl, whisk together the flour, sugar, salt, and instant yeast.

– Combine Wet Ingredients: Add the cold milk and melted butter to the dry ingredients. Mix until the dough comes together.

– Knead the Dough: Transfer the dough to a floured surface and knead gently for about 5 minutes until smooth. It should be slightly sticky but manageable.

– Rest the Dough: Shape the dough into a ball, place it in a lightly greased bowl, and cover it with plastic wrap. Let it rest in the refrigerator for at least 1 hour. This allows the gluten to relax and makes rolling easier.

  1. Prepare the Butter Layer

– Shape the Butter: While the dough is resting, prepare the butter layer. Take the cold butter and place it between two sheets of parchment paper. Use a rolling pin to pound it into a rectangle that’s about 6 inches by 8 inches (15 cm x 20 cm) and about 1/2 inch thick. Chill the butter rectangle in the fridge to keep it firm.

  1. Laminate the Dough

– Roll the Dough: After the dough has rested, turn it out onto a floured surface. Roll the dough into a rectangle that’s about 10 inches by 15 inches (25 cm x 38 cm).

– Add the Butter: Place the chilled butter rectangle in the center of the rolled-out dough. Fold the dough over the butter so that it covers it completely (like folding a letter) to create a “packet.”

– Seal the Edges: Pinch the edges of the dough to seal in the butter. This prevents the butter from escaping during rolling.

  1. Perform the Turns

– First Roll and Fold: Using your rolling pin, gently roll out the dough to about 10 inches by 20 inches (25 cm x 50 cm).

– Fold: Fold the dough into thirds again (like a letter). This is your first turn. Wrap the dough in plastic wrap and refrigerate for 30-60 minutes.

– Repeat: Repeat the rolling and folding process two more times (for a total of three turns). Remember to keep the dough and butter cold during this process.

  1. Shape the Croissants

– Final Roll: After completing the turns, roll the dough into a large rectangle, about 1/4 inch thick.

– Cut the Dough: Cut the rolled dough into triangles (about 4-5 inches wide at the base). You can use a pizza cutter or a sharp knife.

– Shape the Croissants: Starting from the base of each triangle, gently roll the dough up toward the tip, creating a crescent shape. Make sure not to roll too tightly at the tip. Place the shaped croissants on a baking sheet lined with parchment paper, with the tip facing down.

  1. Proof the Croissants

– Let Them Rise: Cover the shaped croissants loosely with plastic wrap or a clean kitchen towel. Allow them to proof at room temperature until they have doubled in size—about 1 to 2 hours.

  1. Bake the Croissants

– Preheat the Oven: Preheat your oven to 400°F (200°C).

– Prepare the Egg Wash: In a small bowl, whisk together the egg and milk or water.

– Brush the Croissants: Gently brush the tops of the croissants with the egg wash to give them a beautiful golden color while baking.

– Bake: Bake the croissants in the preheated oven for 15-20 minutes or until they are golden brown and flaky. Rotate the baking sheet halfway through for even baking.

  1. Cool and Enjoy

– Cool on Wire Rack: Once baked, remove the croissants from the oven and let them cool on a wire rack for a few minutes.

– Serve: Enjoy them warm, plain, or with your favorite filling like chocolate or almond paste. Freshly baked croissants are the perfect accompaniment to coffee or tea!

Tips for Success:

– Temperature Control: Keep your ingredients, especially the butter, as cold as possible to help maintain the layers.

– Be Patient: Croissant-making is a labor of love, so give yourself plenty of time for each step.

– Practice Makes Perfect: The more you make croissants, the more intuitive the process will become!

Conclusion

Making croissants at home is a rewarding process that yields delicious results. With a little patience and attention to detail, you can create flaky, buttery croissants that rival those from your favorite bakery. Enjoy sharing your homemade creations with friends and family, or savor them yourself!

The Ultimate Guide to Cooking with Fresh Herbs

Fresh herbs are the unsung heroes of the culinary world; they can elevate a dish from ordinary to extraordinary. Their vibrant flavors and aromas can add depth and complexity to your meals, making them an essential component in any kitchen. This guide will help you navigate the wonderful world of cooking with fresh herbs, from selection and storage to preparation and usage.

  1. Selecting Fresh Herbs

When choosing fresh herbs, consider the following tips:

– Look for Quality: Fresh herbs should be vibrant in color and have a strong aroma. Avoid any herbs that look wilted, brown, or discolored.

– Know Your Variety: Different herbs have unique flavor profiles. Here are some popular options:

– Basil: Sweet and slightly peppery; commonly used in Italian and Mediterranean dishes.

– Cilantro: Bright and citrusy; a staple in Mexican and Asian cuisines.

– Parsley: Fresh and mildly peppery; great for garnish or adding freshness to dishes.

– Rosemary: Pine-like and woody; perfect for roasted meats and potatoes.

– Thyme: Earthy and slightly floral; versatile for stews, soups, and marinades.

– Mint: Cool and refreshing; often used in desserts, teas, and cocktails.

  1. Storing Fresh Herbs

Proper storage is key to maintaining the flavor and vibrancy of fresh herbs:

– In Water: Place hardy herbs like rosemary and thyme upright in a glass of water, cover them loosely with a plastic bag, and refrigerate.

– Damp Paper Towel: For delicate herbs like basil and cilantro, wrap them in a damp paper towel, place them in a plastic bag, and keep them in the refrigerator. This helps retain moisture without causing rot.

– Freezing: If you have an abundance of herbs, consider freezing them:

– Chop and Freeze: Chop the herbs, mix them with a little olive oil or water, and freeze in ice cube trays.

– Whole and Frozen: Place whole sprigs in freezer bags, removing excess air before sealing.

  1. Preparing Fresh Herbs

Preparation methods can alter the flavor and intensity of fresh herbs:

– Chopping: Use a sharp knife to chop herbs finely. The more you chop, the more oil is released, intensifying the flavor. However, be careful not to over-chop delicate herbs that can bruise easily.

– Muddling: For herbs like mint, use a muddler to gently crush the leaves, releasing their essential oils. This method is excellent for cocktails and dressings.

– Tearing: For soft herbs like basil, gently tear the leaves to maintain their integrity and release flavor without bruising.

  1. Cooking with Fresh Herbs

Incorporating fresh herbs into your cooking can be done in various ways:

– At the Right Time:

– Hardy Herbs (e.g., rosemary, thyme): Add them early in cooking to allow their flavors to infuse.

– Soft Herbs (e.g., basil, cilantro): Add them at the end of cooking to preserve their fresh flavors and vibrant colors.

– Infusions: Create herb-infused oils or vinegars by steeping fresh herbs in olive oil or vinegar for a few days. These infusions can be drizzled over salads, grilled vegetables, or used in marinades.

– Herb Pasta and Sauces: Blend fresh herbs into sauces, pestos, or marinades. For example, basil pesto or chimichurri sauce can bring life to grilled meats and vegetables.

– Garnishing: Fresh herbs make excellent garnishes. Adding a sprinkle of chopped herbs just before serving can enhance the visual appeal and flavor.

– Herb Bouquets: Tie stems of various herbs together and use them as a bouquet garni to infuse flavor into soups, stews, and sauces. Remember to remove the bouquet before serving.

  1. Pairing Fresh Herbs

Understanding which herbs pair well with specific ingredients can enhance your dishes:

– Basil: Pairs well with tomatoes, garlic, and mozzarella.

– Cilantro: Complements lime, avocados, and spicy foods.

– Thyme: Works beautifully with chicken, mushrooms, and roasted vegetables.

– Rosemary: Great with lamb, potatoes, and lemon.

– Dill: Pairs well with fish, yogurt, and potatoes.

  1. Cooking Techniques with Fresh Herbs

Explore different cooking techniques to maximize the impact of fresh herbs:

– Grilling: Brush meats and vegetables with herb-infused oil before grilling for an extra flavor kick.

– Sautéing: Add chopped herbs at the end of sautéing vegetables to maintain freshness.

– Baking: Incorporate herbs into bread or pizza dough for an aromatic and flavorful twist.

Conclusion

Cooking with fresh herbs can transform everyday meals into culinary delights. By selecting high-quality herbs, storing them properly, and using them creatively in your cooking, you’ll enhance flavor profiles and elevate your dishes. Whether you’re making a simple salad or an elaborate feast, fresh herbs deserve a prominent role in your culinary repertoire. Embrace their versatility and enjoy the delightful flavors they bring to your kitchen!

Welcome to The Red Kitchen: Your Home for Healthy Cooking

Hello and welcome to The Red Kitchen! We cook simple meals with a big impact. Also, we share tips to make cooking fun and easy. Our kitchen is all about good taste, healthy choices, and happy moments. For those in French-speaking regions looking for different kinds of online entertainment, there are resources available that review the meilleurs casinos en ligne.

Our Journey for Baking

Baking brings warmth into any home. We love the smell of fresh bread or sweet cakes. In this section, we share easy baking ideas—from breads to cookies, cakes to muffins.

Why Baking Brings Joy

Baking is more than making food—it's creating happiness. You stir, pour, and wait as your kitchen fills with warm, sweet smells. Then comes the best part—taking a bite of something you made with your own hands. That first taste can brighten your whole day.

Baking also brings people together. It's a fun way to spend time with family or friends. Kids love helping with mixing or adding sprinkles. And when you give someone a homemade cookie or loaf of bread, it shows you care. Sharing baked goods is a small act of kindness that means a lot.

Furthermore, baking helps you learn and grow. Each time you bake, you discover how ingredients work together. You figure out what happens when you beat eggs, melt butter, or add sugar. Soon, your confidence grows—and so does your recipe list.

Easy Bread Ideas

1. No-Knead Bread

We recommend this method. This bread is perfect for beginners. Just mix flour, yeast, salt, and water in a bowl. Cover it and let it sit overnight. The next day, bake it in a hot oven. It forms a crisp crust with a soft, airy middle. Best of all, there's no kneading at all.

2. Quick Garlic Bread

Take a loaf of French bread and cut it into slices. Spread garlic butter on each piece. Toast it in the oven until it turns golden and smells amazing. It's the perfect side for pasta, soup, or even salad.

3. Cheesy Flatbread

Mix flour, baking powder, salt, yogurt, and shredded cheese. Roll it flat and cook it in a hot pan. It's quick and satisfying. You can eat it with dips or enjoy it on its own. This is a different kind of simple pleasure than playing a Game online roulette, which offers another form of entertainment.

Cake and Muffin Favorites

1. Simple Vanilla Cake

This classic cake is always a hit. Mix flour, sugar, eggs, butter, baking powder, and vanilla. Once it cools, add your favorite icing. It's great for birthdays or everyday treats.

2. Berry Muffins

These are full of fruity flavor. Scoop into cups and bake for about 20 minutes. The satisfaction of a perfect bake is different from the thrill some seek when looking for big win new zealand casinos.

3. Chocolate Brownies

For rich and fudgy brownies, melt butter with chocolate. Let cool before cutting for gooey, chocolatey squares.

4. Banana Muffins

Have overripe bananas? Bake for soft, sweet muffins that taste like comfort in a cup.

Cookies and Treats

1. Oatmeal Raisin Cookies

These cookies are chewy and comforting. Add chopped nuts if you like a crunch.

2. Peanut Butter Cookies

With just peanut butter, sugar, and eggs, you can whip up a batch fast. Press each cookie with a fork before baking for that classic look.

3. Decorated Sugar Cookies

These are fun for all ages. Roll out sugar cookie dough and cut into shapes. After baking, decorate with colorful icing. Great for holidays, parties, or any creative moment.

4. Chocolate Chip Cookies

The all-time favorite. Combine butter, sugar, eggs, flour, and chocolate chips. Serve warm for the best experience.

Baking Tips for Beginners

  • Preheat the Oven: Always heat your oven before placing anything inside. It ensures even baking from the start.
  • Measure Accurately: Too much or too little of anything can change your bake.
  • Read the Recipe First: Before you begin, read through the steps. That way, you won't be surprised halfway through.
  • Use Room-Temperature Ingredients: Butter, eggs, and milk work better when not too cold.
  • Don't Open the Oven Too Soon: Wait until close to the end to peek. Opening too early can cause cakes to sink.
  • Line Your Pans: Use parchment paper or grease your pans to stop sticking. Cleanup is easier, too.
  • Let Things Cool: Give your baked goods time to rest before cutting or icing. They finish setting as they cool.

Bake with Confidence

Once you start baking, you'll want to try more and more. From simple cookies to fancy cakes, each bake builds your skills. Don't worry about mistakes—they're part of the fun. Keep trying, keep tasting, and soon, you'll have favorite recipes that feel like home. You might even invent your signature treat!

Recipes

We know life can be busy. We also know you need good food fast. That's why we share simple recipes to make your day better. Our recipes include quick breakfasts, healthy lunches, nourishing dinners, and tasty snacks.

Fast and Easy Breakfasts

Mornings can be busy. That's why quick and healthy breakfasts are a great way to start your day. You don't need much time to make something tasty and full of energy. Here are some simple breakfast ideas anyone can try at home.

Avocado Toast

Avocado toast is easy and filling. Add a little salt, pepper, and a squeeze of lemon juice for extra flavor to your mashed avocado. Then toast a slice of whole-grain bread. Spread the avocado on top. For more protein, add a poached or fried egg. You can also sprinkle chili flakes or sesame seeds for a fun twist.

Other Toppings to Try:

  • Sliced tomatoes with fresh basil
  • Crumbled feta cheese and olives
  • Smoked salmon with a squeeze of lemon

Yogurt Parfait

This breakfast looks fancy, but it takes just a few minutes. Layer granola for crunch and fresh fruit for sweetness. Berries, banana slices, or chopped mango work well. You can even drizzle some honey or maple syrup on top. It's a sweet and healthy breakfast that's full of calcium, fiber, and vitamins.

Tips for More Flavor:

  • Add chia seeds or flaxseeds for extra nutrients
  • Use Greek yogurt for a protein boost
  • Try frozen fruit if fresh is not available

Egg and Veggie Scramble

This is a perfect meal when you want something warm. Add chopped vegetables like onions, spinach, bell peppers, or mushrooms to your cracked egg. Cook until the veggies are soft.

Easy Add-ons:

  • Sprinkle shredded cheese just before serving
  • Serve with toast or wrap in a tortilla for a breakfast burrito

More Quick Breakfast Ideas

Banana Oatmeal Bowl

Microwave oats with milk or water. Top with banana slices, cinnamon, and a spoonful of peanut butter. This bowl is warm, creamy, and energizing. It's perfect for cold mornings.

Peanut Butter Toast with Banana

The sweet and salty combo of peanut butter toast with banana gives you protein and energy to keep you going all morning.

Breakfast Quesadilla

Fill a tortilla with scrambled eggs and shredded cheese. You can add cooked beans or avocado slices for more flavor.

Cottage Cheese Bowl

Spoon cottage cheese into a bowl and top with berries, honey, or nuts. It's rich in protein and low in sugar—a great choice for a balanced breakfast.

Tips for Fast Mornings

  • Prepare Ahead: Chop fruit, make smoothie packs, or hard-boil eggs the night before.
  • Keep Basics Ready: Stock up on yogurt, eggs, bread, oats, and fruit.
  • Use One-Pan Recipes: Less mess means quicker cleanup.
  • Stick to a Routine: Choose 2-3 favorite breakfasts and rotate them each week.

Eating breakfast doesn't have to be hard. With just a few minutes and simple ingredients, you can enjoy a meal that fuels your body and mind. Whether you like something sweet, savory, hot, or cold, there's a quick option for you. Try these ideas, mix things up, and discover your morning favorite!

Easy Lunch Ideas

  • Chicken Salad Wrap: Combine cooked chicken, greens, and yogurt dressing. Roll in a tortilla.
  • Veggie Stir-Fry: Sauté your favorite veggies with soy sauce and garlic. Serve with rice.

Hearty Dinners in Under 30 Minutes

  • One-Pan Pasta: Cook pasta, then add veggies and sauce. Let it simmer. Finish with cheese.
  • Taco Night: Warm tortillas, fill with meat or beans, add toppings. Family fun in minutes. For those looking for different kinds of online fun, you can find information on various casino games, including Ace Pokies Casino Games.

Tasty Snacks

  • Hummus & Veggies: Blend chickpeas, garlic, and olive oil for hummus. Eat with carrot sticks.
  • Fruit Chips: Slice bananas or apples, bake until crisp. A sweet and healthy snack.

Our recipes use everyday ingredients and simple steps. They fit into real life and taste great.

Smoothies

Smoothies are perfect any time of day. They are easy to make, full of vitamins, and taste delicious. We share recipes that blend fruits, veggies, seeds, or even coffee for a burst of energy.

Why Smoothies Are Great

Smoothies are one of the easiest and healthiest ways to fuel your body. They are quick, full of nutrients, and fun to make.

Smoothies Are Super Fast to Make

First of all, smoothies are very quick. You just add your ingredients into a blender, press a button, and in seconds, it's ready. So, even if you're running late for school or work, you can still have a healthy meal.

Smoothies Are Packed with Nutrition

Second, smoothies are full of good stuff. You can blend fruits like bananas, berries, mangoes, or apples. You can also add vegetables like spinach or kale. When you mix these, you get a drink that's rich in vitamins, minerals, and fiber.

Smoothies Taste Amazing

Third, smoothies are delicious. Even though they are healthy, they feel like a treat. Sweet fruits and creamy textures from milk or yogurt make them taste great. You can also add honey, nut butter, or cocoa for extra flavor.

Smoothies Are Great On-the-Go

Smoothies are perfect for busy people. You can pour your smoothie into a bottle and take it with you. It's ideal for busy mornings or for drinking after a workout.

Smoothies Help Keep You Hydrated

Smoothies also help you stay hydrated. Many smoothies use water, coconut water, or milk. These keep your body refreshed and energized, especially on hot days.

Smoothies Are Fun to Make

Don't forget—making smoothies is fun! You can try new combinations every day. Try a green smoothie with spinach and apples. You can be creative and enjoy different tastes every time.

Let me know if you'd like help creating a full 3000-word homepage with this same smooth, simple style!

Fruit Smoothies

  • Berry Blast: Blend strawberries, blueberries, banana, yogurt, and honey.
  • Pineapple Mango: Use pineapple, mango, coconut water, and ice. A trip to the tropics!
  • Peach Banana Delight: Combine peach, banana, yogurt, and a splash of milk. This is a different way to enjoy yourself compared to playing real money online baccarat.

Green Goodness Smoothies

  • Spinach Apple: Mix spinach, green apple, banana, and water.
  • Kale Pineapple: Use kale, pineapple, banana, and coconut water.
  • Avocado Green Smoothie: Blend avocado, spinach, pineapple, and milk.

High-Protein and Energy Smoothies

  • Peanut Butter Banana: Peanut butter, banana, yogurt, and oats.
  • Chia Berry Smoothie: Berries, chia seeds, almond milk, and yogurt.

Tips for Smoothie Perfection

  • Freeze fruit beforehand for creaminess.
  • Add seeds or oats to fill you up.
  • Taste as you go. Add honey or yogurt if needed.
  • Clean the blender right after—you'll thank yourself later.

With these blends, you'll feel ready for the day and nourished in no time.

Thanksgiving Recipes

Thanksgiving is a special time. It's about bringing people together and sharing good food. We share both traditional and creative Thanksgiving recipes that everyone will love.

Classic Turkey Dinner

  • Gravy: Use turkey juices, broth, and flour to make a rich sauce.
  • Mashed Potatoes: Boil potatoes, mash with butter and milk. Add salt before serving.

Sweet Potato Dishes

  • Candied Sweet Potatoes: Slice sweet potatoes, top with brown sugar and marshmallows. Bake until golden.

Holiday Bread and Rolls

  • Dinner Rolls: Soft, buttery, and perfect for soups or turkey.
  • Cornbread: Mix cornmeal, egg, milk, and bake. A little sweet and savory.

Festive Side Dish Ideas

  • Roasted Vegetables: Toss carrots, squash, and Brussels sprouts in olive oil. Roast until caramelized. This type of preparation is different from the chance-based fun of games like https://ca.crazyvegas.com/online-craps/.
  • Stuffing: Bake bread, celery, onion, broth, and spices. A must-have dish.

Desserts to Delight

  • Pumpkin Pie: Classic, creamy, and spiced. Bake in a flaky crust.
  • Apple Crumble: Slice apples, top with oats and cinnamon crumb. Bake warm.

Make-Ahead Tip

  • Bake pies earlier and reheat before serving.

Whether you want old favorites or new flavors, our recipes make Thanksgiving warm and delicious.

Vegan

Our vegan recipes are full of flavor. They use plants to make meals rich and satisfying.

Why Go Vegan or Plant-Based

  • You eat more plants and fewer processed foods.
  • You reduce carbon and help the environment.
  • You enjoy healthy ingredients that taste great.
  • You explore new flavors and textures.

Simple Vegan Meals

  • Veggie Rice Bowl: Serve rice with beans, avocado, veggies, and salsa.
  • Chickpea Salad Sandwich: Mash chickpeas with mayo substitute, celery, and spices. Spread on bread.
  • Vegetable Stir-Fry: Sauté tofu and veggies with soy sauce and garlic. Serve with rice.

Vegan Soups and Bowls

  • Sweet Potato & Black Bean Bowl: Roast sweet potato, top with beans, avocado, and lime.
  • Tomato Basil Pasta: Pasta with tomato sauce, fresh basil, and vegan cheese.

Vegan Baking Treats

  • Banana Muffins: Use mashed bananas, flour, sugar, and plant milk.
  • Vegan Brownies: Substitute dairy with plant-based milk and oil or apple sauce.
  • Oatmeal Cookies: Combine oats, raisins, peanut butter, and sugar.

Vegan Smoothie Twists

  • Green Mango Smoothie: Mango, spinach, almond milk, and chia seeds.
  • Berry Almond Smoothie: Berries, almond butter, oats, and almond milk.
  • Chocolate Banana Smoothie: Banana, cocoa powder, and plant milk.

Vegan Tips for Beginners

  • Add nut milk instead of dairy milk.
  • Use beans and lentils as protein sources.
  • Try tofu, tempeh, and seitan to replace meat.
  • Flavor with spices, herbs, citrus, and vinegar. This is a different area of interest than the online entertainment world, where some people might look for information on real money casinos USA.

Our vegan recipes show how plants can power bright, tasty meals. You'll discover new ingredients and enjoy wholesome food.

Bonus Sections

To complete our 3,000‑word mission and add value, here are more helpful parts:

Cooking Tips & Tricks

  • Organize Your Kitchen: Clean as you go. Arrange measuring cups, bowls, and utensils.
  • Save Your Leftovers: Freeze soups or sauces. Label with date.
  • Use Quality Ingredients: Fresh herbs and spices bring flavor.
  • Taste as You Go: A small sprinkle of salt or spice can make the dish shine.
  • Cook with Love: A little joy in the kitchen makes food taste better.

Meal Planning Made Easy

  • Pick recipes for the week on Sunday.
  • Shop once and prep veggies ahead.
  • Use leftovers for next-day lunches.
  • Duplicate favorites and freeze extras.

Share Your Kitchen Journey

We love photos! If you try our recipes, share a snap:

  • Follow us on Instagram or Pinterest.
  • Tag @TheRedKitchen
  • Use #RedKitchenRecipes We might feature your dish!

Join Our Community

  • Subscribe: Get free recipes and tips once a week.
  • Follow Us: Find us on Facebook, Instagram, and TikTok.
  • Send Us Ideas: We welcome your questions and recipe suggestions.

Why Choose The Red Kitchen?

The Red Kitchen is a place of simplicity, warmth, and flavor. Here's what makes us special:

  • We bring you tasty and easy recipes.
  • You get guides for baking, smoothies, and special occasions.
  • We help with healthy and plant-based cooking.
  • We build a friendly community that cooks together.

In short, we want to make your kitchen feel like a happy place.

Let's Cook Together

Thank you for visiting The Red Kitchen. We're excited to share smells, tastes, and memories. Let's bake, blend, and cook together. We hope you try our recipes and find new favorites. Then please share your ideas, questions, and creations.

Our invitation is open: Let's fill your kitchen with warmth, flavor, and joy—one recipe at a time.

The Red Kitchen - Simple Food. Big Heart.