Olive oil is not just a staple in Mediterranean kitchens; it has gained global recognition for its versatility, health benefits, and unique flavors. Whether drizzled over salads, used for sautéing, or incorporated into sauces, olive oil can elevate your culinary creations. This ultimate guide will walk you through the various types of olive oil, their uses in cooking, health benefits, and tips for using olive oil effectively in your kitchen.
- Types of Olive Oil
Olive oil comes in several varieties, each with its unique flavor profile, culinary uses, and quality. Here are the most common types:
– Extra Virgin Olive Oil (EVOO): Made from the first cold pressing of olives, EVOO is the highest quality olive oil. It has a robust flavor and rich aroma, making it ideal for drizzling, dressings, and dipping.
– Virgin Olive Oil: Also derived from the first pressing of olives, virgin olive oil is slightly lower in quality than EVOO. It has a milder flavor but is still suitable for cooking.
– Pure Olive Oil: This blend of refined and virgin olive oils has a more neutral taste. It is useful for frying and sautéing due to its higher smoke point compared to EVOO.
– Light Olive Oil: Despite its name, light olive oil refers to the oil’s flavor, not its calorie content. It is highly refined and has a very mild taste, making it versatile for various cooking applications.
– Pomace Olive Oil: This is made from the leftover pulp, seeds, and skins of olives after the first pressing. Pomace oil is typically used in industrial food production and has a lower quality and flavor.
- Cooking with Olive Oil
Olive oil’s versatility allows it to be used for various cooking methods, including:
– Sautéing: Use EVOO or virgin olive oil for sautéing vegetables and proteins. These oils impart a delicious flavor and can withstand moderate heat.
– Frying: Pure olive oil or light olive oil can be used for frying. They have a higher smoke point, making them suitable for deeper frying methods.
– Roasting: Drizzle olive oil over vegetables before roasting to enhance their flavor and promote golden-browning.
– Dressing and Marinades: EVOO is perfect for salad dressings and marinades because of its rich flavor. Combine it with vinegar, lemon juice, herbs, and spices for a delicious dressing.
– Baking: Olive oil can replace butter or other oils in baking recipes, providing a unique taste and moist texture. It works well in cakes, muffins, and bread.
- Health Benefits of Olive Oil
Olive oil is not just tasty; it also offers numerous health benefits:
– Rich in Antioxidants: Extra virgin olive oil contains polyphenols, which have anti-inflammatory and antioxidant properties that can reduce the risk of chronic diseases.
– Heart Health: Regular consumption of olive oil has been associated with lower blood pressure and improved cholesterol levels, promoting heart health.
– Weight Management: Incorporating healthy fats, like those found in olive oil, can promote satiety and help manage weight when consumed in moderation.
– Skin and Hair Benefits: Olive oil is often used in skincare and haircare products due to its moisturizing properties. Consuming olive oil may also contribute to healthy, glowing skin.
- Tips for Using Olive Oil
– Choose Quality Oils: Opt for high-quality extra virgin olive oil for the best flavor and health benefits. Look for oils that are labeled with a harvest date and a seal of authenticity.
– Store Properly: Keep olive oil in a cool, dark place, away from heat and light to prevent oxidation. Ideally, use dark glass or stainless steel containers for storage.
– Use the Right Oil for the Job: Select olive oil based on its flavor profile and intended use. For a distinct flavor, use EVOO in salads; for a neutral taste, use pure or light olive oil for frying.
– Avoid Overheating: Although olive oil has a relatively high smoke point, using it for high-heat cooking methods (especially EVOO) can cause it to lose some of its flavor and nutritional benefits. Use pure olive oil or light olive oil for frying.
– Experiment with Flavor: Add herbs, spices, and citrus to olive oil for infusing flavors. You can create flavored oils that enhance the taste of your dishes.
- Culinary Inspirations
Here are a few simple and delicious ways to incorporate olive oil into your meals:
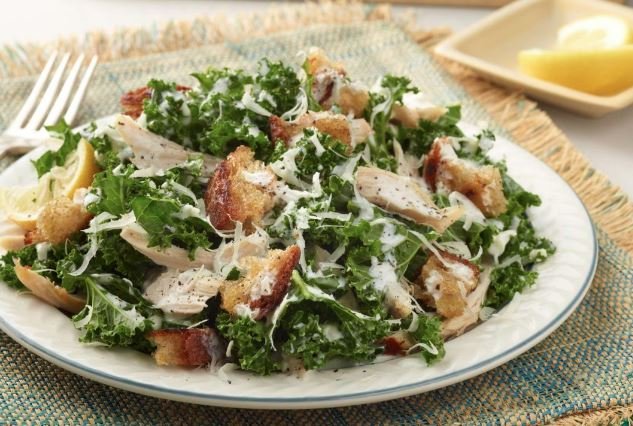
– Mediterranean Salad: Combine fresh greens, cherry tomatoes, cucumber, red onion, olives, and feta cheese. Drizzle with EVOO, lemon juice, oregano, salt, and pepper.
– Garlic and Herb Dip: Mix EVOO with minced garlic, fresh herbs (like basil, parsley, and rosemary), and a pinch of sea salt for a flavorful bread dip.
– Roasted Vegetables: Toss seasonal vegetables with olive oil, salt, pepper, and your favorite herbs. Roast them in the oven at 425°F (220°C) until they’re tender and caramelized.
– Olive Oil Cake: Use olive oil instead of butter in your cake recipes for a moist texture and unique flavor. Combine olive oil with citrus zest for an aromatic touch.
Conclusion
Cooking with olive oil opens up a world of flavor and health benefits. By understanding the different types of olive oil, their culinary uses, and a few tips and tricks, you can elevate your cooking and enjoy the many advantages of this incredible ingredient. Whether you’re drizzling it on a salad, using it in marinades, or incorporating it into baked goods, the possibilities are endless. Embrace the richness of olive oil and discover how it can enhance your dishes today!