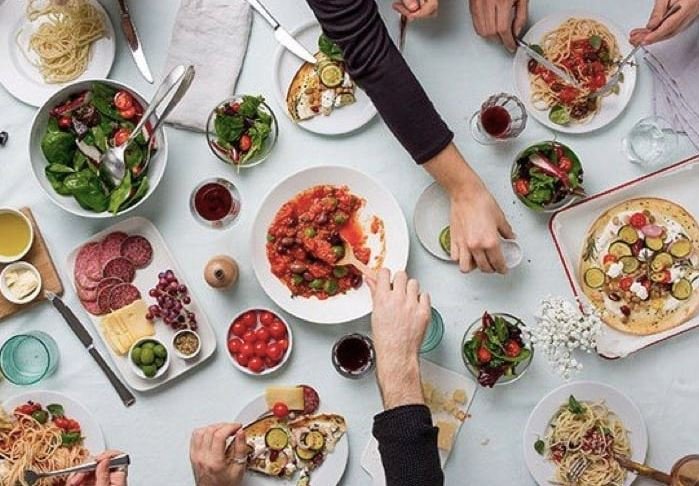
How to Make the Best Homemade Salad Dressing

Homemade salad dressing is a great way to enhance the flavor of your salads and customize the taste to your liking. It’s often fresher, healthier, and more cost-effective than store-bought options. Here’s a guide to creating delicious, versatile dressings from scratch.

Basic Components of Salad Dressing

  1. Base: Usually an oil or yogurt. Common choices include olive oil, vegetable oil, or Greek yogurt.
  2. Acid: Adds tanginess and balances the richness of the oil. Options include vinegar (balsamic, red wine, apple cider) or citrus juice (lemon, lime).
  3. Flavorings: Herbs, spices, mustard, garlic, or honey to add complexity and depth.
  4. Sweetener (optional): A touch of honey, maple syrup, or sugar to balance the acidity if needed.
  5. Seasoning: Salt and pepper to taste.

Classic Vinaigrette

Ingredients:

  • ⅓ cup olive oil
  • 3 tablespoons balsamic vinegar
  • 1 teaspoon Dijon mustard
  • 1 clove garlic, minced
  • Salt and pepper to taste

Instructions:

  1. Combine Ingredients: In a bowl, whisk together the vinegar, mustard, and minced garlic.
  2. Add Oil: Slowly drizzle in the olive oil while whisking to emulsify the dressing.
  3. Season: Add salt and pepper to taste.
  4. Serve: Use immediately or store in an airtight container in the refrigerator for up to a week. Shake or whisk before using.

Creamy Ranch Dressing

Ingredients:

  • ½ cup Greek yogurt or sour cream
  • ¼ cup mayonnaise
  • 1 tablespoon lemon juice
  • 1 tablespoon chopped fresh chives
  • 1 tablespoon chopped fresh parsley
  • 1 teaspoon dried dill
  • 1 clove garlic, minced
  • Salt and pepper to taste

Instructions:

  1. Mix Base: In a bowl, combine Greek yogurt (or sour cream) with mayonnaise.
  2. Add Flavorings: Stir in lemon juice, chives, parsley, dill, and minced garlic.
  3. Season: Add salt and pepper to taste.
  4. Chill: Refrigerate for at least 30 minutes to let the flavors meld. Store in the refrigerator for up to a week.

Lemon-Tahini Dressing

Ingredients:

  • ¼ cup tahini
  • ¼ cup fresh lemon juice
  • 2 tablespoons water (or more for desired consistency)
  • 1 tablespoon olive oil
  • 1 clove garlic, minced
  • Salt and pepper to taste

Instructions:

  1. Combine Ingredients: In a bowl, whisk together tahini, lemon juice, and olive oil.
  2. Adjust Consistency: Add water gradually until you reach your desired consistency.
  3. Add Garlic: Stir in minced garlic.
  4. Season: Add salt and pepper to taste.
  5. Serve: Use immediately or store in an airtight container in the refrigerator for up to a week. Stir well before using.

Honey-Mustard Dressing

Ingredients:

  • ¼ cup Dijon mustard
  • ¼ cup honey
  • ¼ cup apple cider vinegar
  • ¼ cup olive oil
  • Salt and pepper to taste

Instructions:

  1. Mix Mustard and Honey: In a bowl, whisk together Dijon mustard and honey.
  2. Add Vinegar: Stir in apple cider vinegar.
  3. Drizzle in Oil: Slowly whisk in olive oil until fully combined.
  4. Season: Add salt and pepper to taste.
  5. Serve: Use immediately or store in an airtight container in the refrigerator for up to a week. Shake or whisk before using.

Greek Yogurt Dressing

Ingredients:

  • ½ cup Greek yogurt
  • 2 tablespoons lemon juice
  • 1 tablespoon olive oil
  • 1 clove garlic, minced
  • 1 tablespoon fresh dill or parsley, chopped
  • Salt and pepper to taste

Instructions:

  1. Combine Ingredients: In a bowl, mix Greek yogurt with lemon juice and olive oil.
  2. Add Flavorings: Stir in minced garlic and chopped dill or parsley.
  3. Season: Add salt and pepper to taste.
  4. Chill: Refrigerate for at least 30 minutes before serving. Store in the refrigerator for up to a week.

Tips for Perfect Homemade Dressing

  • Adjust to Taste: Feel free to modify the ingredients to suit your taste preferences. Add more honey for sweetness, more vinegar for tanginess, or extra herbs for flavor.
  • Consistency: Adjust the thickness by adding more oil for a thinner dressing or more yogurt/tahini for a thicker one.
  • Emulsification: Whisk or shake dressings thoroughly to ensure they are well-emulsified and don’t separate.

Making homemade salad dressing allows you to customize flavors and create healthier options without preservatives. Experiment with different ingredients and ratios to find your perfect blend!
The Best Slow Cooker Recipes for Busy Weekdays

Slow cookers are perfect for busy weekdays, allowing you to come home to a delicious, ready-to-eat meal. These recipes are easy to prepare and require minimal hands-on time, making them ideal for a hectic schedule. Here are some of the best slow cooker recipes to simplify your week:

1. Classic Beef Stew

Ingredients:

  • 2 lbs beef stew meat, cubed
  • 4 carrots, sliced
  • 4 potatoes, diced
  • 1 onion, chopped
  • 3 cloves garlic, minced
  • 2 cups beef broth
  • 1 cup red wine (optional)
  • 2 tbsp tomato paste
  • 1 tsp dried thyme
  • 1 bay leaf
  • Salt and pepper to taste

Instructions:

  1. Brown Meat (Optional): For added flavor, brown beef cubes in a skillet over medium-high heat.
  2. Combine Ingredients: Add beef, carrots, potatoes, onion, and garlic to the slow cooker. Stir in beef broth, wine (if using), tomato paste, thyme, bay leaf, salt, and pepper.
  3. Cook: Cover and cook on low for 7-8 hours or high for 4-5 hours, until beef is tender and vegetables are cooked through.

2. Creamy Chicken Alfredo

Ingredients:

  • 4 boneless, skinless chicken breasts
  • 1 cup heavy cream
  • 1 cup chicken broth
  • 1/2 cup grated Parmesan cheese
  • 2 cloves garlic, minced
  • 1 tsp dried basil
  • Salt and pepper to taste
  • 8 oz fettuccine pasta

Instructions:

  1. Prepare Sauce: In the slow cooker, combine heavy cream, chicken broth, Parmesan cheese, garlic, basil, salt, and pepper.
  2. Add Chicken: Place chicken breasts in the slow cooker, coating them with the sauce mixture.
  3. Cook: Cover and cook on low for 6-7 hours or high for 3-4 hours. Shred chicken with two forks.
  4. Cook Pasta: Cook fettuccine according to package instructions. Toss with the chicken and sauce before serving.

3. Beef and Broccoli

Ingredients:

  • 1 lb beef sirloin, thinly sliced
  • 2 cups broccoli florets
  • 1/2 cup soy sauce (or tamari for gluten-free)
  • 1/4 cup brown sugar
  • 2 cloves garlic, minced
  • 1 tbsp grated ginger
  • 2 tbsp cornstarch (optional, for thickening)
  • 1/4 cup water (optional, for thickening)

Instructions:

  1. Combine Ingredients: In the slow cooker, mix soy sauce, brown sugar, garlic, and ginger. Add beef slices and coat well.
  2. Cook: Cover and cook on low for 5-6 hours or high for 3-4 hours.
  3. Add Broccoli: About 30 minutes before serving, add broccoli florets.
  4. Thicken Sauce (Optional): Mix cornstarch with water and stir into the sauce to thicken, if desired.

4. Pulled Pork Sandwiches

Ingredients:

  • 3 lbs pork shoulder
  • 1 onion, sliced
  • 1 cup barbecue sauce
  • 1/2 cup apple cider vinegar
  • 2 tbsp brown sugar
  • 1 tbsp smoked paprika
  • Salt and pepper to taste
  • Hamburger buns for serving

Instructions:

  1. Season Pork: Rub the pork shoulder with smoked paprika, salt, and pepper. Place in the slow cooker with onion slices.
  2. Add Liquids: Pour barbecue sauce, apple cider vinegar, and brown sugar over the pork.
  3. Cook: Cover and cook on low for 8-10 hours or high for 4-5 hours. Shred pork with two forks and mix with the sauce. Serve on hamburger buns.

5. Lentil Soup

Ingredients:

  • 1 cup dried lentils, rinsed
  • 1 onion, chopped
  • 2 carrots, diced
  • 2 celery stalks, diced
  • 3 cloves garlic, minced
  • 1 can (14.5 oz) diced tomatoes
  • 4 cups vegetable broth
  • 1 tsp cumin
  • 1 tsp paprika
  • Salt and pepper to taste

Instructions:

  1. Combine Ingredients: Add lentils, onion, carrots, celery, garlic, diced tomatoes, vegetable broth, cumin, paprika, salt, and pepper to the slow cooker.
  2. Cook: Cover and cook on low for 7-8 hours or high for 4-5 hours, until lentils and vegetables are tender.

6. Chicken Taco Soup

Ingredients:

  • 4 boneless, skinless chicken breasts
  • 1 can (15 oz) black beans, drained and rinsed
  • 1 can (15 oz) corn kernels, drained
  • 1 can (14.5 oz) diced tomatoes
  • 1 cup chicken broth
  • 1 packet taco seasoning
  • 1 cup shredded cheddar cheese (optional)
  • Tortilla chips and sour cream for serving

Instructions:

  1. Combine Ingredients: Add chicken breasts, black beans, corn, tomatoes, chicken broth, and taco seasoning to the slow cooker.
  2. Cook: Cover and cook on low for 6-7 hours or high for 3-4 hours. Shred chicken and stir into the soup.
  3. Serve: Top with shredded cheese, tortilla chips, and a dollop of sour cream.

7. Teriyaki Chicken

Ingredients:

  • 4 boneless, skinless chicken thighs
  • 1/2 cup soy sauce (or tamari for gluten-free)
  • 1/4 cup honey
  • 2 tbsp rice vinegar
  • 2 cloves garlic, minced
  • 1 tbsp grated ginger
  • 2 tbsp cornstarch (optional, for thickening)
  • 1/4 cup water (optional, for thickening)

Instructions:

  1. Prepare Sauce: Mix soy sauce, honey, rice vinegar, garlic, and ginger in the slow cooker.
  2. Add Chicken: Place chicken thighs in the sauce mixture.
  3. Cook: Cover and cook on low for 6-7 hours or high for 3-4 hours. Shred chicken if desired.
  4. Thicken Sauce (Optional): Mix cornstarch with water and stir into the sauce to thicken.

8. Vegetable Curry

Ingredients:

  • 1 onion, chopped
  • 2 cloves garlic, minced
  • 1 tbsp curry powder
  • 1 tsp turmeric
  • 1 can (14 oz) coconut milk
  • 2 cups mixed vegetables (potatoes, carrots, bell peppers)
  • 1 can (15 oz) chickpeas, drained and rinsed
  • Salt and pepper to taste

Instructions:

  1. Combine Ingredients: Add onion, garlic, curry powder, turmeric, coconut milk, mixed vegetables, and chickpeas to the slow cooker.
  2. Cook: Cover and cook on low for 6-7 hours or high for 3-4 hours until vegetables are tender.

9. Stuffed Bell Peppers

Ingredients:

  • 4 large bell peppers (any color)
  • 1 lb ground beef or turkey
  • 1 cup cooked rice
  • 1 can (15 oz) diced tomatoes
  • 1/2 cup chopped onion
  • 1 tsp dried oregano
  • 1 cup shredded cheese (optional)

Instructions:

  1. Prepare Peppers: Cut the tops off bell peppers and remove seeds. Place in the slow cooker.
  2. Make Filling: In a bowl, mix ground beef or turkey, cooked rice, diced tomatoes, onion, and oregano. Stuff mixture into peppers.
  3. Cook: Cover and cook on low for 6-7 hours or high for 3-4 hours. Sprinkle with cheese before serving if desired.

10. Sweet and Sour Pork

Ingredients:

  • 1.5 lbs pork tenderloin, cut into cubes
  • 1 cup pineapple chunks (with juice)
  • 1 bell pepper, chopped
  • 1 onion, chopped
  • 1/2 cup soy sauce (or tamari for gluten-free)
  • 1/4 cup brown sugar
  • 2 tbsp rice vinegar
  • 2 cloves garlic, minced

Instructions:

  1. Combine Ingredients: Add pork, pineapple chunks with juice, bell pepper, onion, soy sauce, brown sugar, rice vinegar, and garlic to the slow cooker.
  2. Cook: Cover and cook on low for 6-7 hours or high for 3-4 hours, until pork is tender.

These slow cooker recipes are perfect for busy days, allowing you to prepare wholesome and delicious meals with minimal effort. Enjoy coming home to a hot, comforting dish!

How to Make Homemade Ice Cream Without an Ice Cream Maker

Making homemade ice cream without an ice cream maker is easy and fun! You can achieve creamy, delicious results with a few simple methods. Here’s how to make ice cream using common kitchen tools and ingredients.

1. No-Churn Ice Cream Recipe

This method is ideal for a simple, creamy ice cream using a few basic ingredients.

Ingredients:

  • 2 cups heavy cream
  • 1 cup sweetened condensed milk
  • 1 tsp vanilla extract
  • Add-ins: (chocolate chips, fruit, nuts, etc.)

Instructions:

  1. Whip the Cream: In a large bowl, use an electric mixer to whip the heavy cream until stiff peaks form.
  2. Fold in Sweetened Condensed Milk: Gently fold the sweetened condensed milk and vanilla extract into the whipped cream until well combined.
  3. Add Mix-Ins: Fold in any additional mix-ins like chocolate chips or fruit.
  4. Freeze: Transfer the mixture to a lidded container and freeze for at least 4 hours or until solid.

2. Ice Cream in a Bag

This method uses a bag of ice and salt to freeze the ice cream mixture. It’s a fun activity for kids!

Ingredients:

  • 1 cup heavy cream
  • 1 cup milk
  • 1/2 cup sugar
  • 1 tsp vanilla extract
  • Ice
  • 1/2 cup salt (rock salt or kosher salt works best)

Instructions:

  1. Prepare Ice Cream Mixture: In a bowl, mix the cream, milk, sugar, and vanilla extract until the sugar is dissolved.
  2. Pour into a Bag: Pour the mixture into a small resealable plastic bag and seal tightly.
  3. Prepare Ice Bag: Fill a larger resealable plastic bag halfway with ice and add the salt.
  4. Place and Shake: Place the small bag with the ice cream mixture inside the larger bag with ice. Seal the larger bag and shake vigorously for 5-10 minutes.
  5. Check Consistency: The mixture should thicken and freeze. Remove the small bag, wipe it off, and serve the ice cream.

3. Ice Cream with a Plastic Bag and Salt

Ingredients:

  • 1 cup heavy cream
  • 1 cup milk
  • 1/2 cup sugar
  • 1 tsp vanilla extract
  • Ice
  • 1/2 cup salt

Instructions:

  1. Mix Ingredients: In a bowl, combine cream, milk, sugar, and vanilla until sugar dissolves.
  2. Pour Mixture: Pour the mixture into a quart-sized resealable plastic bag. Seal tightly.
  3. Prepare Ice and Salt: Fill a gallon-sized resealable plastic bag halfway with ice and add salt. Place the smaller bag with the ice cream mixture inside the larger bag.
  4. Shake: Seal the larger bag and shake vigorously for 10-15 minutes until the ice cream thickens.
  5. Serve: Remove the smaller bag from the ice and salt mixture. Wipe off any salt and serve the ice cream.

4. Freezer Bag Method

Ingredients:

  • 2 cups heavy cream
  • 1 cup milk
  • 3/4 cup sugar
  • 1 tsp vanilla extract
  • Add-ins: (optional)

Instructions:

  1. Mix Ingredients: Combine cream, milk, sugar, and vanilla extract in a bowl. Stir until the sugar is completely dissolved.
  2. Pour into a Container: Pour the mixture into a freezer-safe container.
  3. Stir Occasionally: Place the container in the freezer. Every 30 minutes, stir the mixture with a fork to break up ice crystals until the ice cream is fully frozen (about 3-4 hours).

5. Instant Ice Cream with Frozen Fruit

Ingredients:

  • 2 cups frozen fruit (such as berries, mangoes, or bananas)
  • 1/2 cup Greek yogurt or heavy cream
  • 1-2 tbsp honey or maple syrup (optional)

Instructions:

  1. Blend Ingredients: In a food processor or blender, combine frozen fruit, Greek yogurt or heavy cream, and sweetener if using. Blend until smooth.
  2. Serve: Enjoy immediately for a soft-serve consistency or freeze for an additional 1-2 hours for a firmer texture.

Tips for Homemade Ice Cream:

  • Texture: Homemade ice cream may be slightly different in texture compared to store-bought. Stirring it periodically during freezing helps create a smoother texture.
  • Flavor Variations: Experiment with different extracts, fruit, or mix-ins to customize flavors.
  • Storage: Store homemade ice cream in an airtight container in the freezer for up to 2 weeks for the best quality.

These methods allow you to enjoy homemade ice cream without an ice cream maker, giving you creamy and delicious results right from your kitchen!

How to Make the Best Homemade Pies

Homemade pies are a delightful treat that can evoke cherished memories and create new ones. Whether you’re a novice baker or an experienced chef, making the perfect pie can be achieved with a bit of know-how and the right ingredients. Here’s a comprehensive guide to help you create delicious homemade pies that will impress your family and friends.

  1. Choose the Right Recipe

The first step to making the best homemade pie is to select the right recipe. Pies can be split into two primary categories:

– Fruit Pies: Such as apple, cherry, blueberry, and peach, which are filled with fresh or canned fruit.

– Custard Pies: Including options like pumpkin, pecan, and chocolate, which contain a creamy filling that often includes eggs.

  1. Gather Quality Ingredients

High-quality ingredients can make all the difference in your pie’s flavor and texture. Here’s what you’ll need:

– For the Crust:

– All-purpose flour: Use a blend of all-purpose flour for structure.

– Unsalted butter: Cold butter creates a flakier crust; cut it into small cubes.

– Sugar: A touch of sugar enhances flavor.

– Salt: Balances sweetness and enhances flavor.

– Ice water: Keep it cold to maintain the crust’s texture.

– For the Filling:

– Fresh, ripe fruits (if making a fruit pie) or good-quality filling ingredients (for custard pies).

– Sweeteners, spices, and flavorings as specified in your recipe.

  1. Create the Perfect Pie Crust

Basic Pie Crust Recipe:

Ingredients:

– 2 1/2 cups all-purpose flour

– 1 tsp salt

– 1 tbsp granulated sugar

– 1 cup unsalted butter (cold and cubed)

– 6 to 8 tbsp ice water

Instructions:

  1. Mix Dry Ingredients: In a large bowl, combine flour, salt, and sugar.
  2. Cut in Butter: Use a pastry cutter or your hands to incorporate the cold butter into the flour mixture until it resembles coarse crumbs.
  3. Add Ice Water: Gradually add ice water, one tablespoon at a time, mixing until the dough starts to come together. Do not overmix.
  4. Chill the Dough: Divide the dough into two disks, wrap them in plastic wrap, and refrigerate for at least 1 hour (or overnight).
  5. Roll Out: On a floured surface, roll out one disk to fit your pie pan, leaving about an inch overhang. Trim excess and proceed to fill with your desired mixture.
  6. Prepare Your Filling

Fruit Pie Filling:

  1. Ingredients: Fresh fruit, sugar, cornstarch (for thickening), lemon juice, and spices (like cinnamon for apple pie).
  2. Instructions: Toss your fruit with sugar, cornstarch, and other flavorings until evenly coated. Allow it to sit for 15-30 minutes.

Custard Pie Filling:

  1. Ingredients: Eggs, sugar, milk or cream, and any flavorings (vanilla extract, spices).
  2. Instructions: Whisk together the ingredients until well combined, pour it into the prepared pie crust.
  3. Assemble the Pie
  4. Fill the Crust: After rolling out the bottom crust, pour your filling into the pie dish. If you’re making a fruit pie, spread the filling evenly.
  5. Top Crust (if applicable): For double-crust pies, roll out the second disk and place it over the filling. Cut vents for steam to escape. You can also create a lattice crust by weaving strips of dough together on top.
  6. Seal the Edges: Gently press the edges to seal and create a decorative crimp if desired.
  7. Bake to Perfection

– Temperature: Preheat your oven to appropriate temperatures (typically between 350°F to 425°F).

– Baking Time: Bake according to your recipe—fruit pies usually take about 45-60 minutes, while custard pies may bake for 30-45 minutes.

– Check for Doneness: The crust should be golden brown, and for custard pies, they should be set in the center.

  1. Cool and Serve

Allow your pie to cool on a wire rack for at least 1 hour before slicing. This helps the filling set and makes it easier to serve. Consider serving with a scoop of ice cream or a dollop of whipped cream for an extra treat!

  1. Enjoy and Experiment

Making homemade pies is a skill that improves with practice. Feel free to experiment with flavors, crust types (like graham cracker crusts for cheesecakes), and fillings. Don’t hesitate to make adjustments based on your preferences or seasonal ingredients. Enjoy the process, and let your creativity shine!

Final Thoughts

Homemade pies are a delicious way to bring comfort and joy to any occasion. With these tips and a bit of practice, you can master the art of pie-making and create incredible desserts that delight everyone at the table.

The Ultimate Guide to Cooking with Whole Grains

Whole grains are a fantastic addition to any diet, packed with nutrients, fiber, and flavor. Cooking with whole grains opens the door to a variety of delicious dishes, while also providing health benefits like improved digestion, heart health, and sustained energy levels. This guide will cover essential types of whole grains, cooking methods, tips for incorporating them into your meals, and some delightful recipes to inspire your culinary adventures.

  1. Understanding Whole Grains

What Are Whole Grains?

Whole grains consist of the entire grain kernel—the bran, germ, and endosperm—unlike refined grains that have been stripped of their nutritious components. Common whole grains include:

– Brown Rice: A nutty-flavored grain that’s versatile for many dishes.

– Quinoa: A complete protein that cooks quickly and has a unique texture.

– Oats: Excellent for breakfast, oats are hearty and filling.

– Barley: Great for soups and stews with a chewy texture.

– Farro: An ancient grain with a nutty flavor, ideal for salads.

– Millet: A gluten-free grain that can be cooked soft or dry.

– Bulgur: Quick-cooking and often used in salads like tabbouleh.

  1. Cooking Methods

Basic Cooking Techniques:

– Boiling: This method is effective for most whole grains. Use a determined water-to-grain ratio, usually around 2:1 for grains like brown rice and quinoa.

– Steaming: Some grains, like barley and farro, can be steamed to maintain their nutrients and flavor.

– Baking: Combine grains into casseroles or baked dishes for a heartier option.

– Toasting: Before cooking, toasting grains like farro or quinoa in a dry skillet enhances their nutty flavor.

Cooking Tips:

– Rinse grains under cold water before cooking to remove any excess starch and prevent clumping.

– Soaking grains, like steel-cut oats or whole wheat berries, overnight can reduce cooking time and improve texture.

– Adjust liquid amounts based on desired consistency; for creamier grains, use a bit more liquid.

  1. Incorporating Whole Grains into Your Meals

– Breakfast: Start your day with oatmeal, quinoa porridge, or whole grain toast.

– Lunch: Try a grain salad with chopped vegetables and a light vinaigrette or a grain bowl topped with protein and sauce.

– Dinner: Use whole grains as a base for stir-fries, stews, or casseroles, and serve them alongside your favorite proteins.

– Snacks: Make energy balls with oats, nut butter, and honey, or enjoy popcorn as a fun whole grain snack.

  1. Flavoring and Pairing Whole Grains

Whole grains can be flavored creatively to complement any meal:

– Herbs and Spices: Use fresh herbs like parsley, cilantro, or basil, along with spices like cumin and paprika, to enhance the flavor.

– Broths or Stocks: Cooking grains in vegetable, chicken, or beef broth can deepen flavors.

– Acids: A touch of lemon juice or vinegar can brighten the dish and enhance taste.

– Add-Ins: Mix in ingredients like roasted vegetables, nuts, seeds, or dried fruits to boost flavor and nutrition.

  1. Delicious Whole Grain Recipes
  2. Quinoa Salad with Roasted Vegetables

– Ingredients: Quinoa, bell peppers, zucchini, cherry tomatoes, olive oil, balsamic vinegar, salt, and pepper.

– Instructions: Cook quinoa according to package instructions. Toss chopped vegetables with olive oil, salt, and pepper, and roast at 400°F for 20-25 minutes. Mix roasted veggies with quinoa and drizzle with balsamic vinegar.

  1. Barley and Mushroom Risotto

– Ingredients: Barley, mushrooms, onion, garlic, vegetable broth, Parmesan cheese, parsley, salt, and pepper.

– Instructions: Sauté onion and garlic in a pot, add mushrooms, and cook until softened. Stir in barley and gradually add vegetable broth, cooking until the barley is tender. Stir in Parmesan and season with salt and pepper before serving.

  1. Oatmeal Energy Bites

– Ingredients: Rolled oats, nut butter, honey, chocolate chips, and chia seeds.

– Instructions: Mix all ingredients in a bowl until combined, then form into small balls. Refrigerate for at least 30 minutes to set.

  1. Farro Salad with Feta and Spinach

– Ingredients: Farro, spinach, feta cheese, cherry tomatoes, olives, olive oil, lemon juice, salt, and pepper.

– Instructions: Cook farro according to package directions. Toss cooked farro with spinach, feta, tomatoes, olives, olive oil, lemon juice, and season with salt and pepper.

  1. Storing Whole Grains

– Storage: Whole grains should be stored in an airtight container in a cool, dark place to preserve freshness. Uncooked grains can last for several months (or longer if stored properly), while cooked grains should be refrigerated and consumed within a week.

– Freezing: For longer storage, cooked grains can be portioned and frozen for convenience, making meal prep faster and easier.

Conclusion

Cooking with whole grains offers delicious flavors, health benefits, and versatility in the kitchen. By exploring various cooking methods and incorporating grains into your daily meals, you can enjoy nutritious and satisfying dishes that support your health. So grab your favorite whole grains and start experimenting with new recipes to elevate your culinary repertoire!

How to Bake Perfectly Soft Cookies

Baking perfectly soft cookies is an art that combines the right ingredients, techniques, and a little patience. Whether you’re aiming for classic chocolate chip cookies or want to experiment with different flavors, following some key tips can help you achieve that ideal softness. Here’s a step-by-step guide to ensure your cookies come out perfectly soft every time.

Ingredients

  1. Butter: Use unsalted butter at room temperature. This provides the rich flavor and helps create a tender texture.
  2. Sugars: Use a combination of granulated sugar and brown sugar. Brown sugar contains molasses, which adds moisture and contributes to the softness.
  3. Flour: All-purpose flour is typically used, but consider using a little less than the recipe calls for, or use a flour that is labeled as “soft.”
  4. Leavening Agents: Baking soda and baking powder help the cookies rise, creating a softer texture.
  5. Eggs: Use large eggs, as they add moisture and help bind the ingredients.
  6. Vanilla Extract: For flavor enhancement.
  7. Salt: A small amount of salt balances sweetness and enhances all flavors.
  8. Mix-Ins: Chocolate chips, nuts, or dried fruit add flavor and texture, but avoid too many mix-ins as they can weigh the cookies down.

Steps to Bake Perfectly Soft Cookies

  1. Preheat Your Oven: Preheat your oven to the temperature specified in your recipe, usually around 350°F (175°C). This ensures even baking.
  2. Cream the Butter and Sugars:

– In a large mixing bowl, beat softened butter with both sugars using an electric mixer on medium speed until the mixture is light and fluffy. This process incorporates air into the batter, which helps create a softer cookie.

  1. Add Eggs and Vanilla:

– Add the egg(s) one at a time, mixing well after each addition, followed by vanilla extract. Mixing these in thoroughly will help to create a more uniform dough.

  1. Combine Dry Ingredients:

– In a separate bowl, whisk together the flour, baking soda, baking powder, and salt. This ensures even distribution of the leavening agents and helps prevent clumping.

  1. Gradually Add Dry Ingredients to Wet Ingredients:

– Slowly incorporate the dry mixture into the wet mixture, stirring until just combined. Overmixing can lead to tougher cookies, so mix until you no longer see streaks of flour.

  1. Incorporate Mix-Ins:

– Gently fold in any mix-ins (like chocolate chips) by hand, ensuring they are evenly distributed throughout the dough.

  1. Chill the Dough:

– For softer cookies, it’s a good practice to chill the dough for at least 30 minutes to an hour. This helps the cookies maintain their shape while baking and can result in a softer texture.

  1. Scoop the Dough:

– Use a cookie scoop or spoon to portion out the dough onto a baking sheet lined with parchment paper. Keep the cookies spaced apart (about 2 inches) to allow room for spreading.

  1. Bake:

– Bake the cookies until the edges are lightly golden but the centers still look soft and slightly underbaked. This usually takes about 8 to 12 minutes, depending on the size of your cookies.

  1. Let Them Cool:

– Allow the cookies to cool on the baking sheet for about 5 minutes before transferring them to a wire rack. This resting time lets them set up slightly, and they will continue to cook through the residual heat.

  1. Store Properly:

– To keep your cookies soft, store them in an airtight container. You can also add a slice of bread to the container, as this will help maintain moisture and softness.

Additional Tips

– Experiment with Different Flours: Substituting part of the all-purpose flour with cake flour can create a softer texture since cake flour has a lower protein content, leading to a more tender result.

– Don’t Overbake: The key to soft cookies is to take them out of the oven while they still look slightly underbaked. They will firm up as they cool.

– Use Room Temperature Ingredients: Ensuring your butter and eggs are at room temperature helps with the mixing process and leads to a better texture.

– Try Brown Butter: For added flavor, melt your butter and let it brown slightly before adding it to the dough. This brings a delicious nutty flavor and can enhance the softness.

Conclusion

Baking perfectly soft cookies is all about balancing your ingredients and being mindful of your technique. By following these steps and tips, you’ll create cookies that are deliciously soft and chewier, making them a favorite for anyone who tries them.

Top 10 Healthy Snack Recipes for Kids

Creating healthy snacks for kids can be both fun and rewarding. With the right ingredients and a bit of creativity, you can make snacks that are not only nutritious but also appealing to young taste buds. Here are ten healthy snack recipes that children will love:


  1. Fruit Kabobs

Ingredients:

– Assorted fruits (strawberries, grapes, melon, pineapple, etc.)

– Wooden skewers


Instructions:

  1. Cut larger fruits into bite-sized pieces.
  2. Alternately thread various pieces of fruit onto the skewers.
  3. Serve fresh with a yogurt dip if desired.


  1. Veggie Sticks with Hummus

Ingredients:

– Carrots, cucumbers, bell peppers, and celery (cut into sticks)

– Hummus (store-bought or homemade)


Instructions:

  1. Arrange the veggie sticks on a plate.
  2. Serve with a small bowl of hummus for dipping.


  1. Banana Oatmeal Cookies

Ingredients:

– 2 ripe bananas, mashed

– 1 cup oats

– Optional: chocolate chips or raisins


Instructions:

  1. Preheat the oven to 350°F (175°C).
  2. Mix mashed bananas and oats in a bowl (add chocolate chips or raisins if desired).
  3. Drop tablespoonfuls of the mixture onto a baking sheet.
  4. Bake for 10-12 minutes until golden.


  1. Yogurt Parfaits

Ingredients:

– Greek yogurt (vanilla or plain)

– Mixed berries (strawberries, blueberries, and raspberries)

– Granola


Instructions:

  1. In a cup or bowl, layer yogurt, a layer of berries, and a layer of granola.
  2. Repeat the layers until the cup is full.
  3. Serve immediately or chill for later.


  1. Peanut Butter Banana Roll-Ups

Ingredients:

– Whole grain tortillas

– Peanut butter or almond butter

– 1 banana, peeled


Instructions:

  1. Spread a layer of peanut butter on the tortilla.
  2. Place the banana on one end of the tortilla and roll it up tightly.
  3. Slice into bite-sized pieces and serve.


  1. Cheesy Popcorn

Ingredients:

– Plain popcorn (air-popped or microwaved)

– Grated cheese (cheddar or Parmesan)

– Optional: a sprinkle of garlic powder or paprika


Instructions:

  1. Pop the popcorn according to package instructions.
  2. While it’s still warm, sprinkle the cheese over the popcorn.
  3. Toss to distribute evenly and season with optional spices.


  1. Apple Slices with Nut Butter

Ingredients:

– 1 apple, sliced

– Almond or peanut butter


Instructions:

  1. Core and slice the apple into thin wedges.
  2. Serve the apple slices with a side of nut butter for dipping.


  1. Frozen Yogurt Bark

Ingredients:

– 2 cups Greek yogurt (any flavor)

– Assorted toppings (berries, nuts, seeds, or cacao nibs)


Instructions:

  1. Line a baking sheet with parchment paper.
  2. Spread the yogurt evenly on the sheet.
  3. Sprinkle your choice of toppings over the yogurt.
  4. Freeze for at least 2 hours, then break into pieces.


  1. Mini Veggie Muffins

Ingredients:

– 1 cup flour (whole wheat or all-purpose)

– 1/2 cup shredded carrots

– 1/2 cup zucchini, grated

– 1/2 cup Greek yogurt

– 2 eggs

– 1 tsp baking powder


Instructions:

  1. Preheat the oven to 350°F (175°C) and grease a mini muffin tin.
  2. In a bowl, mix all the ingredients until combined.
  3. Pour the mixture into the muffin tin, filling each cup about 3/4 full.
  4. Bake for 15-20 minutes until a toothpick comes out clean.


  1. Energy Bites

Ingredients:

– 1 cup oats

– 1/2 cup nut butter

– 1/3 cup honey or maple syrup

– 1/2 cup chocolate chips or dried fruit


Instructions:

  1. In a bowl, mix all ingredients until well combined.
  2. Roll the mixture into small balls (about 1 inch in diameter).
  3. Place them on a baking sheet and refrigerate for at least 30 minutes before serving.


Conclusion

These healthy snack recipes are not only nutritious but also easy to prepare and delicious, making them perfect for kids. Feel free to modify the ingredients and get creative with flavors and textures to keep your little ones excited about healthy eating!

How to Make the Best Homemade Burgers

Making homemade burgers allows you to control the quality of ingredients and customize flavors to your liking. Here’s a comprehensive guide to crafting juicy, flavorful burgers that will impress everyone at the table.

Ingredients:

  • 1 1/2 lbs ground beef (80% lean, 20% fat for juiciness)
  • 1 tbsp Worcestershire sauce
  • 1 tsp garlic powder
  • 1 tsp onion powder
  • 1 tsp salt
  • 1/2 tsp black pepper
  • 4 hamburger buns
  • Your favorite burger toppings (lettuce, tomato, onion, cheese, pickles, etc.)
  • Condiments (ketchup, mustard, mayonnaise)

Instructions:

1. Prepare the Beef:

  1. Mix Ingredients: In a large bowl, gently mix the ground beef with Worcestershire sauce, garlic powder, onion powder, salt, and pepper. Be careful not to overwork the meat, as this can make the burgers tough. 
  2. Shape Patties: Divide the beef mixture into 4 equal portions. Gently shape each portion into a patty, about 3/4 to 1 inch thick. Use your thumb to make a small indentation in the center of each patty. This helps the burgers cook evenly and prevents them from puffing up in the center. 

2. Cook the Patties:

Option 1: Grill
  1. Preheat Grill: Preheat your grill to medium-high heat.
  2. Grill Patties: Place the patties on the grill. Cook for 4-5 minutes on each side for medium-rare, or 6-7 minutes for medium. Avoid pressing down on the patties, as this releases juices and can make them dry.
  3. Add Cheese: If adding cheese, place a slice on each patty during the last minute of cooking and close the grill lid to melt.
Option 2: Skillet
  1. Preheat Skillet: Heat a cast-iron skillet or non-stick pan over medium-high heat.
  2. Cook Patties: Add the patties to the skillet and cook for 4-5 minutes on each side for medium-rare, or 6-7 minutes for medium. Use a meat thermometer to check for doneness (160°F or 71°C for medium).
  3. Add Cheese: Place cheese on the patties during the last minute of cooking and cover the skillet to melt.

3. Toast the Buns:

  1. Toast Buns: Slice the hamburger buns in half. Lightly butter the cut sides and toast them in a skillet or on the grill until golden brown.

4. Assemble the Burgers:

  1. Spread Condiments: Spread your choice of condiments on the bottom half of each bun.
  2. Add Patties: Place the cooked burger patties on top of the condiments.
  3. Layer Toppings: Add your favorite toppings such as lettuce, tomato, onion, pickles, and any additional cheese or sauces.
  4. Finish with the Top Bun: Place the top half of the bun on top of the toppings.

Tips for the Perfect Burger:

  • Use High-Quality Beef: Choose beef with at least 20% fat content for juicier, more flavorful burgers.
  • Don’t Overwork the Meat: Mix the ingredients gently to keep the burgers tender.
  • Keep the Patties Cold: Refrigerate the patties before cooking to help them hold their shape.
  • Let the Burgers Rest: Allow the cooked patties to rest for a few minutes before assembling the burgers. This helps the juices redistribute.
  • Customize to Your Taste: Feel free to add additional seasonings or mix-ins (like chopped onions, herbs, or spices) to the beef for a personalized touch.

With these steps, you can create the best homemade burgers that are juicy, flavorful, and perfectly cooked. Enjoy your burger night!

The Best Brunch Recipes for a Relaxing Weekend

Brunch is the perfect way to enjoy a leisurely weekend with friends and family. Whether you’re in the mood for something sweet, savory, or a bit of both, these brunch recipes are sure to impress and make your weekend special.

1. Classic Eggs Benedict

Ingredients:

  • 4 English muffins, split and toasted
  • 8 slices of Canadian bacon
  • 4 large eggs
  • 1 tbsp white vinegar
  • 1 cup hollandaise sauce (store-bought or homemade)
  • Fresh chives, chopped (for garnish)

Instructions:

  1. Cook Bacon: In a skillet, cook Canadian bacon over medium heat until crispy.
  2. Poach Eggs: Bring a pot of water to a simmer with white vinegar. Crack eggs into a small cup, gently slide into the water, and cook for 3-4 minutes until whites are set but yolks are runny. Remove with a slotted spoon.
  3. Assemble: Place a slice of bacon on each English muffin half. Top with a poached egg and spoon over hollandaise sauce.
  4. Garnish: Sprinkle with fresh chives.

2. Avocado Toast with Poached Eggs

Ingredients:

  • 4 slices of whole-grain bread
  • 2 ripe avocados
  • 1 tbsp lemon juice
  • Salt and pepper, to taste
  • 4 large eggs
  • Red pepper flakes (optional)

Instructions:

  1. Toast Bread: Toast the slices of bread to your liking.
  2. Prepare Avocado: In a bowl, mash avocados with lemon juice, salt, and pepper.
  3. Poach Eggs: Follow the instructions for poaching eggs above.
  4. Assemble: Spread mashed avocado on toast. Top with poached eggs and sprinkle with red pepper flakes if desired.

3. Berry Pancakes with Maple Syrup

Ingredients:

  • 1 1/2 cups all-purpose flour
  • 2 tbsp sugar
  • 1 tbsp baking powder
  • 1/2 tsp salt
  • 1 1/4 cups milk
  • 1 large egg
  • 3 tbsp melted butter
  • 1 cup mixed berries (strawberries, blueberries, raspberries)
  • Maple syrup, for serving

Instructions:

  1. Mix Dry Ingredients: In a bowl, whisk together flour, sugar, baking powder, and salt.
  2. Combine Wet Ingredients: In another bowl, mix milk, egg, and melted butter.
  3. Combine and Cook: Pour wet ingredients into dry ingredients and stir until just combined. Fold in berries.
  4. Cook Pancakes: Heat a non-stick skillet over medium heat. Pour batter onto the skillet and cook until bubbles form. Flip and cook until golden brown.
  5. Serve: Serve with maple syrup.

4. Quiche Lorraine

Ingredients:

  • 1 pre-made pie crust
  • 8 slices of bacon, cooked and crumbled
  • 1 cup shredded Swiss cheese
  • 1/2 cup chopped onions
  • 4 large eggs
  • 1 cup heavy cream
  • Salt and pepper, to taste

Instructions:

  1. Preheat Oven: Preheat to 375°F (190°C).
  2. Prepare Pie Crust: Fit the pie crust into a pie dish and crimp edges. Bake for 10 minutes.
  3. Assemble Quiche: Sprinkle bacon, cheese, and onions in the pie crust.
  4. Mix Custard: In a bowl, whisk together eggs, heavy cream, salt, and pepper. Pour over the bacon mixture.
  5. Bake: Bake for 35-40 minutes, or until the quiche is set and golden brown.

5. Smoked Salmon Bagels

Ingredients:

  • 4 bagels, sliced and toasted
  • 8 oz cream cheese
  • 4 oz smoked salmon
  • 1 small red onion, thinly sliced
  • Capers (optional)
  • Fresh dill, for garnish

Instructions:

  1. Prepare Bagels: Spread cream cheese on each bagel half.
  2. Top: Layer with smoked salmon, red onion, and capers if using.
  3. Garnish: Sprinkle with fresh dill.

6. French Toast with Fresh Fruit

Ingredients:

  • 4 slices of thick bread (brioche or challah work well)
  • 2 large eggs
  • 1/2 cup milk
  • 1 tsp vanilla extract
  • 1/2 tsp cinnamon
  • 2 tbsp butter
  • Fresh fruit (berries, bananas, etc.)
  • Powdered sugar, for garnish (optional)

Instructions:

  1. Mix Batter: In a bowl, whisk together eggs, milk, vanilla, and cinnamon.
  2. Soak Bread: Dip bread slices in the egg mixture, coating both sides.
  3. Cook: Heat butter in a skillet over medium heat. Cook bread slices until golden brown on both sides.
  4. Serve: Serve with fresh fruit and a dusting of powdered sugar if desired.

7. Breakfast Burritos

Ingredients:

  • 4 large flour tortillas
  • 6 large eggs
  • 1 cup cooked and crumbled breakfast sausage or bacon
  • 1 cup shredded cheese
  • 1/2 cup salsa
  • 1/2 cup chopped bell peppers
  • 1/2 cup chopped onions

Instructions:

  1. Cook Eggs: Scramble eggs in a skillet until cooked through.
  2. Assemble Burritos: Place tortillas on a flat surface. Divide eggs, sausage or bacon, cheese, bell peppers, onions, and salsa among tortillas.
  3. Roll Up: Fold in sides and roll up each tortilla.
  4. Heat: Return to the skillet and cook until the burritos are golden and the cheese is melted.

8. Greek Yogurt Parfaits

Ingredients:

  • 2 cups Greek yogurt
  • 1 cup granola
  • 1 cup fresh berries (strawberries, blueberries, etc.)
  • Honey, for drizzling

Instructions:

  1. Layer Parfaits: In serving glasses, layer Greek yogurt, granola, and berries.
  2. Drizzle: Drizzle with honey.
  3. Serve: Serve immediately or chill until ready to serve.

9. Spinach and Feta Stuffed Croissants

Ingredients:

  • 4 pre-made croissants
  • 1 cup fresh spinach, chopped
  • 1/2 cup crumbled feta cheese
  • 1/4 cup grated Parmesan cheese
  • 1 egg, beaten (for egg wash)

Instructions:

  1. Preheat Oven: Preheat to 375°F (190°C).
  2. Prepare Filling: Mix spinach, feta, and Parmesan cheese in a bowl.
  3. Stuff Croissants: Slice croissants in half and fill with spinach mixture.
  4. Bake: Place stuffed croissants on a baking sheet. Brush with beaten egg. Bake for 10-12 minutes until golden.

10. Cinnamon Roll Casserole

Ingredients:

  • 1 can (16 oz) cinnamon rolls, cut into pieces
  • 4 large eggs
  • 1 cup milk
  • 1/2 cup maple syrup
  • 1 tsp vanilla extract
  • 1/2 tsp cinnamon

Instructions:

  1. Preheat Oven: Preheat to 350°F (175°C).
  2. Prepare Casserole: In a baking dish, place cinnamon roll pieces.
  3. Mix Custard: In a bowl, whisk together eggs, milk, syrup, vanilla, and cinnamon. Pour over cinnamon rolls.
  4. Bake: Bake for 25-30 minutes until set and golden brown. Drizzle with icing from the cinnamon roll can.

These brunch recipes are sure to make your weekend relaxing and delicious, offering something for every taste preference.

How to Make Delicious Homemade Pizza Dough

Making homemade pizza dough is easier than you might think and results in a delicious, crispy crust that’s perfect for any pizza. Here’s a straightforward recipe to make your own pizza dough from scratch:

Ingredients:

  • 2 1/4 tsp (1 packet) active dry yeast
  • 1 1/2 cups warm water (110°F or 45°C)
  • 3 1/2 to 4 cups all-purpose flour
  • 2 tbsp olive oil
  • 1 tbsp granulated sugar
  • 1 tsp salt

Instructions:

1. Activate the Yeast:

  1. Mix Yeast and Sugar: In a small bowl, combine the warm water and sugar. Stir to dissolve. Sprinkle the yeast over the water.
  2. Wait for Foam: Let the mixture sit for about 5-10 minutes, until it becomes frothy. If it doesn’t foam, the yeast might be expired or the water might be too hot or too cold.

2. Prepare the Dough:

  1. Combine Dry Ingredients: In a large mixing bowl, whisk together 3 1/2 cups of flour and salt.
  2. Add Wet Ingredients: Make a well in the center of the flour mixture and pour in the yeast mixture and olive oil.
  3. Mix the Dough: Stir the ingredients together until a rough dough forms. You can use a wooden spoon or your hands for this process.

3. Knead the Dough:

  1. Flour the Surface: Lightly flour your work surface.
  2. Knead: Turn the dough out onto the floured surface and knead for about 5-7 minutes. Add more flour a little at a time if the dough is too sticky. Knead until the dough is smooth and elastic.

4. Let the Dough Rise:

  1. Prepare the Bowl: Lightly oil a large bowl.
  2. Place the Dough in the Bowl: Shape the dough into a ball and place it in the oiled bowl. Turn the dough around in the bowl so it gets coated with oil.
  3. Cover and Rise: Cover the bowl with a clean kitchen towel or plastic wrap. Let the dough rise in a warm, draft-free place for 1 to 1.5 hours, or until it has doubled in size.

5. Shape the Dough:

  1. Preheat Oven: If baking the pizza in the oven, preheat it to 475°F (245°C).
  2. Punch Down the Dough: Once risen, punch down the dough to release air bubbles.
  3. Divide and Roll: Divide the dough into two equal parts for two pizzas or keep it whole for a larger pizza. On a floured surface, roll out the dough to your desired thickness.

6. Assemble and Bake:

  1. Add Toppings: Transfer the rolled-out dough to a pizza stone or baking sheet. Add your favorite pizza sauce, cheese, and toppings.
  2. Bake: Bake in the preheated oven for 12-15 minutes, or until the crust is golden and the cheese is bubbly and slightly browned.

7. Cool and Serve:

  1. Cool Slightly: Remove the pizza from the oven and let it cool for a few minutes before slicing. This helps the crust set and makes it easier to cut.

Tips for Perfect Pizza Dough:

  • Warm Water: Ensure the water is warm but not hot to activate the yeast properly.
  • Flour Amount: The exact amount of flour may vary depending on humidity and flour type. Add flour gradually as needed.
  • Resting Time: Letting the dough rise in a warm environment is crucial for a fluffy crust.
  • Preheat the Oven: A hot oven is key for a crispy crust. Use a pizza stone if you have one for even baking.

With this homemade pizza dough, you’ll have a delicious base for creating your favorite pizzas right in your kitchen. Enjoy your homemade pizza night!