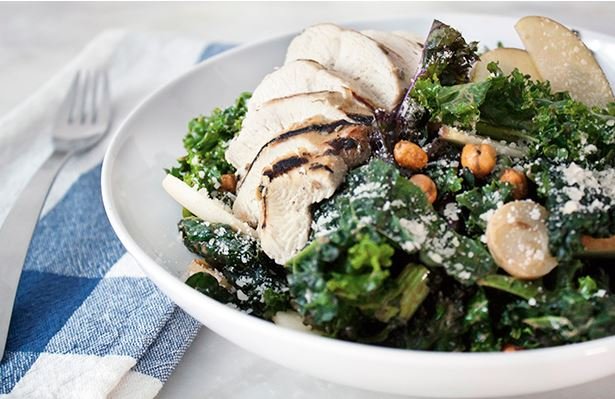
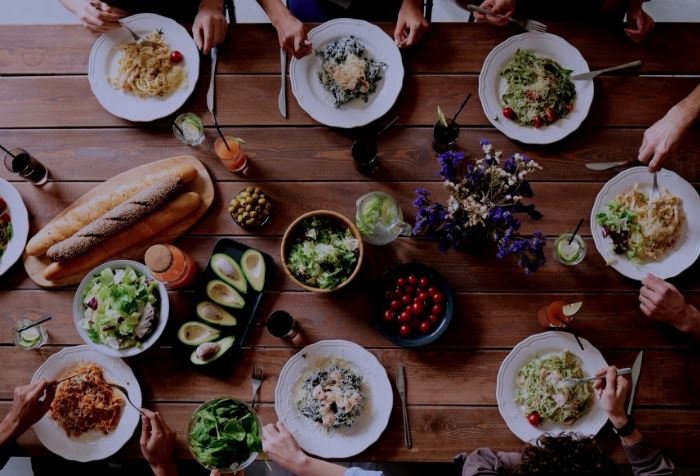
How to Make the Perfect Homemade Meatballs

Making homemade meatballs is a delightful culinary experience that can elevate your meals, whether you’re serving them with pasta, in a sub sandwich, or on their own. The key to perfect meatballs lies in the right combination of ingredients, proper technique, and a bit of love. Here’s a step-by-step guide to crafting delicious homemade meatballs that will impress your family and friends.

Ingredients

For the Meatballs:

– 1 pound ground meat (beef, pork, chicken, turkey, or a combination)

– ½ cup breadcrumbs (Italian or plain)

– ¼ cup grated Parmesan cheese

– 2 cloves garlic, minced

– 1 egg, beaten

– ¼ cup fresh parsley, finely chopped (or 1 tablespoon dried parsley)

– 1 teaspoon dried oregano

– 1 teaspoon salt

– ½ teaspoon black pepper

– ¼ teaspoon red pepper flakes (optional, for a kick)

– 2 tablespoons milk (optional, for moisture)

For Cooking:

– Olive oil (for frying) or marinara sauce (for baking)

Instructions

  1. Prepare Your Ingredients

– Gather and measure out all your ingredients beforehand to make the process smooth and efficient.

  1. Mix the Meatball Ingredients

– In a large bowl, combine the ground meat, breadcrumbs, grated Parmesan cheese, minced garlic, beaten egg, parsley, oregano, salt, black pepper, and red pepper flakes.

– If you’re adding milk for extra moisture, mix it in at this stage.

– Use your hands to gently mix the ingredients until evenly combined. Avoid over-mixing, as this can make the meatballs tough.

  1. Shape the Meatballs

– With your hands, take a portion of the mixture and roll it into a ball about 1 to 1.5 inches in diameter. You can use a cookie scoop for uniformity.

– Place the formed meatballs on a baking sheet lined with parchment paper to avoid sticking.

  1. Cooking Options

– Frying: Heat 2-3 tablespoons of olive oil in a large skillet over medium heat. Once the oil is hot, add the meatballs in batches, being careful not to overcrowd the pan. Cook for about 4-5 minutes on each side, rotating until they are golden brown and cooked through.

– Baking: Preheat your oven to 400°F (200°C). Place the meatballs on a baking sheet lined with parchment paper and bake for about 20-25 minutes, or until they reach an internal temperature of 160°F (71°C).

– Simmering in Sauce: Alternatively, you can gently add the cooked or raw meatballs to simmering marinara sauce. If cooking raw meatballs in sauce, let them simmer for 30-45 minutes to ensure they cook through and absorb flavor.

  1. Check for Doneness

– Use a meat thermometer to ensure the internal temperature of the meatballs reaches 160°F (71°C). This is especially important if you’re using poultry.

  1. Serve and Enjoy

– Serve the meatballs with spaghetti and marinara sauce, tucked into a sub with melted cheese, or as an appetizer with your favorite dipping sauce. Garnish with freshly chopped herbs or a sprinkle of Parmesan cheese for added flavor.

Tips for the Best Meatballs

– Meat Selection: Using a combination of different meats (like beef and pork) can enhance the flavor and texture. Aim for a blend that has some fat content for moisture.

– Breadcrumb Tips: If you prefer a finer texture, use fresh breadcrumbs made from day-old bread. For a flavored twist, use seasoned breadcrumbs.

– Add Flavor: Customize your meatballs by adding minced onions, chopped bell peppers, or different herbs and spices according to your taste.

– Cooking Ahead: Meatballs freeze well! Consider making a double batch and freeze extras for quick meals later. Allow cooked meatballs to cool, then freeze on a baking sheet before transferring to an airtight container or freezer bag.

– Sauce Variations: Experiment with different sauces! Meatballs can be served with BBQ sauce, creamy white sauce, or even in Asian-inspired sauces for a twist.

Conclusion

Creating the perfect homemade meatballs is a gratifying experience that can bring warmth and comfort to your meals. By following these steps and tips, you’ll be able to whip up delicious, tender, and flavorful meatballs that will earn rave reviews. Enjoy your cooking, and savor the delicious results! Happy cooking!

The Best Recipes for a Quick and Healthy Lunch

Finding time for a healthy lunch can be challenging in our busy lives, but with the right ingredients and a bit of planning, you can prepare nutritious meals that don’t take much time to whip up. Here are some of the best recipes for quick and healthy lunches that are both satisfying and delicious!

  1. Quinoa Salad with Chickpeas and Avocado

Ingredients:

– 1 cup cooked quinoa

– 1 cup canned chickpeas (rinsed and drained)

– 1 avocado (diced)

– 1 cup cherry tomatoes (halved)

– 1/4 cup cucumber (diced)

– 2 tablespoons olive oil

– Juice of 1 lemon

– Salt and pepper to taste

– Fresh herbs (like parsley or cilantro) for garnish

Instructions:

  1. In a large bowl, combine cooked quinoa, chickpeas, avocado, cherry tomatoes, and cucumber.
  2. In a small bowl, whisk together olive oil, lemon juice, salt, and pepper.
  3. Drizzle the dressing over the salad and toss gently.
  4. Garnish with fresh herbs before serving.
  5. Veggie Wrap with Hummus

Ingredients:

– 1 whole-grain wrap or tortilla

– 1/2 cup hummus

– 1/2 cup mixed greens or spinach

– 1/4 cup shredded carrots

– 1/4 cup cucumber (sliced)

– 1/4 cup bell pepper (sliced)

– Optional: Feta cheese or sliced avocado

Instructions:

  1. Spread hummus evenly over the wrap.
  2. Layer mixed greens, carrots, cucumber, and bell pepper on top.
  3. Add feta or avocado if desired.
  4. Roll the wrap tightly and slice in half before serving.
  5. Mediterranean Chickpea Bowl

Ingredients:

– 1 can chickpeas (rinsed and drained)

– 1 cup cooked brown rice or couscous

– 1/2 cup cherry tomatoes (halved)

– 1/4 cup red onion (diced)

– 1/4 cup feta cheese (crumbled)

– 2 tablespoons olive oil

– 1 tablespoon red wine vinegar

– Salt, pepper, and dried oregano to taste

Instructions:

  1. In a bowl, mix chickpeas, brown rice, cherry tomatoes, red onion, and feta cheese.
  2. In a separate small bowl, whisk together olive oil, red wine vinegar, salt, pepper, and oregano.
  3. Pour the dressing over the chickpea mixture and toss to combine.
  4. Egg and Spinach Breakfast Muffins

Ingredients:

– 6 eggs

– 1 cup fresh spinach (chopped)

– 1/2 cup diced bell pepper

– 1/4 cup shredded cheese (optional)

– Salt and pepper to taste

Instructions:

  1. Preheat the oven to 350°F (175°C) and grease a muffin tin.
  2. In a bowl, whisk together eggs, spinach, bell pepper, cheese, salt, and pepper.
  3. Pour the egg mixture into the muffin tin, filling each cup about 2/3 full.
  4. Bake for 15-20 minutes, or until the eggs are set.
  5. Let cool slightly before removing from the tin.
  6. Smashed Avocado Toast with Poached Egg

Ingredients:

– 1 slice whole-grain bread (toasted)

– 1/2 ripe avocado (smashed)

– 1 egg (poached)

– Salt, pepper, and red pepper flakes (to taste)

– Optional: Cherry tomatoes or arugula for topping

Instructions:

  1. Toast the slice of whole-grain bread.
  2. Spread the smashed avocado on top of the toast, seasoning with salt and pepper.
  3. Carefully place the poached egg on the avocado.
  4. Sprinkle with red pepper flakes and add any additional toppings like cherry tomatoes or arugula.
  5. Turkey and Apple Salad

Ingredients:

– 2 cups mixed greens

– 1 cup cooked turkey breast (sliced or shredded)

– 1 apple (cored and sliced)

– 1/4 cup walnuts (chopped)

– 1/4 cup feta cheese (crumbled)

– 2 tablespoons balsamic vinaigrette

Instructions:

  1. In a large bowl, combine mixed greens, turkey, apple slices, walnuts, and feta cheese.
  2. Drizzle with balsamic vinaigrette and toss gently before serving.

Conclusion

These quick and healthy lunch recipes are not only satisfying but also packed with nutrients to keep you energized throughout the day. They can be prepared in advance or quickly assembled, making them perfect for those busy days. Try them out and enjoy a delicious midday meal that fuels your body and mind!

Top 10 Healthy Smoothie Recipes for Breakfast

Smoothies are a fantastic way to kickstart your day with a nutrient-packed breakfast. These 10 healthy smoothie recipes are not only delicious but also quick to make, ensuring you get a nutritious start to your morning.

1. Green Power Smoothie

Ingredients:

  • 1 cup spinach
  • 1 banana
  • 1/2 avocado
  • 1/2 cup Greek yogurt
  • 1 cup almond milk
  • 1 tablespoon chia seeds

Instructions:

  1. Blend all ingredients until smooth.
  2. Serve immediately.

2. Berry Banana Blast

Ingredients:

  • 1 cup mixed berries (blueberries, strawberries, raspberries)
  • 1 banana
  • 1 cup spinach
  • 1 tablespoon flaxseeds
  • 1 cup coconut water

Instructions:

  1. Combine all ingredients in a blender.
  2. Blend until smooth.

3. Tropical Mango Pineapple Smoothie

Ingredients:

  • 1 cup frozen mango chunks
  • 1 cup frozen pineapple chunks
  • 1/2 banana
  • 1/2 cup Greek yogurt
  • 1 cup orange juice

Instructions:

  1. Blend all ingredients until smooth.
  2. Enjoy chilled.

4. Protein-Packed Peanut Butter Banana Smoothie

Ingredients:

  • 1 banana
  • 1 tablespoon peanut butter
  • 1 scoop protein powder (vanilla or unflavored)
  • 1 cup almond milk
  • 1 tablespoon hemp seeds

Instructions:

  1. Blend until creamy and smooth.
  2. Serve immediately.

5. Avocado Mint Smoothie

Ingredients:

  • 1/2 avocado
  • 1/2 cup fresh mint leaves
  • 1 cucumber, peeled and diced
  • 1 cup coconut water
  • 1 tablespoon honey (optional)

Instructions:

  1. Combine all ingredients in a blender.
  2. Blend until smooth and refreshing.

6. Apple Cinnamon Oat Smoothie

Ingredients:

  • 1 apple, cored and diced
  • 1/4 cup rolled oats
  • 1/2 teaspoon cinnamon
  • 1 tablespoon chia seeds
  • 1 cup almond milk

Instructions:

  1. Blend all ingredients until smooth.
  2. Serve chilled or at room temperature.

7. Chocolate Cherry Smoothie

Ingredients:

  • 1 cup frozen cherries
  • 1 banana
  • 1 tablespoon cocoa powder
  • 1 cup Greek yogurt
  • 1/2 cup almond milk

Instructions:

  1. Combine all ingredients in a blender.
  2. Blend until smooth and creamy.

8. Peach Green Tea Smoothie

Ingredients:

  • 1 cup frozen peaches
  • 1/2 cup brewed green tea (cooled)
  • 1/2 cup Greek yogurt
  • 1 tablespoon honey (optional)
  • 1/2 teaspoon vanilla extract

Instructions:

  1. Blend all ingredients until smooth.
  2. Serve chilled.

9. Berry Beet Smoothie

Ingredients:

  • 1/2 cup cooked and cooled beetroot
  • 1/2 cup mixed berries
  • 1 banana
  • 1 cup spinach
  • 1 cup coconut water

Instructions:

  1. Combine all ingredients in a blender.
  2. Blend until smooth and vibrant.

10. Kale Pineapple Smoothie

Ingredients:

  • 1 cup kale leaves
  • 1 cup frozen pineapple chunks
  • 1/2 banana
  • 1/2 cup Greek yogurt
  • 1 cup apple juice

Instructions:

  1. Blend all ingredients until smooth.
  2. Serve immediately.

These smoothie recipes are great for a quick and nutritious breakfast. Feel free to mix and match ingredients based on your preferences and what you have on hand. Enjoy your healthy and delicious start to the day!

How to Cook the Perfect Thanksgiving Pies

Thanksgiving wouldn’t be complete without a selection of delicious pies to grace the table. From classic pumpkin to decadent pecan, the right pie can be the highlight of your holiday feast. Here’s a guide to help you cook the perfect Thanksgiving pies, complete with tips, recipes, and techniques to impress your guests.

  1. Choose Your Pies Wisely

Before you dive into baking, consider the following classic Thanksgiving pies:

– Pumpkin Pie: A holiday staple filled with spiced pumpkin custard.

– Pecan Pie: A sweet and nutty pie with a rich filling.

– Apple Pie: A timeless choice, combining tart apples with warm spices.

– Sweet Potato Pie: A smooth, spiced pie that offers a twist on pumpkin.

– Cherry Pie: A fruity pie that adds a bright contrast to the holiday spread.

  1. Prepare Your Pie Crust

The crust is the foundation of your pie, and here’s how to make it perfectly flaky:

Ingredients:

– 2 ½ cups all-purpose flour

– 1 teaspoon salt

– 1 tablespoon sugar (optional, for a touch of sweetness)

– 1 cup unsalted butter, cold and cubed

– 6-8 tablespoons ice water

Instructions:

  1. Mix Dry Ingredients: In a large bowl, whisk together the flour, salt, and sugar.
  2. Cut in the Butter: Add the cold, cubed butter to the flour mixture. Use a pastry cutter or your fingertips to mix until the mixture resembles coarse crumbs.
  3. Add Ice Water: Gradually add the ice water, 1 tablespoon at a time, mixing until the dough just comes together. Avoid overworking it.
  4. Chill the Dough: Divide the dough into two discs, wrap in plastic wrap, and refrigerate for at least 1 hour or overnight for best results.
  5. Blind Baking (Optional)

For pies with custard or creamy fillings, like pumpkin or pecan, blind baking the crust ensures it stays crisp.

Instructions:

  1. Preheat your oven to 375°F (190°C).
  2. Roll out the chilled dough and fit it into your pie dish.
  3. Prick the bottom with a fork to prevent bubbling.
  4. Line the crust with parchment paper and fill it with pie weights or dried beans.
  5. Bake for 15 minutes, then remove the weights and parchment, and bake for another 5-10 minutes until lightly golden. Let it cool before filling.
  6. Perfect Fillings

Here are some classic filling recipes:

Pumpkin Pie Filling

Ingredients:

– 1 can (15 oz) pumpkin puree

– 1 cup heavy cream

– ¾ cup brown sugar

– ¾ teaspoon cinnamon

– ½ teaspoon nutmeg

– ¼ teaspoon ginger

– ¼ teaspoon salt

– 3 large eggs

Instructions:

  1. In a large bowl, whisk together all ingredients until smooth.
  2. Pour the filling into the blind-baked pie crust and bake at 350°F (175°C) for 45-55 minutes, or until the filling is set. Let it cool before serving.

Pecan Pie Filling

Ingredients:

– 1 cup corn syrup

– 1 cup packed brown sugar

– ¼ cup melted butter

– 3 eggs

– 1 teaspoon vanilla extract

– 2 cups pecan halves

Instructions:

  1. In a mixing bowl, combine the corn syrup, brown sugar, melted butter, eggs, and vanilla. Mix until smooth.
  2. Stir in the pecans.
  3. Pour into an unbaked pie crust and bake at 350°F (175°C) for 60-70 minutes, or until the center is set and slightly jiggly. Let cool before slicing.

Apple Pie Filling

Ingredients:

– 6-8 cups peeled, cored, and sliced apples (Granny Smith, Honeycrisp, or a mix)

– ¾ cup sugar

– 2 tablespoons lemon juice

– 2 tablespoons flour or cornstarch

– 1 teaspoon cinnamon

– ¼ teaspoon nutmeg

– ¼ teaspoon salt

Instructions:

  1. Toss the apple slices with sugar, lemon juice, flour, cinnamon, nutmeg, and salt in a large bowl.
  2. Pour the filling into a prepared pie crust and cover with a second crust, crimping the edges to seal. Cut slits in the top crust for steam to escape.
  3. Bake at 425°F (220°C) for 15 minutes, then reduce heat to 350°F (175°C) and bake for an additional 35-45 minutes until the apples are tender and the crust is golden brown.
  4. Finishing Touches

– Cool Before Serving: Allow pies to cool completely before serving to help the filling set and make slicing easier.

– Garnish: Top pumpkin and pecan pies with whipped cream or serve apple pie with a scoop of vanilla ice cream for an extra treat.

  1. Storage Tips

– Refrigeration: Most pies can be stored in the refrigerator for 3-4 days. Keep them covered or in an airtight container.

– Freezing: To freeze, wrap pies tightly in plastic wrap and foil. They can be stored for up to 3 months. Thaw overnight in the refrigerator before serving.

Conclusion

With the right preparation and attention to detail, you can create the perfect Thanksgiving pies that will delight your family and friends. Whether you stick with traditional flavors or experiment with new combinations, these pies will surely be the crowning glory of your holiday table. Happy baking and enjoy your Thanksgiving feast!

10 Delicious Recipes for a Christmas Breakfast

Christmas morning is the perfect time to enjoy a delightful breakfast that can be shared with family and friends. Here are 10 delicious recipes that will make your Christmas breakfast special:

  1. Cinnamon Roll Casserole

Ingredients:

– 2 cans of refrigerated cinnamon rolls

– 4 large eggs

– 1 cup milk

– 1 teaspoon vanilla extract

– 1 teaspoon ground cinnamon

– Icing (from the cinnamon rolls)

Instructions:

  1. Preheat the oven to 350°F (175°C). Grease a 9×13-inch baking dish.
  2. Cut each cinnamon roll into quarters and spread them in the baking dish.
  3. In a bowl, whisk together eggs, milk, vanilla extract, and cinnamon. Pour over the cinnamon rolls.
  4. Bake for 25-30 minutes or until set. Drizzle with icing before serving.
  5. Eggnog French Toast

Ingredients:

– 8 slices of thick bread (like challah or brioche)

– 1 cup eggnog

– 3 large eggs

– 1 teaspoon vanilla extract

– 1/2 teaspoon ground nutmeg

– Butter for frying

Instructions:

  1. In a shallow dish, whisk together eggnog, eggs, vanilla, and nutmeg.
  2. Dip each slice of bread into the mixture, coating both sides.
  3. Melt butter in a skillet over medium heat. Cook the bread for 3-4 minutes per side until golden brown.
  4. Serve warm with syrup or powdered sugar.
  5. Breakfast Quiche

Ingredients:

– 1 pie crust (store-bought or homemade)

– 6 large eggs

– 1 cup milk

– 1 cup shredded cheese (cheddar or Swiss)

– 1 cup diced vegetables (spinach, bell peppers, onions)

– Salt and pepper to taste

Instructions:

  1. Preheat the oven to 375°F (190°C). Place the pie crust in a pie dish.
  2. In a bowl, whisk together eggs, milk, salt, and pepper. Stir in cheese and vegetables.
  3. Pour the mixture into the crust and bake for 35-40 minutes, or until set.
  4. Let cool slightly before slicing and serving.
  5. Baked Raspberry Oatmeal

Ingredients:

– 2 cups rolled oats

– 1 cup milk

– 1/2 cup brown sugar

– 1 teaspoon baking powder

– 1 teaspoon vanilla extract

– 1 cup fresh or frozen raspberries

Instructions:

  1. Preheat the oven to 350°F (175°C). Grease a baking dish.
  2. In a bowl, combine oats, milk, brown sugar, baking powder, and vanilla. Stir in raspberries.
  3. Pour the mixture into the baking dish and bake for 30-35 minutes. Serve warm with yogurt or milk.
  4. Sausage and Cheese Breakfast Casserole

Ingredients:

– 1 pound breakfast sausage

– 6 large eggs

– 2 cups shredded cheese (cheddar or mozzarella)

– 4 cups cubed bread

– 2 cups milk

– Salt and pepper to taste

Instructions:

  1. Preheat the oven to 350°F (175°C). Grease a 9×13-inch baking dish.
  2. In a skillet, cook sausage until browned. Drain excess fat.
  3. In a bowl, whisk together eggs, milk, salt, and pepper. Stir in bread cubes, cooked sausage, and cheese.
  4. Pour the mixture into the baking dish and bake for 30-35 minutes, or until set.
  5. Maple Pecan Sticky Buns

Ingredients:

– 1 package of frozen bread dough (or homemade dough)

– 1 cup chopped pecans

– 1/2 cup brown sugar

– 1/2 cup maple syrup

– 1/2 cup butter, melted

Instructions:

  1. Thaw and prepare the bread dough according to package instructions.
  2. Mix together pecans, brown sugar, maple syrup, and melted butter in a bowl.
  3. Shape dough into buns, placing them in the pecan mixture in a baking dish.
  4. Let rise until doubled, then bake at 350°F (175°C) for 25-30 minutes.
  5. Fruit and Yogurt Parfaits

Ingredients:

– 2 cups Greek yogurt

– 2 cups granola

– 4 cups mixed fresh fruit (berries, bananas, kiwi)

Instructions:

  1. In a glass or bowl, layer Greek yogurt, granola, and mixed fruit.
  2. Repeat the layers until desired, finishing with fruit on top.
  3. Drizzle with honey or maple syrup if desired.
  4. Ham and Cheese Breakfast Muffins

Ingredients:

– 1 cup diced ham

– 1 cup shredded cheese (cheddar or Swiss)

– 4 large eggs

– 1 cup milk

– 1 cup all-purpose flour

– 1 teaspoon baking powder

– Salt and pepper to taste

Instructions:

  1. Preheat the oven to 350°F (175°C) and grease muffin tins.
  2. In a bowl, whisk together eggs, milk, flour, baking powder, salt, and pepper.
  3. Fold in diced ham and cheese, then pour the mixture into the muffin tins.
  4. Bake for 20-25 minutes until muffins are puffed and golden.
  5. Chocolate Chip Banana Bread

Ingredients:

– 3 ripe bananas, mashed

– 1/3 cup melted butter

– 1 teaspoon baking soda

– Pinch of salt

– 3/4 cup sugar

– 1 large egg, beaten

– 1 teaspoon vanilla extract

– 1 cup all-purpose flour

– 1/2 cup chocolate chips

Instructions:

  1. Preheat the oven to 350°F (175°C). Grease a loaf pan.
  2. In a bowl, mix mashed bananas with melted butter. Stir in baking soda and salt.
  3. Add sugar, egg, and vanilla, then mix in flour and chocolate chips.
  4. Pour the batter into the loaf pan and bake for 50-60 minutes.
  5. Savory Hash Brown Casserole

Ingredients:

– 1 package frozen hash browns

– 1 cup shredded cheese (cheddar or pepper jack)

– 1 cup sour cream

– 1 can cream of mushroom soup

– 1 cup diced cooked ham or bacon

– Salt and pepper to taste

Instructions:

  1. Preheat the oven to 350°F (175°C) and grease a baking dish.
  2. In a bowl, mix hash browns, cheese, sour cream, soup, diced meat, salt, and pepper.
  3. Spread the mixture in the baking dish and bake for 45-50 minutes until bubbly and golden.

Conclusion

These recipes are sure to bring joy and deliciousness to your Christmas morning celebrations. Whether you’re serving a crowd or enjoying a cozy breakfast with family, these dishes will create a warm, festive atmosphere.

How to Make the Best Homemade Pasta Noodles

Making homemade pasta noodles from scratch is a rewarding culinary experience that adds a touch of authenticity to your meals. While it may seem intimidating at first, the process is quite straightforward and can be mastered with a little practice. Here’s a detailed guide to help you create the best homemade pasta noodles.

Ingredients

– 2 cups all-purpose flour (plus extra for dusting)

– 3 large eggs

– 1/2 teaspoon salt

– 1 tablespoon olive oil (optional)

Equipment Needed

– Clean work surface (like a countertop or cutting board)

– Rolling pin or pasta machine

– Sharp knife or pizza cutter

– Cooking pot (for boiling)

– Mixing bowl

– Plastic wrap or a clean kitchen towel

Instructions

  1. Prepare the Dough
  2. Form the Flour and Eggs:

– On a clean work surface, mound the flour and create a well in the center. Add the eggs and salt into the well. If you’re using olive oil, add it to the eggs.

  1. Incorporate the Ingredients:

– Using a fork, gently beat the eggs while gradually incorporating the flour from the edges of the well. Continue mixing until the dough begins to come together.

  1. Knead the Dough:

– Once the dough has formed, gather it into a ball. Knead the dough by hand for about 8-10 minutes until it becomes smooth and elastic. If the dough is sticky, sprinkle a little more flour as needed. Wrap the dough in plastic wrap or cover it with a kitchen towel and let it rest for at least 30 minutes. This resting period helps relax the gluten, making it easier to roll out.

  1. Roll Out the Dough
  2. Divide the Dough:

– After resting, divide the dough into four equal pieces. Keep the pieces you’re not currently working with covered to prevent them from drying out.

  1. Flatten and Roll:

– Lightly flour your work surface and take one piece of dough. Flatten it slightly with your hands or a rolling pin. Using a rolling pin or pasta machine, roll it out to your desired thickness. For thinner pasta, aim for about 1/16 inch; for thicker noodles, you can go up to 1/4 inch.

  1. Cutting the Noodles:

– Once rolled out, dust the sheet with flour to prevent sticking. Use a sharp knife or pizza cutter to cut the pasta into your desired shape—tagliatelle, fettuccine, or lasagna sheets, for instance. For long noodles, cut them into strips of approximately 1/4 inch in width.

  1. Drying and Storing
  2. Dry the Noodles:

– If you plan to cook the pasta immediately, you can do so right away. If you’d like to dry the noodles for later use, lay the cut pasta on a lightly floured surface or hang it over a pasta drying rack. Allow it to dry for about 30 minutes to 1 hour.

  1. Storing the Noodles:

– Dried noodles can be stored in an airtight container for up to a week. If you want to preserve them for longer, consider freezing them. To do this, freeze the fresh noodles in a single layer on a baking sheet before transferring them to a freezer-safe bag.

  1. Cooking the Pasta
  2. Boil Water:

– In a large pot, bring salted water to a rolling boil. Use about 1 tablespoon of salt per liter of water.

  1. Cook the Noodles:

– Add the fresh pasta to the boiling water. Fresh pasta cooks quickly, typically in 2-4 minutes. Taste a piece to check for doneness.

  1. Draining:

– Reserve a cup of the pasta water before draining, as this starchy water can be added to sauces for extra flavor and consistency.

  1. Serve:

– Toss the cooked pasta with your favorite sauce, and enjoy!

Tips for Success

– Use the Right Flour: For a more authentic texture, consider using “00” flour, which is finer and yields a silkier pasta. Mixing it with semolina flour can also improve the texture.

– Experiment with Flavors: For variations, consider adding herbs or spinach to the dough for flavored pastas.

– Practice Makes Perfect: Don’t be discouraged if your first attempt isn’t perfect. With practice, your skills will improve, and you’ll find your rhythm in making pasta.

Conclusion

Making homemade pasta noodles is a delightful and fulfilling process that elevates any dish. By following these steps, you’ll create delicious, fresh pasta that will impress your family and friends. So roll up your sleeves, gather your ingredients, and enjoy the art of pasta-making! Buon Appetito!

The Ultimate Guide to Cooking with Root Vegetables

Root vegetables are a diverse group of edible plants that grow underground. They are not only packed with flavors and nutrients but also incredibly versatile in cooking. From sweet potatoes to beets, root vegetables can be roasted, mashed, boiled, or even pickled. This guide will provide you with insights into the different types of root vegetables, their nutritional benefits, and various cooking methods to help you elevate your culinary skills.

  1. Common Types of Root Vegetables

– Potatoes: Perhaps the most popular root vegetable, available in many varieties including russet, red, and fingerling. Versatile and can be used in numerous dishes.

– Sweet Potatoes: Naturally sweet and great for baking, mashing, or roasting. Rich in vitamins A and C.

– Carrots: Crunchy and sweet, carrots can be eaten raw or cooked. They are excellent for soups, stews, or roasted.

– Beets: Earthy in flavor, beets can be roasted, pickled, or used in salads. They come in different varieties, including red, golden, and striped.

– Turnips: Slightly peppery, turnips can be roasted or mashed. The greens are also edible and nutritious.

– Radishes: Commonly used in salads, radishes can be eaten raw or roasted for a milder flavor.

– Parsnips: Sweet and nutty, parsnips are excellent when roasted or used in soups. They can be swapped for carrots in many recipes.

– Celeriac (Celery Root): With a unique, earthy flavor, celeriac can be pureed, roasted, or used in salads.

  1. Nutritional Benefits of Root Vegetables

Root vegetables are nutritious and offer a variety of health benefits:

– Rich in Fiber: Root vegetables are high in dietary fiber, aiding in digestion and promoting gut health.

– Vitamins and Minerals: They are a great source of vitamins A, C, and several B vitamins, as well as minerals like potassium and magnesium.

– Antioxidant Properties: Many root vegetables contain antioxidants that protect the body from oxidative stress and inflammation.

– Low in Calories: Generally low in calories, they make a healthy addition to meals without excessive calorie intake.

  1. Cooking Techniques for Root Vegetables
  2. Roasting

– Method: Preheat your oven to 400°F (200°C). Chop root vegetables into even-sized pieces, toss with olive oil, salt, and herbs, and spread them out on a baking sheet. Roast until golden and tender, usually 25-40 minutes.

– Tip: For extra flavor, consider adding garlic, onions, or herbs like rosemary and thyme.

  1. Boiling

– Method: Chop the vegetables into uniform pieces and place them in a pot of salted water. Bring to a boil and cook until fork-tender, typically 10-30 minutes depending on the vegetable.

– Tip: Reserve the cooking water for soups or sauces, as it contains nutrients released during cooking.

  1. Steaming

– Method: Place chopped root vegetables in a steamer basket over boiling water. Cover and steam for 10-20 minutes until tender.

– Tip: Steaming preserves more nutrients than boiling.

  1. Mashing

– Method: Boil or steam root vegetables until tender, then mash with butter, cream, and seasonings for a creamy side dish.

– Tip: Combine different root vegetables, such as potatoes and carrots, for unique flavors and colors.

  1. Baking

– Method: Whole sweet potatoes or small beets can be wrapped in foil and baked until soft. This method intensifies their sweetness.

– Tip: Add spices like cinnamon or nutmeg to enhance sweet potatoes’ natural flavor.

  1. Stir-Frying and Sautéing

– Method: Cut root vegetables into thin slices or matchsticks and sauté in a hot skillet with oil. Cook until lightly browned and tender.

– Tip: Add soy sauce or garlic for extra flavor.

  1. Pickling

– Method: Quick pickling can be a delicious way to preserve radishes or beets. Slice the vegetables and soak them in a vinegar solution with sugar and salt.

– Tip: Use a variety of vinegar and spices to create your unique pickling blend.

  1. Recipe Ideas with Root Vegetables

– Roasted Root Vegetable Medley: A mix of carrots, parsnips, and sweet potatoes roasted with rosemary and thyme.

– Beet Salad: Roasted beets sliced and served atop arugula with goat cheese, walnuts, and a balsamic vinaigrette.

– Creamy Mashed Sweet Potatoes: Sweet potatoes mashed with butter, cream, maple syrup, and a hint of cinnamon.

– Carrot and Celery Root Soup: A pureed soup made from boiled or roasted carrots and celeriac, flavored with garlic and herbs.

– Turnip and Potato Gratin: Layers of thinly sliced turnips and potatoes baked with cream and cheese until golden.

  1. Storing Root Vegetables

– Cool and Dark: Store root vegetables in a cool, dark place like a pantry or cellar. Avoid storing them in the refrigerator, as cold temperatures can affect their texture.

– Avoid Dampness: Keep them in a breathable bag to prevent moisture buildup, which can lead to rot.

– Check Regularly: Inspect stored root vegetables for signs of spoilage, and use any that are starting to go bad before they affect others.

Conclusion

Root vegetables are a fantastic and versatile ingredient that can elevate any meal. By understanding the types of root vegetables, their nutritional benefits, and various cooking methods, you can make the most of these flavorful ingredients. Experiment with different recipes and cooking techniques to discover new flavors and textures, and enjoy the process of cooking with these hearty and nutritious vegetables!

How to Make the Perfect Homemade Pancakes

There’s nothing quite like the delightful aroma of freshly cooked pancakes wafting through your kitchen. Making pancakes from scratch is easier than you might think, and with a few simple ingredients and tips, you can create golden, fluffy pancakes that are perfect for breakfast or brunch. Here’s a step-by-step guide to whipping up the perfect homemade pancakes.

Ingredients

– 1 cup all-purpose flour

– 2 tablespoons sugar (optional, adjust to taste)

– 1 teaspoon baking powder

– 1/2 teaspoon baking soda

– 1/4 teaspoon salt

– 1 cup buttermilk (or make your own by adding 1 tablespoon of vinegar or lemon juice to 1 cup of milk and letting it sit for 5 minutes)

– 1 large egg

– 2 tablespoons unsalted butter, melted (plus more for cooking)

– Optional mix-ins: chocolate chips, blueberries, nuts, etc.

Instructions

  1. Mix Dry Ingredients

In a medium mixing bowl, whisk together the flour, sugar, baking powder, baking soda, and salt. Make sure there are no lumps, and everything is evenly combined.

  1. Combine Wet Ingredients

In a separate bowl, combine the buttermilk, egg, and melted butter. Whisk until the mixture is smooth and well combined.

  1. Combine Wet and Dry Ingredients

Pour the wet ingredients into the bowl with the dry ingredients. Use a spatula or a whisk to gently mix them together. Be careful not to over-mix; it’s okay if there are a few lumps. Over-mixing can lead to tough pancakes, so just blend until combined.

  1. Let the Batter Rest

Allow the batter to rest for about 5-10 minutes. This helps the gluten relax and will lead to lighter, fluffier pancakes.

  1. Preheat Your Pan

Heat a non-stick skillet or griddle over medium heat. Add a little butter to the pan, swirling it to coat the surface. You’ll know it’s hot enough when the butter is bubbling but not browning.

  1. Cook the Pancakes

Using a ladle or measuring cup, pour about 1/4 cup of batter onto the pan for each pancake. If you’re using mix-ins (like chocolate chips or blueberries), sprinkle them on top of the batter now.

– Watch for Bubbles: Cook until bubbles form on the surface of the pancakes and the edges look set, about 2-3 minutes.

– Flip: Carefully flip the pancake with a spatula and cook for another 1-2 minutes on the other side until golden brown.

  1. Keep Warm and Repeat

Transfer the cooked pancakes to a plate and cover with a clean kitchen towel to keep them warm while you cook the remaining pancakes. Add more butter to the pan as needed before cooking each new batch.

  1. Serve and Enjoy

Serve your pancakes warm with your favorite toppings! Traditional accompaniments include maple syrup, fresh fruit, whipped cream, or even yogurt. Feel free to get creative with toppings!

Tips for Perfect Pancakes

– Temperature Control: If the heat is too high, the outside of your pancakes may burn before the inside cooks through. Adjust the temperature as needed.

– Consistency of Batter: If your batter is too thick, you can add a little more buttermilk until it reaches your desired consistency. It should be pourable but not overly runny.

– Test Your Pancakes: For the first pancake, you can use it as a test to see if the temperature is right. If it cooks too quickly or too slowly, adjust the heat accordingly.

– Make-Ahead: Pancakes can be made in advance and stored in the refrigerator or freezer. To reheat, pop them in the toaster or microwave.

Conclusion

With this easy recipe and a few tips, you can create delicious, fluffy pancakes that are sure to impress family and friends. Enjoy them any way you like, and don’t hesitate to experiment with different flavors and toppings to personalize your pancake experience.

The Best Comfort Food Recipes for a Cozy Evening

When the weather turns chilly or you simply need a little pick-me-up, nothing warms the heart and soul like a plate of comforting food. Comfort food is about nostalgia, warmth, and flavors that make you feel good. Whether you prefer something cozy and hearty or sweet and indulgent, here are some of the best comfort food recipes to enjoy on a cozy evening.

  1. Creamy Tomato Basil Soup

Ingredients:

– 2 cans (14 oz each) diced tomatoes

– 1 onion, chopped

– 2 cloves garlic, minced

– 1 cup chicken or vegetable broth

– 1 cup heavy cream

– Fresh basil leaves

– Olive oil, salt, and pepper

Instructions:

  1. In a pot, heat olive oil over medium heat. Sauté the onion and garlic until softened.
  2. Add the diced tomatoes and broth. Simmer for about 15 minutes.
  3. Blend the mixture until smooth (an immersion blender works great).
  4. Stir in the heavy cream and cook for 5 more minutes. Season with salt and pepper.
  5. Serve with fresh basil leaves on top. Pair with a grilled cheese sandwich for ultimate comfort!

  1. Classic Macaroni and Cheese

Ingredients:

– 8 oz elbow macaroni

– 2 cups sharp cheddar cheese, shredded

– 1 cup milk

– 1/2 cup cream

– 1/4 cup butter

– 1/4 cup all-purpose flour

– Salt and pepper

– Breadcrumbs (optional)

Instructions:

  1. Cook the macaroni according to package instructions; drain and set aside.
  2. In a saucepan, melt butter over medium heat. Stir in flour, salt, and pepper to create a roux.
  3. Slowly whisk in milk and cream until smooth. Add cheese gradually until melted and creamy.
  4. Combine the cheese sauce with the cooked pasta. Mix well.
  5. For a baked version, pour into a baking dish, top with breadcrumbs, and bake at 350°F (175°C) for 20 minutes until golden and bubbly.

  1. Beef Stew

Ingredients:

– 2 lbs beef chuck, cubed

– 4 cups beef broth

– 4 carrots, chopped

– 3 potatoes, cubed

– 1 onion, chopped

– 2 cloves garlic, minced

– 2 tablespoons tomato paste

– 1 teaspoon thyme

– Salt and pepper

– Olive oil

Instructions:

  1. In a large pot, heat olive oil over medium-high heat and brown the beef cubes.
  2. Remove the beef, and in the same pot, sauté the onion and garlic until fragrant.
  3. Return the beef to the pot and add the tomato paste, thyme, salt, and pepper.
  4. Pour in the beef broth and bring to a simmer. Cook for about 1.5 hours.
  5. Add carrots and potatoes and continue to simmer until the vegetables are tender (about 30 minutes more). Serve warm with bread.

  1. Cheesy Garlic Bread

Ingredients:

– 1 loaf of French bread

– 1/2 cup unsalted butter, softened

– 4 cloves garlic, minced

– 1 cup mozzarella cheese, shredded

– 1/2 cup parmesan cheese, grated

– Fresh parsley, chopped

Instructions:

  1. Preheat the oven to 375°F (190°C).
  2. In a bowl, mix the softened butter with minced garlic and parsley.
  3. Cut the French bread in half lengthwise and spread the garlic butter mixture on each half.
  4. Top with mozzarella and parmesan cheese.
  5. Bake for 10-15 minutes or until the cheese is melty and bubbly. Serve warm.

  1. Chocolate Chip Cookies

Ingredients:

– 1 cup unsalted butter, softened

– 3/4 cup granulated sugar

– 3/4 cup brown sugar

– 1 teaspoon vanilla extract

– 2 large eggs

– 2 1/4 cups all-purpose flour

– 1 teaspoon baking soda

– 1/2 teaspoon salt

– 2 cups chocolate chips

Instructions:

  1. Preheat the oven to 350°F (175°C).
  2. In a bowl, cream together the butter, granulated sugar, brown sugar, and vanilla.
  3. Add the eggs, one at a time, beating well after each addition.
  4. Gradually mix in flour, baking soda, and salt. Fold in the chocolate chips.
  5. Drop rounded tablespoons onto ungreased baking sheets and bake for 9-11 minutes or until golden. Let cool and enjoy!

Conclusion

These comforting recipes are sure to create a warm and inviting atmosphere for a cozy evening at home. Whether you’re sharing them with family or enjoying them solo while wrapped in a blanket, they’re perfect for elevating your mood and satisfying your taste buds. So gather your ingredients, cozy up, and enjoy a comforting night in!

How to Cook the Perfect Roast Beef

Cooking the perfect roast beef is a culinary skill that can impress your family and friends while providing a delicious centerpiece for any meal. Whether you’re preparing a classic Sunday dinner, a holiday feast, or a special occasion, following these steps will help you achieve a tender, juicy, and flavorful roast beef. Here’s a comprehensive guide to cooking the perfect roast beef:

Ingredients

– Beef Roast: Choose a cut like ribeye, sirloin, or tenderloin (about 3-5 pounds)

– Salt and Pepper: Coarse salt and freshly cracked black pepper

– Garlic: Fresh garlic cloves (4-6, smashed or minced)

– Herbs: Fresh rosemary, thyme, or your herb of choice

– Olive Oil: For searing

– Beef Broth or Red Wine: Optional, for making gravy or adding flavor during roasting

– Vegetables: Optional, such as carrots, onions, and potatoes, for a complete one-pan meal

Equipment

– A sharp knife

– A cutting board

– A roasting pan with a rack

– A meat thermometer

– Aluminum foil

Instructions

  1. Choose the Right Cut of Meat

Choosing the right cut is essential for a flavorful roast. Some popular options include:

– Ribeye Roast: Well-marbled and tender, rich in flavor.

– Sirloin Roast: Leaner cut with a robust flavor.

– Tenderloin: The most tender cut, but can be less flavorful than others.

  1. Bring the Meat to Room Temperature

– Remove the roast from the fridge about 1-2 hours before cooking. Allowing it to come to room temperature ensures even cooking.

  1. Season Generously

– Preheat your oven to 450°F (230°C).

– Generously season the roast with coarse salt and freshly cracked black pepper. Make sure to rub the seasoning all over, including the sides.

– If desired, create a simple herb mixture using minced garlic, chopped fresh herbs, and olive oil. Rub this mixture all over the roast for added flavor.

  1. Sear the Roast

– In a large skillet or a heavy-bottomed pan, heat olive oil over medium-high heat until shimmering.

– Sear the roast on all sides for about 3-4 minutes per side until it achieves a golden-brown crust. This step locks in the juices and enhances flavor.

  1. Place in the Oven

– Transfer the seared roast to a roasting pan fitted with a rack. If you’re using vegetables, spread them around the roast in the pan.

– Pour in beef broth or red wine (if using) to keep the moisture and enhance flavor. This can also be used later for making gravy.

  1. Roast to Desired Doneness

– Place the roasting pan in the preheated oven and roast for about 20 minutes. Then, lower the oven temperature to 325°F (160°C) and continue to roast until the meat reaches your desired level of doneness:

– Rare: 120-125°F (49-52°C)

– Medium-Rare: 130-135°F (54-57°C)

– Medium: 140-145°F (60-63°C)

– Medium-Well: 150-155°F (65-68°C)

– Well Done: 160°F (71°C) and above

It’s best to use a meat thermometer to accurately gauge the internal temperature.

  1. Rest the Meat

– Once the roast reaches the desired temperature, remove it from the oven and loosely cover it with aluminum foil. Let it rest for at least 15-20 minutes before slicing. Resting allows the juices to redistribute, resulting in a more tender and juicy roast.

  1. Slice and Serve

– After resting, use a sharp knife to slice the roast against the grain into thick or thin pieces, depending on your preference.

– Serve with your choice of sides, such as roasted vegetables, mashed potatoes, or a fresh salad. Don’t forget to drizzle any pan juices or gravy over the slices.

Optional: Making Gravy

If you’d like to make gravy from the drippings:

– Pour the drippings from the roasting pan into a saucepan.

– Skim off excess fat.

– Add flour to make a roux and whisk until smooth, then gradually add beef broth and stir until thickened.

– Season to taste, and serve with the roast.

Conclusion

Cooking the perfect roast beef requires a balance of proper seasoning, cooking techniques, and patience. By following these steps, you’ll create a delicious and impressive dish that is sure to please any crowd. Whether it’s for a special occasion or a simple Sunday dinner, enjoy the process and, most importantly, the delicious results!