Tips for Making Thanksgiving Desserts Ahead of Time

Preparing Thanksgiving desserts ahead of time can help reduce stress and ensure that you have more time to enjoy the holiday with your loved ones. With careful planning and a few smart strategies, you can create delicious desserts that taste just as fresh on the big day. Here are some tips to help you make your Thanksgiving desserts ahead of time.

Tips for Making Thanksgiving Desserts Ahead of Time

Choose Desserts That Store Well

Opt for Make-Ahead Friendly Recipes

Some desserts are better suited for making in advance than others. Look for recipes that store well, such as:

  • Pies: Pumpkin, pecan, and apple pies are classic Thanksgiving desserts that can be made ahead of time and stored in the refrigerator or freezer.
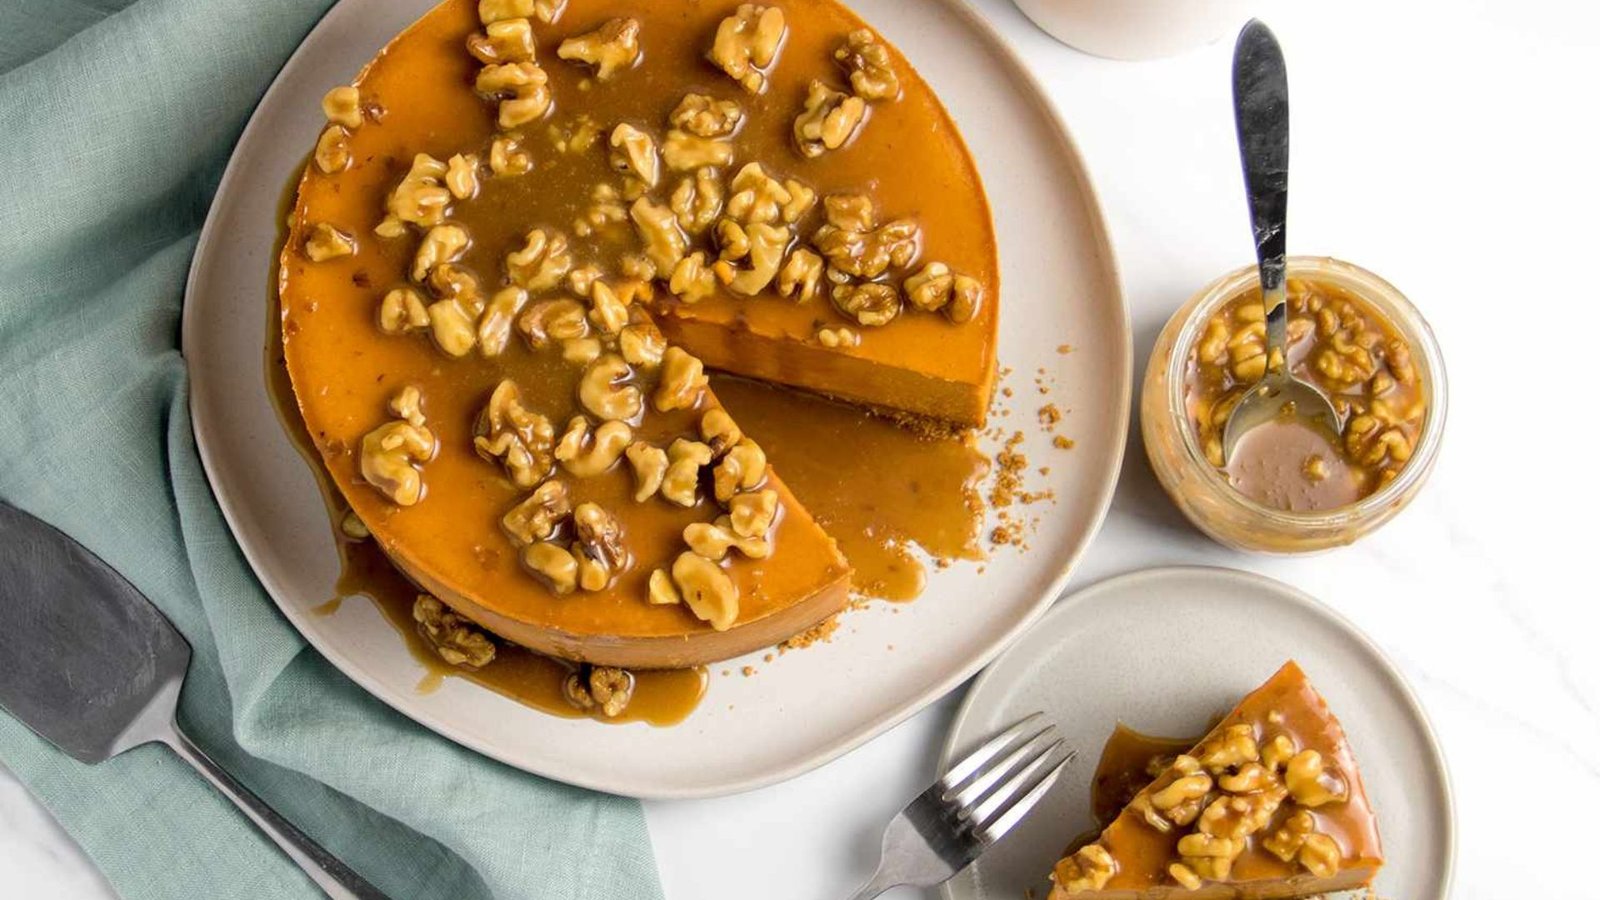
  • Cakes: Bundt cakes, loaf cakes, and cheesecakes can be baked in advance and stored without losing their flavor or texture.
  • Cookies: Many types of cookies, like shortbread or gingerbread, can be made weeks ahead and stored in airtight containers.

Avoid Delicate or Cream-Based Desserts

Desserts with delicate textures or cream-based fillings, such as soufflés or whipped cream-topped pies, may not hold up well if made too far in advance. These are better prepared closer to Thanksgiving Day.

Freeze Your Desserts Properly

Wrap and Store Pies and Cakes

Freezing is a great way to preserve the freshness of your desserts:

  • Pies: After baking, let the pie cool completely. Wrap it tightly in plastic wrap, followed by a layer of aluminum foil, and store it in the freezer. Thaw it in the refrigerator the night before Thanksgiving and reheat it in the oven before serving.
  • Cakes: Wrap individual cake layers in plastic wrap and freeze them. You can frost and assemble the cake after thawing it, which keeps the cake moist and fresh.

Use Freezer-Safe Containers

For desserts like cookies or bars, store them in freezer-safe containers or bags to prevent freezer burn. Label each container with the date and type of dessert for easy identification.

Prepare Components Separately

Make Fillings and Toppings in Advance

If your dessert has multiple components, prepare each part separately:

  • Pie Fillings: Make pie fillings ahead of time and store them in the refrigerator or freezer. Assemble the pie the day before or on Thanksgiving morning.
  • Frostings and Ganaches: Prepare frostings and ganaches ahead of time, storing them in airtight containers in the refrigerator. Bring them to room temperature before using.

Assemble Before Serving

Assembling the dessert closer to serving time can help maintain its freshness:

  • Trifles and Parfaits: Prepare the components like custards, fruit fillings, and whipped cream separately. Assemble the layers the day before or the morning of Thanksgiving.
  • Tarts and Cheesecakes: If possible, make the crust and filling separately, then combine them closer to serving time.

Plan Your Baking Schedule

Create a Timeline

Planning your baking schedule can help you stay organized and ensure everything is ready on time:

  • 1-2 Weeks Ahead: Make and freeze pies, cookie dough, and cake layers.
  • 3-5 Days Ahead: Prepare fillings, sauces, and frostings, and store them in the refrigerator.
  • 1 Day Ahead: Assemble and finish desserts, such as frosting cakes or assembling trifles.
  • Thanksgiving Morning: Thaw frozen desserts and reheat pies if necessary.

Prioritize Perishable Items

If you’re making a dessert that requires fresh ingredients, like fruit or cream, plan to add these components closer to Thanksgiving to ensure maximum freshness.

Reheat and Serve

Reheat with Care

If you need to reheat your desserts, do so carefully to avoid drying them out:

  • Pies: Reheat pies in the oven at a low temperature (around 300°F or 150°C) for about 15-20 minutes.
  • Cakes: Bring cakes to room temperature by leaving them out for a few hours. If needed, reheat slices in the microwave for a few seconds.

Add Final Touches Before Serving

Adding final touches right before serving can make your desserts look and taste fresh:

  • Whipped Cream: Make fresh whipped cream on Thanksgiving Day to top pies or cakes.
  • Fruit Garnishes: Add fresh fruit, nuts, or sauces just before serving to maintain their texture and flavor.

Conclusion

Making your Thanksgiving desserts ahead of time is a smart way to reduce holiday stress and ensure that you have plenty of time to enjoy the festivities. By choosing desserts that store well, freezing and storing them properly, and planning your baking schedule, you can create delicious treats that are ready to impress your guests. With a little preparation, your desserts will be the perfect sweet ending to your Thanksgiving meal.

How to Make the Perfect Homemade Lasagna

Lasagna is a classic Italian dish that is beloved for its rich flavors, hearty ingredients, and comforting layers of pasta, cheese, and sauce. Making the perfect homemade lasagna may seem daunting, but with a bit of preparation and the right techniques, you can create a delicious dish that will impress your family and friends. Here’s a step-by-step guide to making the perfect homemade lasagna from scratch.

Ingredients

For the Meat Sauce:

– 1 pound ground beef or Italian sausage (or a mix of both)

– 1 medium onion, finely chopped

– 2 cloves garlic, minced

– 1 can (28 ounces) crushed tomatoes

– 2 tablespoons tomato paste

– 1 teaspoon dried oregano

– 1 teaspoon dried basil

– Salt and pepper to taste

– 1 tablespoon olive oil

For the Cheese Mixture:

– 15 ounces ricotta cheese

– 1 large egg

– 1 ½ cups grated Parmesan cheese

– 1 teaspoon dried parsley

– Salt and pepper to taste

For Assembly:

– 12 lasagna noodles (use no-boil noodles for convenience)

– 3 cups shredded mozzarella cheese

– Additional Parmesan cheese for topping

– Fresh basil or parsley for garnish (optional)

Instructions

  1. Prepare the Meat Sauce:

– In a large skillet or saucepan, heat the olive oil over medium heat. Add the chopped onion and cook until softened, about 3-4 minutes.

– Add the minced garlic and cook for an additional minute until fragrant.

– Add the ground beef (or sausage) and cook until browned, breaking it apart with a spoon as it cooks. Drain excess fat if necessary.

– Stir in the crushed tomatoes, tomato paste, oregano, basil, salt, and pepper. Bring to a simmer and let it cook for about 20-30 minutes, stirring occasionally. This allows the flavors to meld and the sauce to thicken.

  1. Prepare the Cheese Mixture:

– In a mixing bowl, combine the ricotta cheese, egg, 1 ½ cups Parmesan cheese, dried parsley, salt, and pepper. Mix until well combined and set aside.

  1. Cook the Lasagna Noodles:

– If you’re using traditional lasagna noodles, cook them according to package instructions in a large pot of salted boiling water until al dente. Drain and lay them flat on a clean towel to prevent them from sticking together.

– If you’re using no-boil noodles, you can skip this step, as they will soften during baking.

  1. Assemble the Lasagna:

– Preheat your oven to 375°F (190°C).

– In a 9×13-inch baking dish, spread a thin layer of meat sauce on the bottom.

– Place a layer of noodles over the sauce, followed by a layer of the ricotta cheese mixture, a layer of meat sauce, and a layer of mozzarella cheese.

– Repeat this layering process (noodles, ricotta, meat sauce, mozzarella) until all ingredients are used, finishing with a layer of noodles topped with meat sauce and a generous sprinkle of mozzarella and remaining Parmesan cheese.

  1. Bake the Lasagna:

– Cover the baking dish with aluminum foil (to prevent sticking, spray the foil with cooking spray) and bake in the preheated oven for 25 minutes.

– After 25 minutes, remove the foil and bake for an additional 25-30 minutes, or until the cheese is bubbly and golden brown.

– Let the lasagna rest for about 15-20 minutes before slicing. This resting time helps set the layers and makes serving easier.

  1. Serve and Enjoy:

– Garnish with fresh basil or parsley if desired. Serve the lasagna with a side salad and garlic bread for a complete meal.

Tips for the Perfect Lasagna

– Flavorful Sauce: Make your meat sauce a day in advance to let the flavors deepen. Reheat it when you’re ready to assemble the lasagna.

– Don’t Overload: Be mindful not to overload the layers; too much liquid can make the lasagna soupy.

– Cheese Balance: Use a mix of cheeses for depth of flavor. You can experiment with different types of cheese to customize the taste.

– Make-ahead: Lasagna can be made ahead of time and stored in the refrigerator for a day or two before baking or frozen for up to three months. Just be sure to cover it tightly.

Making homemade lasagna may take some time, but the resulting layers of cheesy, hearty goodness are worth every effort. Enjoy crafting this classic Italian dish that is sure to be a hit at your dinner table!

How to Cook the Best Meatloaf

Meatloaf is a classic comfort food that’s beloved for its savory flavors, tender texture, and versatility. With a few simple ingredients and techniques, you can create a mouthwatering meatloaf that will impress family and friends. Here’s a detailed guide on how to cook the best meatloaf, along with tips and variations to suit your taste.

Ingredients

For the Meatloaf:

– 1 pound ground beef (or a mix of beef, pork, and veal for added flavor)

– 1 cup breadcrumbs (panko for extra crunch or regular)

– 1 small onion, finely chopped

– 2 cloves garlic, minced

– 1/2 cup milk (or beef broth for richer flavor)

– 1 large egg

– 2 tablespoons Worcestershire sauce

– 1 teaspoon salt

– 1/2 teaspoon black pepper

– 1 teaspoon dried thyme (or Italian seasoning)

– 1 tablespoon fresh parsley, chopped (optional)

For the Glaze:

– 1/4 cup ketchup

– 1 tablespoon brown sugar (or honey)

– 1 tablespoon mustard (yellow or Dijon)

Instructions

  1. Preheat Your Oven:

Preheat your oven to 350°F (175°C) to ensure it’s hot enough to cook the meatloaf evenly.

  1. Prepare the Meat Mixture:

– In a large mixing bowl, combine the ground meat, breadcrumbs, chopped onion, minced garlic, milk, egg, Worcestershire sauce, salt, pepper, thyme, and parsley.

– Use your hands (or a spoon) to mix the ingredients gently. Be careful not to overmix; this can make the meatloaf tough. Mix just until the ingredients are combined.

  1. Shape the Meatloaf:

– Transfer the meat mixture to a baking tray or a loaf pan. If using a baking sheet, shape the mixture into a loaf about 2 inches high and make sure it’s compact. If using a loaf pan, press it firmly without leaving any air pockets.

– You can create a slight well in the center to help it cook evenly.

  1. Prepare the Glaze:

– In a small bowl, mix together the ketchup, brown sugar, and mustard until smooth.

– Spread half of the glaze mixture over the top of the meatloaf. Reserve the other half for glazing later.

  1. Bake:

– Place the meatloaf in the preheated oven and bake for about 1 hour, or until the internal temperature reaches 160°F (70°C).

– For the last 15 minutes of baking, spread the remaining glaze over the meatloaf for a nice finish.

  1. Let it Rest:

– Once cooked, remove the meatloaf from the oven and allow it to rest for about 10-15 minutes. This helps the juices redistribute, making for a juicier slice.

  1. Slice and Serve:

– Carefully slice the meatloaf with a sharp knife. Serve with sides such as mashed potatoes, green beans, or a fresh salad.

Tips for the Best Meatloaf

– Meat Selection: For a juicy meatloaf, choose ground beef with a higher fat content (80/20 or 85/15 is ideal). You can also mix in ground pork or turkey for varied flavors and textures.

– Add Ins: Customize your meatloaf by adding chopped vegetables (like bell peppers or carrots), cheese, or herbs.

– Avoid Dryness: If you notice that your meatloaf is drying out, consider adding a few tablespoons of barbecue sauce or additional milk to the mixture.

– Freezing: Meatloaf freezes well. Shape it and wrap tightly in plastic wrap before placing in a freezer bag. Thaw in the fridge before cooking.

– Glaze Variations: Experiment with the glaze by incorporating barbecue sauce, teriyaki sauce, or a balsamic vinegar reduction for different flavor profiles.

Conclusion

With these steps and tips, you can make a delicious and comforting meatloaf that is sure to become a family favorite. Don’t hesitate to get creative with the ingredients and make it your own! Enjoy your savory, homemade meatloaf with warm sides and good company.

10 Delicious Recipes for a Cozy Winter Dinner

As the cold winter months settle in, there’s nothing quite like gathering around a warm, hearty meal to brighten the chilly evenings. These 10 cozy dinner recipes are perfect for winter nights, offering warmth, comfort, and a delightful array of flavors. Whether you’re cooking for family or friends, these dishes are sure to create a cozy atmosphere that everyone will love.

  1. Creamy Mushroom Risotto

Ingredients:

– 1 cup Arborio rice

– 4 cups vegetable broth

– 1 cup mushrooms (cremini or shiitake), sliced

– 1 small onion, diced

– 2 cloves garlic, minced

– 1/2 cup white wine

– 1/2 cup Parmesan cheese, grated

– 2 tbsp olive oil

– Salt and pepper to taste

– Fresh parsley for garnish

Instructions:

  1. In a saucepan, heat the vegetable broth and keep it warm.
  2. In a large skillet, heat olive oil over medium heat. Add onions and garlic, sautéing until soft.
  3. Add mushrooms and cook until tender. Stir in Arborio rice and cook for 1-2 minutes.
  4. Pour in white wine and stir until absorbed. Gradually add warm broth, one ladle at a time, stirring continuously until absorbed before adding more.
  5. When the rice is creamy and al dente, remove from heat, and stir in Parmesan cheese. Season with salt and pepper. Garnish with parsley.

  1. Beef Stew with Root Vegetables

Ingredients:

– 2 lbs beef chuck, cut into cubes

– 4 cups beef broth

– 2 carrots, sliced

– 2 potatoes, diced

– 1 onion, chopped

– 2 cloves garlic, minced

– 2 tbsp tomato paste

– 1 bay leaf

– 1 tsp thyme

– Olive oil, salt, and pepper

Instructions:

  1. In a large pot, heat olive oil over medium heat and brown the beef cubes. Remove from pot and set aside.
  2. In the same pot, add onions and garlic, sauté until soft. Stir in tomato paste.
  3. Return beef to the pot, add broth, carrots, potatoes, bay leaf, and thyme. Season with salt and pepper.
  4. Bring to a boil, then reduce heat to low and simmer for 2-3 hours until beef is tender. Remove bay leaf before serving.

  1. Vegetarian Chili

Ingredients:

– 1 can black beans, drained and rinsed

– 1 can kidney beans, drained and rinsed

– 1 can diced tomatoes

– 1 bell pepper, chopped

– 1 onion, chopped

– 2 cloves garlic, minced

– 2 tbsp chili powder

– 1 tsp cumin

– Olive oil, salt, and pepper

Instructions:

  1. In a large pot, heat olive oil over medium heat. Add onion and garlic, cooking until soft.
  2. Add bell pepper and cook for another 3-4 minutes.
  3. Stir in the beans, diced tomatoes, chili powder, cumin, salt, and pepper.
  4. Simmer for 30 minutes, allowing flavors to meld. Serve hot with cornbread or crusty bread.

  1. Chicken Pot Pie

Ingredients:

– 2 cups cooked chicken, shredded

– 1 cup carrots, diced

– 1 cup peas

– 1/2 cup onion, chopped

– 1/2 cup celery, diced

– 1/4 cup flour

– 2 cups chicken broth

– 1 cup milk

– 2 tbsp butter

– 1 tsp thyme

– Salt and pepper

– 1 pie crust (store-bought or homemade)

Instructions:

  1. Preheat the oven to 425°F (220°C).
  2. In a large saucepan, melt butter. Add onion, celery, and carrots; cook until tender.
  3. Stir in flour, cook for 1-2 minutes. Gradually add broth and milk, stirring to thicken.
  4. Add chicken, peas, thyme, salt, and pepper. Pour into a pie dish and cover with pie crust.
  5. Cut slits in the top crust for steam. Bake for 30-35 minutes until golden brown. Let cool before serving.

  1. Spicy Butternut Squash Soup

Ingredients:

– 1 medium butternut squash, peeled and cubed

– 1 onion, chopped

– 2 cloves garlic, minced

– 4 cups vegetable broth

– 1 tsp cayenne pepper (adjust to taste)

– Olive oil, salt, and pepper

– Fresh cilantro for garnish

Instructions:

  1. In a large pot, heat olive oil over medium heat. Add onions and garlic, sauté until soft.
  2. Add butternut squash, cayenne pepper, salt, and pepper, stirring for a few minutes.
  3. Pour in the vegetable broth and bring to a boil. Reduce heat and simmer until squash is tender.
  4. Blend the soup until smooth. Adjust seasoning and garnish with cilantro before serving.

  1. Pasta Bake with Sausage and Spinach

Ingredients:

– 12 oz pasta (penne or rigatoni)

– 1 lb Italian sausage, casing removed

– 2 cups spinach, chopped

– 2 cups marinara sauce

– 1 1/2 cups mozzarella cheese, shredded

– 1/2 cup Parmesan cheese, grated

– Olive oil, salt, and pepper

Instructions:

  1. Preheat the oven to 375°F (190°C). Cook pasta according to package instructions; drain.
  2. In a skillet, heat olive oil, add sausage, and cook until browned. Stir in spinach until wilted. Season with salt and pepper.
  3. In a large bowl, combine pasta, sausage mixture, marinara sauce, and half of the mozzarella cheese.
  4. Transfer to a baking dish and top with remaining mozzarella and Parmesan cheese. Bake for 25-30 minutes until bubbly and golden.

  1. Lentil and Sweet Potato Stew

Ingredients:

– 1 cup lentils, rinsed

– 1 large sweet potato, diced

– 1 onion, chopped

– 2 carrots, sliced

– 2 cloves garlic, minced

– 4 cups vegetable broth

– 1 tsp cumin

– 1 tsp paprika

– Olive oil, salt, and pepper

Instructions:

  1. In a large pot, heat olive oil over medium heat. Add onion and garlic; cook until soft.
  2. Stir in sweet potato, carrots, cumin, and paprika. Cook for another 5 minutes.
  3. Add lentils and broth. Bring to a boil, then reduce heat and simmer for 30-35 minutes until lentils and vegetables are tender. Season with salt and pepper.

  1. Braised Lamb Shanks

Ingredients:

– 2 lamb shanks

– 1 onion, chopped

– 2 carrots, diced

– 2 cloves garlic, minced

– 1 cup red wine

– 2 cups beef broth

– 1 sprig rosemary

– 1 tsp thyme

– Olive oil, salt, and pepper

Instructions:

  1. Preheat oven to 325°F (160°C).
  2. In a large Dutch oven, heat olive oil over medium-high. Season lamb shanks with salt and pepper; brown on all sides. Remove and set aside.
  3. Add onion, carrots, and garlic to the pot; sauté until softened.
  4. Pour in red wine, scraping up brown bits. Return the lamb to the pot, add broth, rosemary, and thyme.
  5. Cover and braise in the oven for 2-3 hours until the meat is tender. Serve with mashed potatoes or crusty bread.

  1. Baked Macaroni and Cheese

Ingredients:

– 1 lb elbow macaroni

– 4 cups milk

– 1/2 cup butter

– 1/2 cup flour

– 4 cups cheddar cheese, shredded

– 1 cup breadcrumbs

– Salt and pepper to taste

Instructions:

  1. Preheat the oven to 350°F (175°C). Cook macaroni according to package directions; drain.
  2. In a saucepan, melt butter over medium heat. Whisk in flour, cooking for 1-2 minutes.
  3. Gradually add milk, stirring until thickened. Remove from heat and stir in cheese until smooth. Season with salt and pepper.
  4. Combine the macaroni with the cheese sauce, then transfer to a baking dish. Top with breadcrumbs and a bit of extra cheese.
  5. Bake for 25-30 minutes until bubbly and golden brown.

  1. Hot Chocolate with Marshmallows

Ingredients:

– 2 cups milk

– 2 tbsp cocoa powder

– 2 tbsp sugar (or to taste)

– 1/4 tsp vanilla extract

– Mini marshmallows for topping

Instructions:

  1. In a small saucepan, combine cocoa powder, sugar, and milk. Heat over medium, whisking continuously until hot but not boiling.
  2. Stir in vanilla extract. Pour into mugs and top with mini marshmallows. For an extra touch, use a kitchen torch to toast the marshmallows lightly.

Conclusion

These 10 delicious recipes are sure to keep you warm and satisfied during the winter months. From hearty stews to comforting pasta dishes, each meal brings a sense of coziness that’s perfect for family gatherings or quiet nights in. Enjoy the flavors of the season and the joy of cooking during this chilly time of year!

How to Make the Perfect Homemade Waffles

Waffles are a delightful breakfast treat that can be enjoyed sweet or savory and are perfect for any occasion, whether it’s a lazy weekend morning or a special brunch gathering. Making the perfect homemade waffles isn’t as tricky as you might think! Follow this simple step-by-step guide to achieve golden, crispy, and fluffy waffles every time.

Ingredients

Dry Ingredients:

– 2 cups all-purpose flour

– 2 tablespoons sugar

– 1 tablespoon baking powder

– 1/2 teaspoon baking soda

– 1/2 teaspoon salt

Wet Ingredients:

– 2 large eggs

– 1 3/4 cups milk (buttermilk works great too!)

– 1/2 cup vegetable oil or melted butter

– 1 teaspoon vanilla extract

Equipment

– Waffle iron

– Mixing bowls

– Whisk

– Measuring cups and spoons

– Ladle or cup for pouring batter

Instructions

Step 1: Preheat Your Waffle Iron

Plug in your waffle iron and preheat it according to the manufacturer’s instructions. This usually takes around 5-10 minutes. Preheating ensures that your waffles cook evenly and become crispy on the outside.

Step 2: Mix the Dry Ingredients

In a large mixing bowl, whisk together the following dry ingredients:

– 2 cups all-purpose flour

– 2 tablespoons sugar

– 1 tablespoon baking powder

– 1/2 teaspoon baking soda

– 1/2 teaspoon salt

Make sure there are no lumps, as this will help create a smooth batter.

Step 3: Combine the Wet Ingredients

In a separate bowl, whisk together the wet ingredients:

– 2 large eggs

– 1 3/4 cups milk (or buttermilk)

– 1/2 cup vegetable oil or melted butter

– 1 teaspoon vanilla extract

Whisk until everything is fully combined. If using buttermilk, it adds a nice tang and extra moisture to the waffles.

Step 4: Combine Wet and Dry Mixtures

Make a well in the center of the dry ingredients and pour in the wet mixture. Gently fold the batter using a spatula or a whisk until just combined. Be cautious not to overmix; a few small lumps are perfectly fine. Overmixing can lead to dense and chewy waffles.

Step 5: Let the Batter Rest

Allow the batter to rest for about 5-10 minutes. This helps the gluten relax and yields lighter, fluffier waffles.

Step 6: Grease the Waffle Iron

Once your batter is ready, lightly grease your preheated waffle iron with cooking spray or a small amount of melted butter. This ensures your waffles won’t stick.

Step 7: Pour in the Batter

Using a ladle or measuring cup, pour enough batter onto the waffle iron to cover the surface, but avoid overfilling, as the batter will spread while cooking. Close the lid and cook according to your waffle iron’s instructions, usually for 4-6 minutes, until the waffles are golden brown.

Step 8: Serve Immediately

Carefully remove the waffles from the iron, using a fork or silicone spatula. Serve them immediately while they’re piping hot! You can keep them warm in a preheated oven at 200°F (93°C) if you’re making multiple batches.

Toppings and Variations

– Classic Toppings: Serve with butter and maple syrup, fresh fruit, whipped cream, or a dusting of powdered sugar.

– Savory Options: Add cooked bacon or cheese to the batter for a savory twist.

– Flavored Variations: Experiment with adding spices such as cinnamon or nutmeg, or mix in chocolate chips, blueberries, or chopped nuts.

Tips for Perfect Waffles

  1. Use the Right Flour: All-purpose flour works well, but for extra fluffiness, consider using a mix of whole wheat and all-purpose flour.
  2. Avoid Overmixing: Overmixing can lead to tough waffles. Gently combine until just blended for the best texture.
  3. Monitor Cooking Time: Every waffle iron is different; adjust cooking times accordingly and check for doneness.

Conclusion

With this simple recipe and tips, you can whip up the perfect homemade waffles that are crispy on the outside and fluffy on the inside. Enjoy experimenting with different toppings and flavors to make each batch uniquely yours.

The Ultimate Guide to Cooking with Citrus Fruits

Citrus fruits are a vibrant and essential ingredient in many cuisines around the world. With their bright colors, refreshing flavors, and versatility, they can elevate any dish—from appetizers to desserts. Whether you’re looking to add a zesty kick to your savory meals or enhance the sweetness of your desserts, this guide covers everything you need to know about cooking with citrus fruits.

  1. Types of Citrus Fruits

Before diving into cooking techniques, let’s familiarize ourselves with some popular citrus fruits:

– Lemons: Tangy and acidic, lemons are great for dressings, marinades, and desserts.

– Limes: Similar to lemons but with a slightly sweeter flavor, perfect for cocktails, salsas, and savory dishes.

– Oranges: Sweet and juicy, oranges are excellent for snacking, salads, and desserts.

– Grapefruits: Tart and slightly bitter, grapefruits can be used in salads, cocktails, and as a breakfast item.

– Tangerines: Smaller and sweeter than oranges, tangerines are great for snacking and in salads.

– Clementines: Seedless and easy to peel, these sweet fruits are perfect for on-the-go snacks and desserts.

– Blood Oranges: With a unique flavor and vibrant color, blood oranges work well in salads, sauces, and desserts.

  1. Culinary Uses of Citrus Fruits

Citrus fruits have a variety of culinary applications that can enhance flavors and bring brightness to dishes:

– Zest: The outer peel contains essential oils that add intense flavor. Use a microplane or zester to grate the zest and incorporate it into dishes such as marinades, dressings, and baked goods.

– Juice: Freshly squeezed citrus juice adds acidity and brightness to dishes. Use it in salad dressings, marinades, desserts, and beverages.

– Segments: The fruit segments can be added to salads, desserts, and salsas. For a cleaner presentation, peel the fruit and remove the membranes to create beautiful, juicy segments.

– Infusions: Citrus peels can be used to infuse flavor into liquids like oils, vinegar, and spirits. Simply steep the peels in the liquid for a few days to extract the flavor.

– Candied Citrus: Thinly slice citrus fruits and simmer them in a sugar syrup until translucent. Candied citrus can be used to decorate desserts or add a sweet element to savory dishes.

  1. Cooking Techniques with Citrus

Here are several cooking techniques to effectively use citrus fruits in your dishes:

– Marinating: Use citrus juices in marinades for meats and seafood. The acidity helps tenderize proteins while infusing them with flavor. Combine citrus juice with herbs and spices for a delicious marinade.

– Roasting: Add citrus halves or wedges to roasted meats and vegetables for added flavor. Citrus fruits can caramelize and develop a sweet, smoky flavor in the oven.

– Sauces: Create zesty sauces and dressings by combining citrus juice, zest, olive oil, and seasonings. These can elevate salads, grilled meats, and seafood.

– Baking: Incorporate citrus zest and juice into baked goods for a refreshing flavor. Lemon or orange cakes, muffins, and cookies benefit greatly from citrus ingredients.

– Pickling: Use citrus juice in pickling solutions to give an unusual tang to pickled vegetables, enhancing their flavor profile.

  1. Pairing Citrus with Other Ingredients

Citrus fruits pair wonderfully with a variety of ingredients:

– Herbs: Citrus complements fresh herbs like cilantro, mint, basil, and parsley, adding brightness to dishes.

– Spices: Experiment with spices such as cumin, coriander, and chili to create bold flavors with citrus.

– Dairy: Lemon and lime zest add depth to creamy dishes like cheesecakes, puddings, and dressings.

– Seafood: Citrus works exceptionally well in seafood dishes, helping to balance flavors and enhance freshness.

– Sweet Treats: Citrus fruits pair with chocolate, nuts, and other fruits, creating delightful desserts.

  1. Storage Tips for Citrus Fruits

To keep your citrus fruits fresh longer, follow these simple storage tips:

– Room Temperature: Store lemons and limes at room temperature if you plan to use them within a week. They will stay juicier.

– Refrigeration: For longer storage, keep citrus fruits in the crisper drawer of your refrigerator. They can last up to a few weeks when stored this way.

– Zest and Juice Storage: If you have leftover zest or juice, store them in airtight containers in the refrigerator for short-term use or freeze them in ice cube trays for later.

  1. Simple Citrus Recipe Ideas

Here are a few easy and delicious recipes to inspire your culinary adventures with citrus:

– Citrus Salad: Combine mandarin segments, grapefruit sections, and arugula with a honey-lime vinaigrette for a refreshing salad.

– Lemon Garlic Roasted Chicken: Marinate chicken with lemon juice, garlic, and herbs before roasting for a juicy and flavorful dish.

– Citrus Glazed Salmon: Cook salmon fillets in a citrus glaze made with orange juice, brown sugar, and soy sauce for a sweet and tangy flavor.

– Lemon Bars: Combine lemon juice and zest with sugar, eggs, and a buttery crust for a classic sweet treat.

Conclusion

Citrus fruits are a culinary powerhouse that can brighten up a variety of dishes with their tangy flavor and vibrant colors. By understanding their uses, cooking techniques, and pairings, you can unlock the full potential of these fruits in your kitchen. Experiment with different citrus varieties and enjoy the refreshing and zesty flavors they offer.

How to Bake the Best Cupcakes

Baking the perfect cupcakes is an art that balances quality ingredients, precise measurements, and a touch of creativity. Whether you’re making them for a special occasion, a casual gathering, or just to satisfy a sweet tooth, following these steps will help you create cupcakes that are moist, flavorful, and visually appealing. Here’s your guide to baking the best cupcakes!

Ingredients

  1. Basic Ingredients:

– 1 ½ cups all-purpose flour

– 1 cup granulated sugar

– ½ cup unsalted butter (softened)

– 2 large eggs

– ½ cup milk (room temperature)

– 1 ½ teaspoons baking powder

– 1 teaspoon vanilla extract

– ¼ teaspoon salt

  1. Optional Variations:

– Chocolate Cupcakes: Substitute ⅓ cup of flour with ⅓ cup of cocoa powder.

– Lemon Cupcakes: Add 1 tablespoon of lemon zest and replace part of the milk with lemon juice.

– Add-ins: Chocolate chips, nuts, or dried fruit can be added to the batter for extra flavor.

Equipment

– Oven

– Muffin tin

– Cupcake liners

– Mixing bowls

– Electric mixer (or a whisk)

– Measuring cups and spoons

– Cooling rack

Step-by-Step Instructions

  1. Preheat Your Oven:

– Set your oven to 350°F (175°C). Preheating ensures even baking.

  1. Prepare the Muffin Tin:

– Place cupcake liners in the muffin tin. This prevents sticking and makes for easy cleanup.

  1. Mix Dry Ingredients:

– In a medium bowl, whisk together the flour, baking powder, and salt. This ensures that the leavening agents are evenly distributed throughout the batter.

  1. Cream Butter and Sugar:

– In a large bowl, beat the softened butter and granulated sugar together using an electric mixer on medium speed until light and fluffy (about 3-5 minutes). This step is crucial for incorporating air, which helps the cupcakes rise.

  1. Add Eggs and Vanilla:

– Add the eggs one at a time, mixing well after each addition. Then, blend in the vanilla extract.

  1. Incorporate Dry Ingredients and Milk:

– Gradually add the dry ingredient mixture to the butter mixture, alternating with the milk. Start and end with the dry ingredients (e.g., dry, milk, dry, milk, dry). Mix each addition until just combined; overmixing can lead to dense cupcakes.

  1. Add Flavorings or Mix-Ins:

– If you’re including any flavors, such as lemon zest or chocolate chips, gently fold them into the batter at this stage.

  1. Fill the Cupcake Liners:

– Use a scoop or spoon to fill each liner about 2/3 full. This allows space for the cupcakes to rise without overflowing.

  1. Bake:

– Place the muffin tin in the preheated oven and bake for 18-22 minutes or until a toothpick inserted into the center comes out clean. The tops should be slightly golden.

  1. Cool:

– Remove the cupcakes from the oven and let them cool in the tin for about 5 minutes. Then, transfer them to a cooling rack to cool completely. Allowing them to cool completely is essential if you plan to frost them.

Frosting

To add the finishing touch, consider making a simple buttercream frosting:

  1. Ingredients:

– 1 cup unsalted butter (softened)

– 4 cups powdered sugar

– 1 teaspoon vanilla extract

– 2-4 tablespoons milk or heavy cream (adjust for desired consistency)

  1. Instructions:

– In a mixing bowl, beat the softened butter until creamy. Gradually add the powdered sugar, mixing well.

– Add vanilla and milk, and beat until smooth and fluffy. Adjust the consistency with more milk or powdered sugar as needed.

  1. Decorate:

– Once the cupcakes are completely cool, use a piping bag or a knife to frost your cupcakes. You can also add sprinkles, chocolate shavings, or fruit for a decorative touch.

Tips for Success

– Room Temperature Ingredients: Ensure that eggs, butter, and milk are at room temperature for the best mixing results.

– Don’t Overmix: Mix until just combined to maintain a light and airy cupcake texture.

– Rotate Your Pan: If your oven has hot spots, consider rotating the muffin tin halfway through baking for even results.

– Experiment: Don’t hesitate to try different flavors, fillings, or toppings to make the cupcakes your own.

Conclusion

Baking the best cupcakes requires attention to detail, quality ingredients, and a bit of creativity. By following these steps and tips, you’ll create deliciously moist cupcakes that everyone will love. Whether you stick with the classic vanilla or branch out into chocolate or fruit flavors, the joy of baking is in the process and sharing these delightful treats with others.

Top 10 Delicious Rice Recipes

Rice is a versatile and globally loved staple that can be used in a multitude of delicious dishes. Whether you’re looking for something savory, sweet, or a bit of both, here are ten mouthwatering rice recipes to inspire your culinary adventures:

  1. Vegetable Fried Rice

Ingredients: Cooked rice, mixed vegetables (carrots, peas, bell peppers), soy sauce, garlic, green onions, and scrambled eggs (optional).

– Instructions: Sauté garlic in a pan, add mixed vegetables, and cook until tender. Add cooked rice, soy sauce, and toss until combined. Stir in scrambled eggs and garnish with green onions.

  1. Risotto

Ingredients: Arborio rice, broth (chicken or vegetable), onion, garlic, white wine, parmesan cheese, and butter.

– Instructions: Sauté onion and garlic in butter, add Arborio rice and toast for a minute. Slowly add broth one ladle at a time, stirring until absorbed. Finish with a splash of wine, parmesan, and additional butter for creaminess.

  1. Spanish Paella

Ingredients: Bomba rice, saffron, chicken, shrimp, mussels, bell peppers, peas, and chicken broth.

– Instructions: In a large skillet, sauté chicken and vegetables. Add rice and saffron, then pour in broth. Cook without stirring until rice is tender, and garnish with seafood. Allow to sit for a few minutes before serving.

  1. Coconut Rice

Ingredients: Jasmine rice, coconut milk, sugar, and salt.

– Instructions: Rinse the rice, then combine it with coconut milk, sugar, and salt in a saucepan. Bring to a boil, then simmer covered until the rice is tender and fluffy. Great as a side for tropical dishes.

  1. Sushi Rice

Ingredients: Short-grain rice, rice vinegar, sugar, and salt.

– Instructions: Rinse the rice until water runs clear. Cook according to package instructions. Once cooked, mix vinegar, sugar, and salt, and fold into the rice while it cools. Use for making sushi rolls.

  1. Rice and Beans

Ingredients: Brown rice, black beans, onion, garlic, cumin, lime juice, and cilantro.

– Instructions: Cook the rice separately. Sauté onion and garlic, then add cooked beans, cumin, and lime juice. Stir in cooked rice and garnish with fresh cilantro for a hearty, nutritious meal.

  1. Mushroom Risotto

Ingredients: Arborio rice, mushrooms, onion, garlic, vegetable broth, white wine, and parmesan cheese.

– Instructions: Sauté onions and garlic in olive oil, add mushrooms and cook until soft. Add Arborio rice and toast for a minute, then follow with broth in gradually added ladles until creamy. Stir in parmesan before serving.

  1. Lemon Rice

Ingredients: Cooked rice, lemon juice, turmeric, mustard seeds, peanuts, and curry leaves.

– Instructions: Heat oil in a pan, add mustard seeds and curry leaves until they splutter. Mix in turmeric, cooked rice, and lemon juice. Top with roasted peanuts for crunch and serve warm.

  1. Fried Rice Noodles (Combining Rice Varieties)

Ingredients: Cooked rice noodles, soy sauce, tofu (or chicken), vegetables, and egg (optional).

– Instructions: Stir-fry your choice of protein and vegetables with oil until cooked. Add cooked rice noodles and soy sauce, toss everything until well combined, and serve with a sprinkle of scallions.

  1. Dolma (Stuffed Grape Leaves)

Ingredients: Grape leaves, rice, onion, pine nuts, dill, and lemon juice.

– Instructions: Sauté onions and pine nuts, then mix with rice, dill, and seasonings. Place spoonfuls of the filling on grape leaves and roll tightly. Cook in a pot with lemon juice and water until rice is tender and flavors meld.

Conclusion

Whether served as a side dish, main course, or dessert, rice is an essential ingredient that can be transformed into endless delicious recipes. Each of the dishes above showcases different cultures and flavors while highlighting the versatility of rice. Enjoy experimenting with these recipes, and feel free to adapt them to suit your taste!

How to Make the Perfect Homemade Pizza Sauce

Creating the perfect pizza sauce is the cornerstone of making a delicious homemade pizza. The right sauce offers flavor, balance, and the complementing acidity that enhances your toppings and crust. Here’s a simple yet flavorful recipe for making the perfect homemade pizza sauce.

Ingredients

– 1 can (28 ounces) of crushed tomatoes (preferably San Marzano for rich flavor)

– 2 tablespoons of extra virgin olive oil

– 3 cloves of garlic, minced

– 1 teaspoon of sugar (optional, to balance acidity)

– 1 teaspoon of dried oregano

– 1 teaspoon of dried basil (or 1 tablespoon fresh basil, chopped)

– 1/2 teaspoon of salt

– 1/2 teaspoon of freshly ground black pepper

– 1/4 teaspoon of red pepper flakes (optional, for a bit of heat)

– 1 tablespoon of tomato paste (for rich flavor and thickness)

– Fresh basil leaves (for garnish, optional)

Instructions

  1. Prepare the Base:

In a medium saucepan, heat the olive oil over medium heat. Once hot, add the minced garlic and sauté for about 30 seconds, or until fragrant. Be careful not to let it brown, as burnt garlic can impart a bitter flavor.

  1. Add the Tomatoes:

Pour in the crushed tomatoes, stirring to combine with the garlic and oil. You can also use whole canned tomatoes and crush them by hand if you prefer a chunkier sauce.

  1. Season the Sauce:

Add the sugar, dried oregano, dried basil, salt, pepper, and red pepper flakes (if using). Stir well to ensure all the seasonings are evenly distributed throughout the sauce.

  1. Incorporate Tomato Paste:

Add the tomato paste to the saucepan and mix it into the sauce. This will enhance the flavor and texture, giving the sauce a perfect consistency.

  1. Simmer the Sauce:

Allow the sauce to simmer on low heat for about 20-30 minutes. This simmering step is essential as it helps develop flavors and reduces the liquid for a thicker sauce. Stir occasionally to prevent it from sticking to the bottom of the pan.

  1. Taste and Adjust:

After simmering, taste the sauce and adjust the seasoning if necessary. You can add more salt, pepper, or herbs according to your preference.

  1. Cool and Store:

Allow the sauce to cool before using it for your pizza. If you’re not using it right away, you can store it in an airtight container in the refrigerator for up to one week or freeze it for up to three months.

  1. Using the Sauce:

When you’re ready, spread a generous amount of sauce over your pizza dough, leaving a small border around the edges for the crust. Top with your favorite cheese and toppings, and bake according to your pizza dough instructions.

Tips for the Perfect Sauce:

– Quality Ingredients: Use high-quality tomatoes (look for brands like San Marzano) for a richer, deeper flavor.

– Fresh Herbs: If you have access to fresh herbs, such as basil and oregano, use them instead of dried for a fresher taste.

– Customize to Your Taste: Feel free to play around with spices or make it your own by adding ingredients like fresh garlic, onion powder, or even a splash of red wine for depth.

– Garlic and Onion: You can add finely chopped onions for added sweetness and flavor. Sauté them with the garlic at the beginning.

Conclusion

Making the perfect homemade pizza sauce is simple and rewarding, encapsulating the essence of traditional Italian cooking in your kitchen. With just a few quality ingredients and a bit of time, you can create a sauce that enhances every bite of your homemade pizza. Enjoy your cooking and savor the delicious results!

The Best Vegan Dinner Recipes

Here’s a list of delicious and satisfying vegan dinner recipes that are not only easy to prepare but also packed with flavor and nutrients. Whether you’re a seasoned vegan or just looking to incorporate more plant-based meals into your diet, these recipes are sure to please.

  1. Chickpea Curry

Ingredients:

– 1 can chickpeas (drained and rinsed)

– 1 can coconut milk

– 1 onion (chopped)

– 2 cloves garlic (minced)

– 1-inch piece ginger (grated)

– 1 can diced tomatoes

– 2 tablespoons curry powder

– 1 tablespoon olive oil

– Fresh cilantro (for garnish)

– Salt and pepper (to taste)

Instructions:

  1. Heat olive oil in a pot over medium heat. Sauté the onion, garlic, and ginger until fragrant.
  2. Add curry powder and cook for another minute.
  3. Stir in the diced tomatoes, chickpeas, and coconut milk. Simmer for 20 minutes.
  4. Season with salt and pepper. Serve with rice and garnish with fresh cilantro.
  5. Vegan Tacos

Ingredients:

– 1 can black beans (drained and rinsed)

– 1 bell pepper (diced)

– 1 onion (chopped)

– 1 teaspoon cumin

– 1 teaspoon smoked paprika

– Corn tortillas

– Toppings: avocado, salsa, vegan sour cream, chopped cilantro

Instructions:

  1. In a skillet, sauté the onion and bell pepper until softened.
  2. Add black beans, cumin, and smoked paprika. Cook until heated through.
  3. Warm corn tortillas in a separate pan or microwave.
  4. Assemble tacos with the bean mixture and your favorite toppings.
  5. Stuffed Bell Peppers

Ingredients:

– 4 bell peppers (halved and seeds removed)

– 1 cup quinoa (cooked)

– 1 can diced tomatoes

– 1 cup black beans (drained and rinsed)

– 1 teaspoon chili powder

– 1 teaspoon cumin

– Salt and pepper (to taste)

Instructions:

  1. Preheat the oven to 375°F (190°C).
  2. Mix quinoa, diced tomatoes, black beans, chili powder, cumin, salt, and pepper in a bowl.
  3. Stuff the halved bell peppers with the mixture and place in a baking dish.
  4. Bake for 30 minutes until the peppers are tender.
  5. Creamy Vegan Pasta

Ingredients:

– 8 oz pasta of choice

– 1 cup cashews (soaked in water for 2 hours)

– 1 cup plant-based milk

– 2 cloves garlic (minced)

– 1 tablespoon nutritional yeast

– 1 tablespoon lemon juice

– Spinach or kale (optional)

– Salt and pepper (to taste)

Instructions:

  1. Cook pasta according to package instructions.
  2. In a blender, combine soaked cashews, plant-based milk, garlic, nutritional yeast, lemon juice, salt, and pepper. Blend until smooth.
  3. In a pan, sauté spinach or kale until wilted, then add the sauce and cooked pasta. Toss to combine and serve warm.
  4. Vegan Buddha Bowl

Ingredients:

– 1 cup cooked brown rice or quinoa

– 1 cup mixed greens

– 1 cup roasted vegetables (such as broccoli, sweet potatoes, or carrots)

– 1/2 avocado (sliced)

– 1/4 cup hummus or tahini dressing

– Lemon juice (for drizzling)

– Salt and pepper (to taste)

Instructions:

  1. In a large bowl, layer cooked rice or quinoa, mixed greens, and roasted vegetables.
  2. Top with avocado slices and a dollop of hummus or tahini dressing.
  3. Drizzle with lemon juice, and season with salt and pepper to taste.
  4. Vegan Stir-Fry

Ingredients:

– 2 cups mixed vegetables (bell peppers, broccoli, carrots, snow peas)

– 1 block firm tofu (cubed)

– 2 tablespoons soy sauce or tamari

– 1 tablespoon sesame oil

– 2 cloves garlic (minced)

– Cooked rice or noodles (for serving)

Instructions:

  1. In a skillet, heat sesame oil over medium heat. Add tofu cubes and cook until golden.
  2. Add garlic and mixed vegetables, then stir-fry for a few minutes until veggies are tender-crisp.
  3. Stir in soy sauce or tamari and cook for an additional 2-3 minutes.
  4. Serve warm over rice or noodles.
  5. Lentil Shepherd’s Pie

Ingredients:

– 1 cup lentils (cooked)

– 1 onion (chopped)

– 2 carrots (diced)

– 2 cloves garlic (minced)

– 1 cup vegetable broth

– 4 cups mashed potatoes (made with plant-based milk)

– 1 tablespoon soy sauce

– 1 teaspoon thyme

– Salt and pepper (to taste)

Instructions:

  1. Preheat the oven to 400°F (200°C).
  2. In a skillet, sauté onion, carrots, and garlic until softened. Add cooked lentils, vegetable broth, soy sauce, thyme, salt, and pepper. Stir well.
  3. Transfer the lentil mixture to a baking dish and top with mashed potatoes.
  4. Bake for 25-30 minutes or until the top is golden.

Conclusion

These vegan dinner recipes are nutritious, delicious, and satisfying, perfect for anyone looking to enjoy flavorful plant-based meals. Whether you’re cooking for yourself or hosting friends, these dishes will delight your taste buds and leave everyone feeling satisfied.